A subscription event must be created prior to making seats eligible for subscriptions. Once the subscription event is created, then go to the event page where the seats can be purchased. See the article “Using Seating Charts for Events” for more information about setting up theater-style seating for an event.
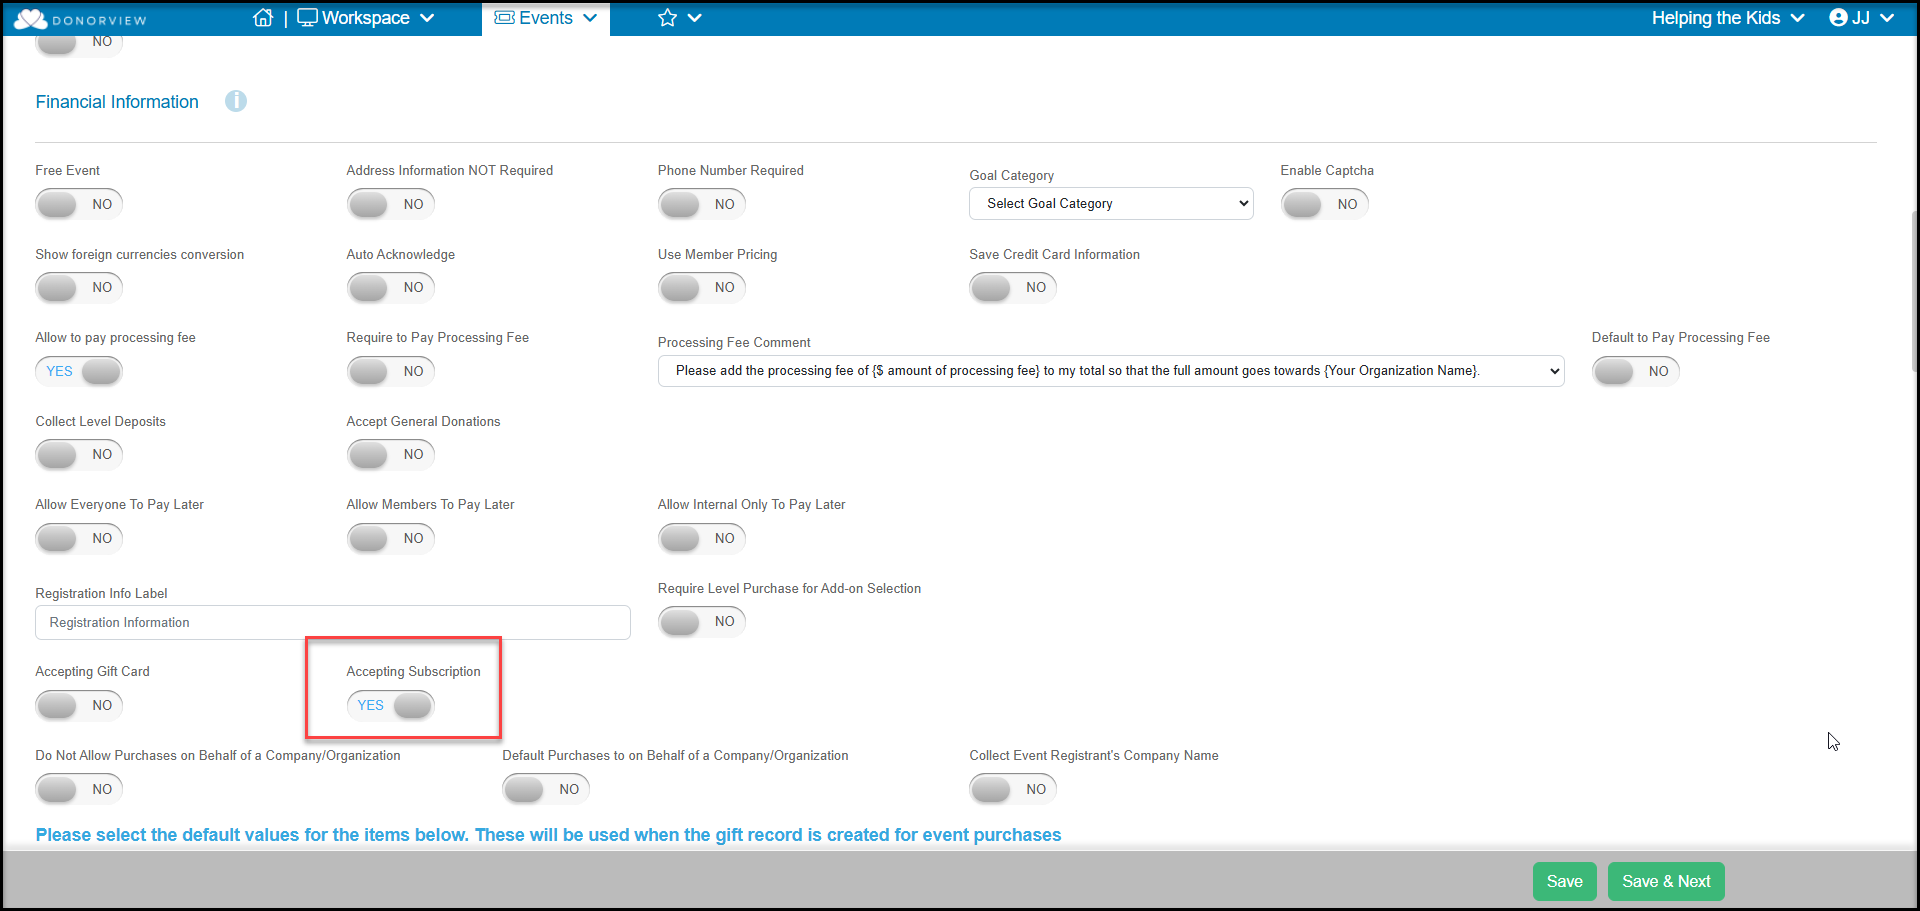
From the Event Pages grid, select the event and click on View/Edit. On the Event Settings tab, under the Financial Information Section, mark Accepting Subscription to YES. When finished making your other selections on this tab, click Save and Next at the bottom of the page to proceed to the Event Setup Tab.
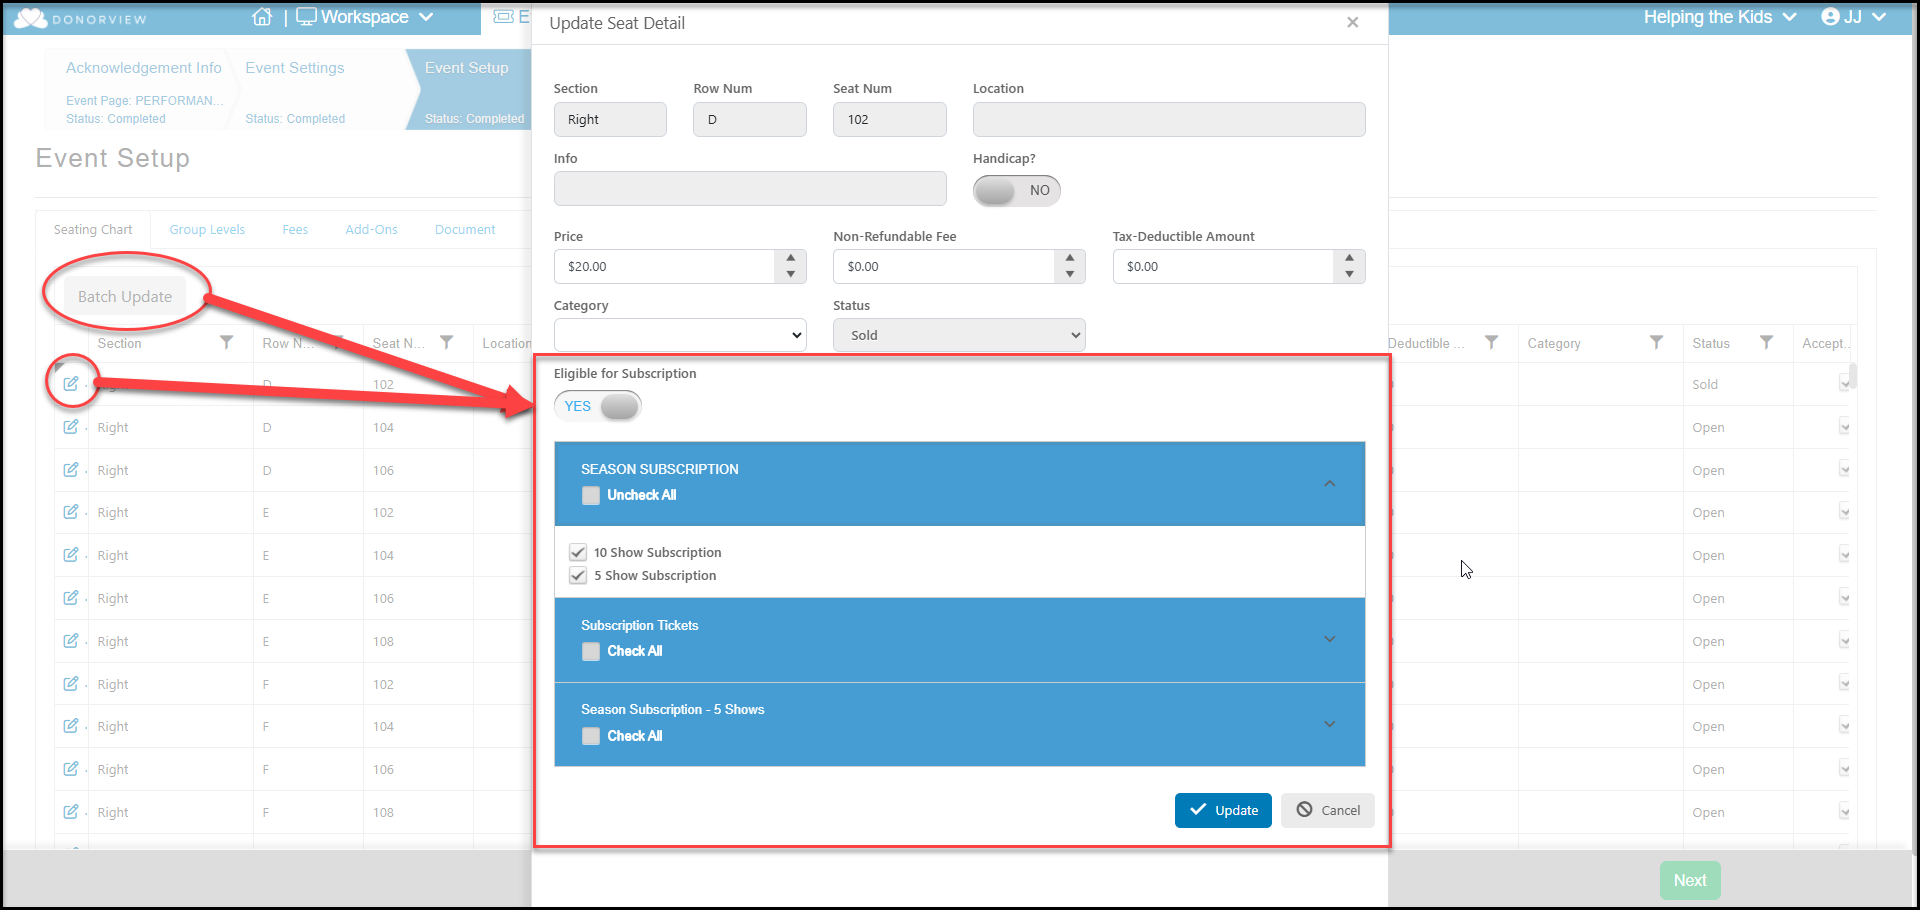
On the Event Setup tab, you can add the subscription information for the specific seats either by editing a single seat or using Batch Update. To edit a single seat, click on the edit icon to the left of the row. The Update Seat Detail window will open and allow you to add a category for the seat, which can be very helpful for filtering the grid.
Mark Eligible for Subscription to YES to reveal the accordion style selector for all the subscription event pages you have created. Under each page, the different subscription levels are shown. You can select whichever subscription levels you would like to be available for this seat.
Click Update to update that seat or all the seats in the filtered list to be eligible for the subscriptions you have selected.
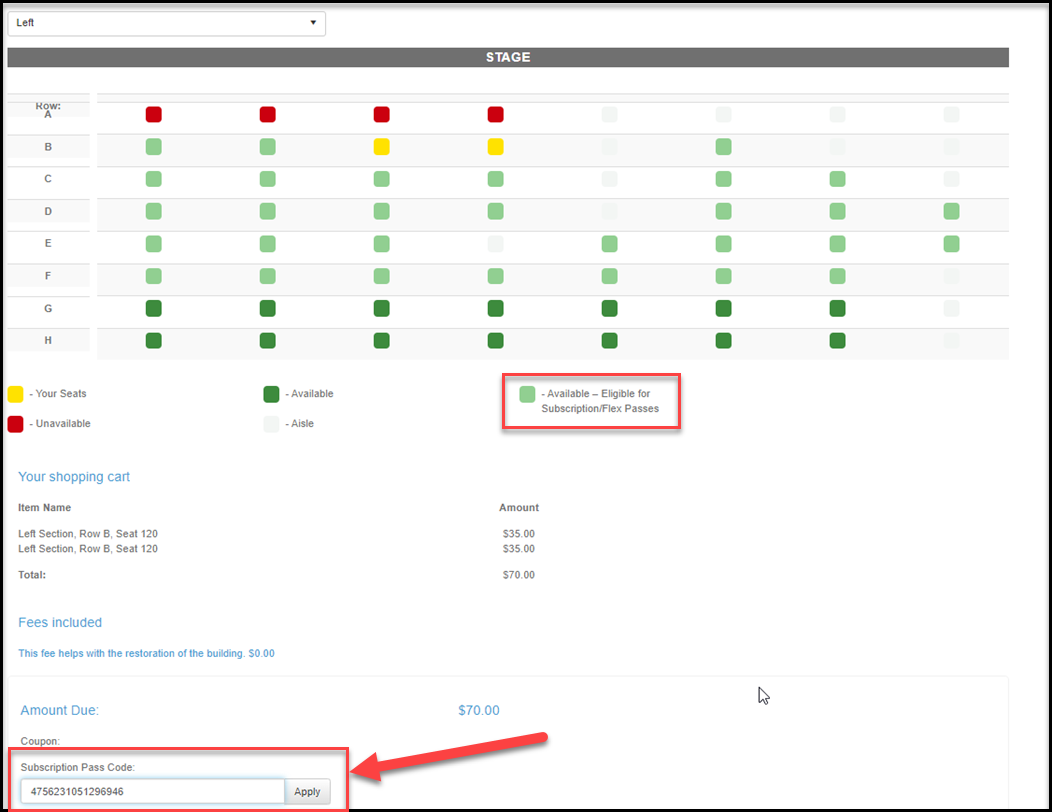
Seats that accept subscription passes are identified as light green. When the purchaser selects the seat, they will see a pop up message letting them know that subscriptions are available for that seat. They can enter the subscription code at that time and click Apply or they can enter it the Subscription Pass Code field below the shopping cart and Apply there.

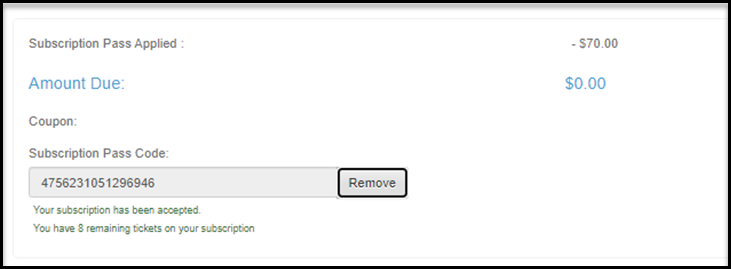
Once the Subscription Pass Code is used, the message below will let them know how many tickets remain on their subscription and they will see the Amount Due reduced to zero if they have not already used all their subscription passes. If the do not have enough passes to cover the entire purchase, they will need to pay the balance due with their credit card to complete the purchase.
The subscription pass code was emailed to the purchaser when they purchased the subscription, but it can also be found under the Ticket Number column on the Events Grid. If you are using the Advanced Portal, the purchaser could also recover their subscription passes from the Events module in the portal.