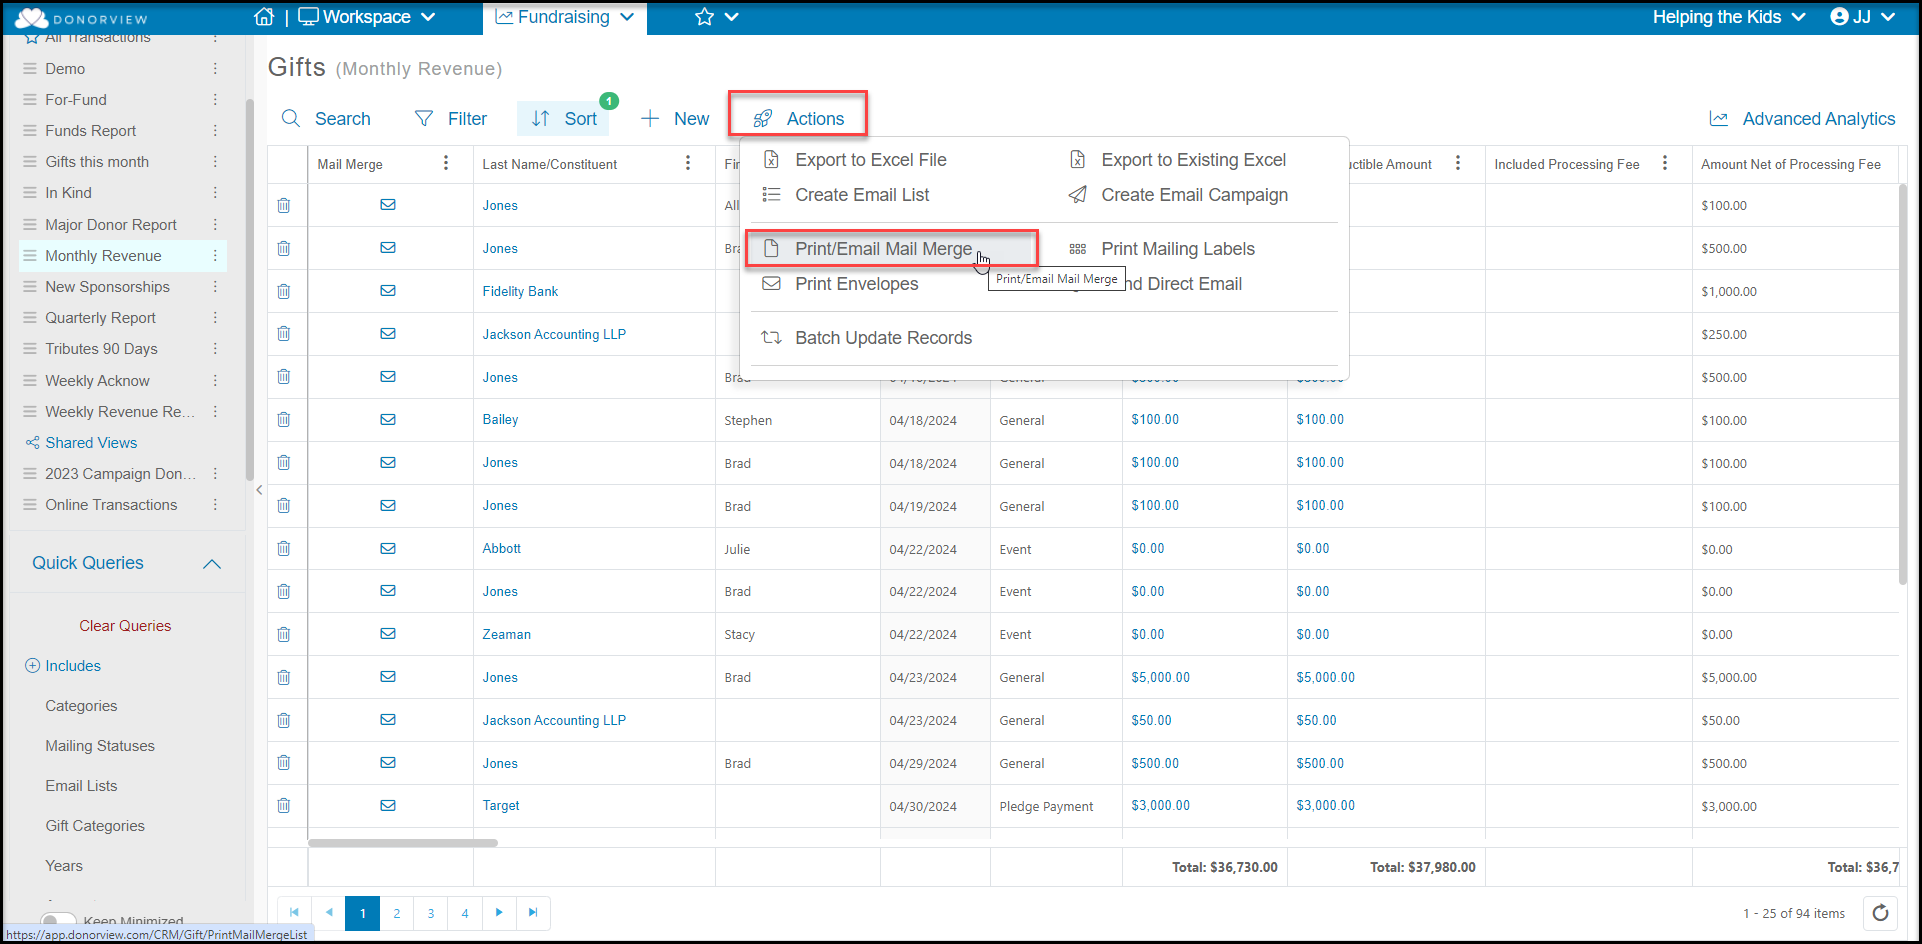
You will begin by filtering the Gifts grid to identify those gifts you wish to acknowledge. You can add queries like Date, Fund, or filter the Acknowledged column for "False" to show just those gifts which have not been marked as acknowledged.
With your filtered list, use the Actions menu and select Print/Email Mail Merge.
This will open a new window that allows you to select your Mail Merge Template. This is a selection of one of the templates created in the Mail Merge Gift Templates page. The green View/Edit button next to the list will allow you to open the letter and make edits, just note that those edits will also apply to any future acknowledgements.
The View/Edit button is not used for editing each individual thank you letter, you can do that if you choose the Delivery option of Print to Word, which will allow you to edit the individual letters as desired.
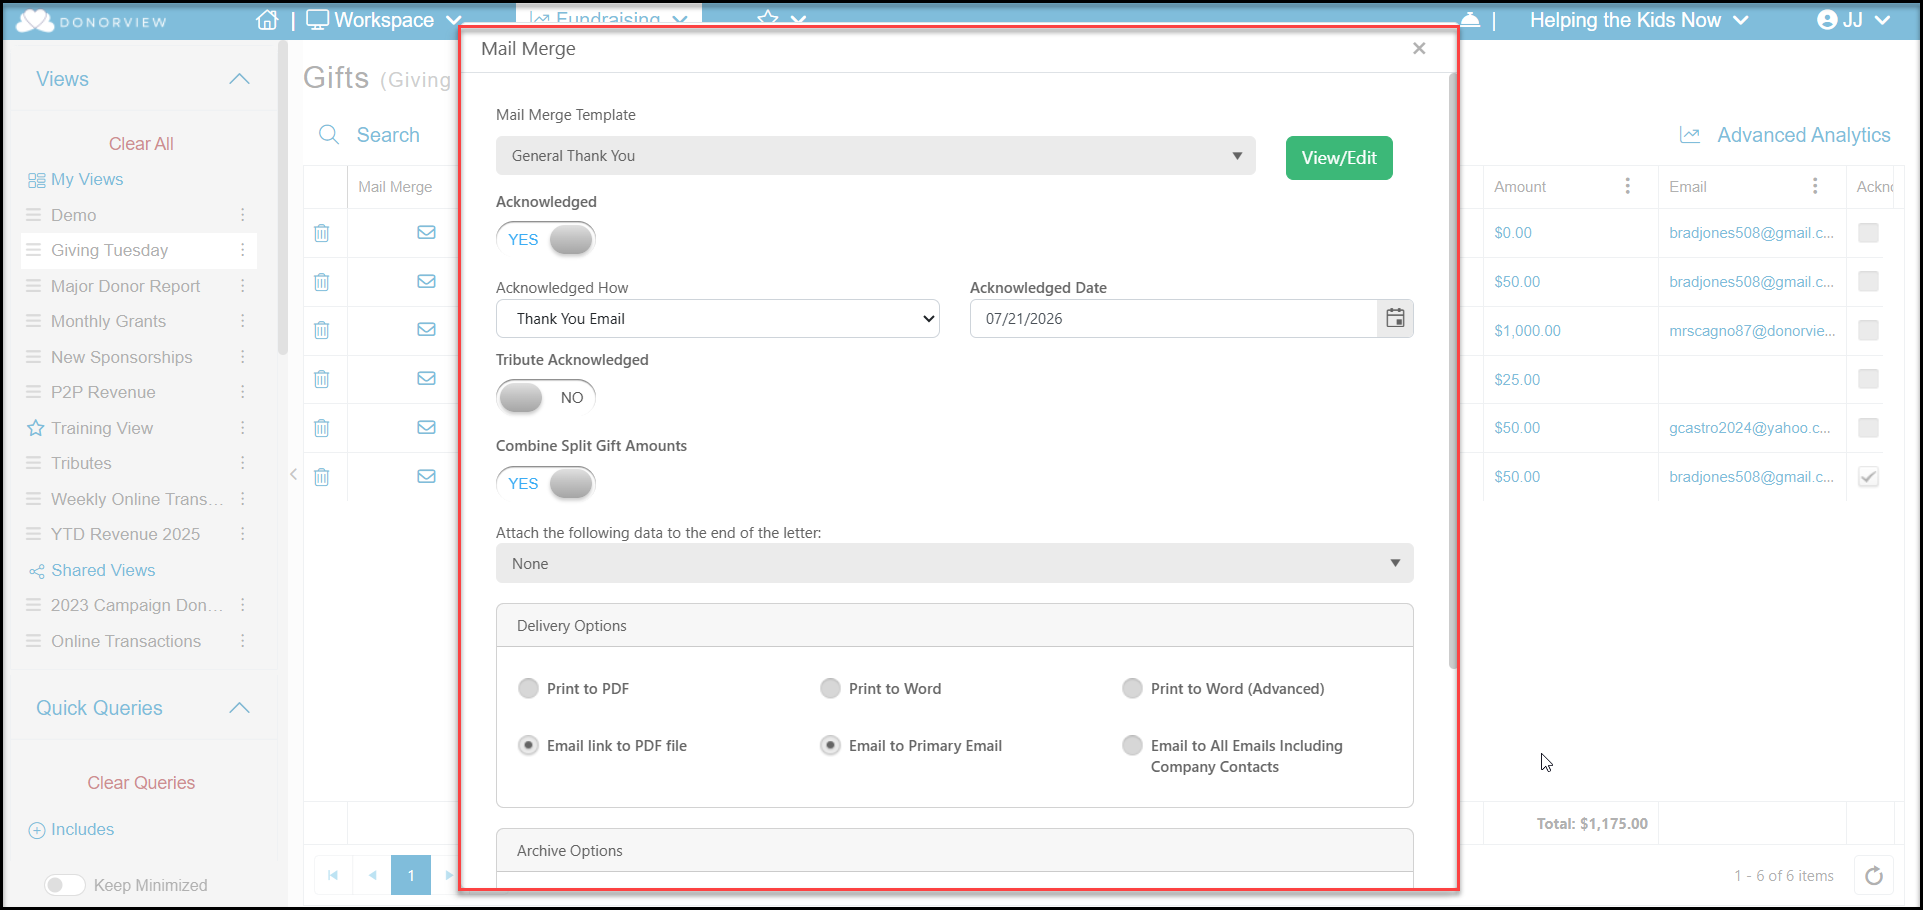
The next button is Acknowledged. Setting this YES will add a checkmark in the Acknowledged column on the Gifts grid. You will also have the option of selecting the method under Acknowledged How and the Acknowledged Date, which defaults to today's date.
The Tribute Acknowledged button will remain NO for donation acknowledgements. It is only used for sending statement notifications to families for tributes.
When Combine Split Gift Amounts is set to YES, if the transaction was a split gift, the total amount will be combined into one letter. If this is set to NO, separate letters will be printed for each split amount, however they will be the same letter with the applicable amount entered for each split.
The Attach the following to the end of the letter is also only used for tribute statements and should be left as None.
Next you can choose your Delivery Options.
- Print to PDF will produce a pdf file of the letter and open it in a new tab on your browser.
- Print to Word will produce a Word document and download it to your computer. Be sure that your pop-up blocker is off for your browser. If you need to edit the letter prior to sending it, use the Print to Word feature to make your edits.
- Print to Word (Advanced) will also produce a Word document and download it to your computer, but it is only used for documents which contain complex features like tables and charts.
- Email Link to PDF file will open a new window once you click on OK at the bottom of the window. You can choose to send Email to Primary Email or Email to All Emails which would send a copy to all emails in the constituent's profile. Note that this selection will not allow any edits to the letter. However, you will be able to customize the email message.
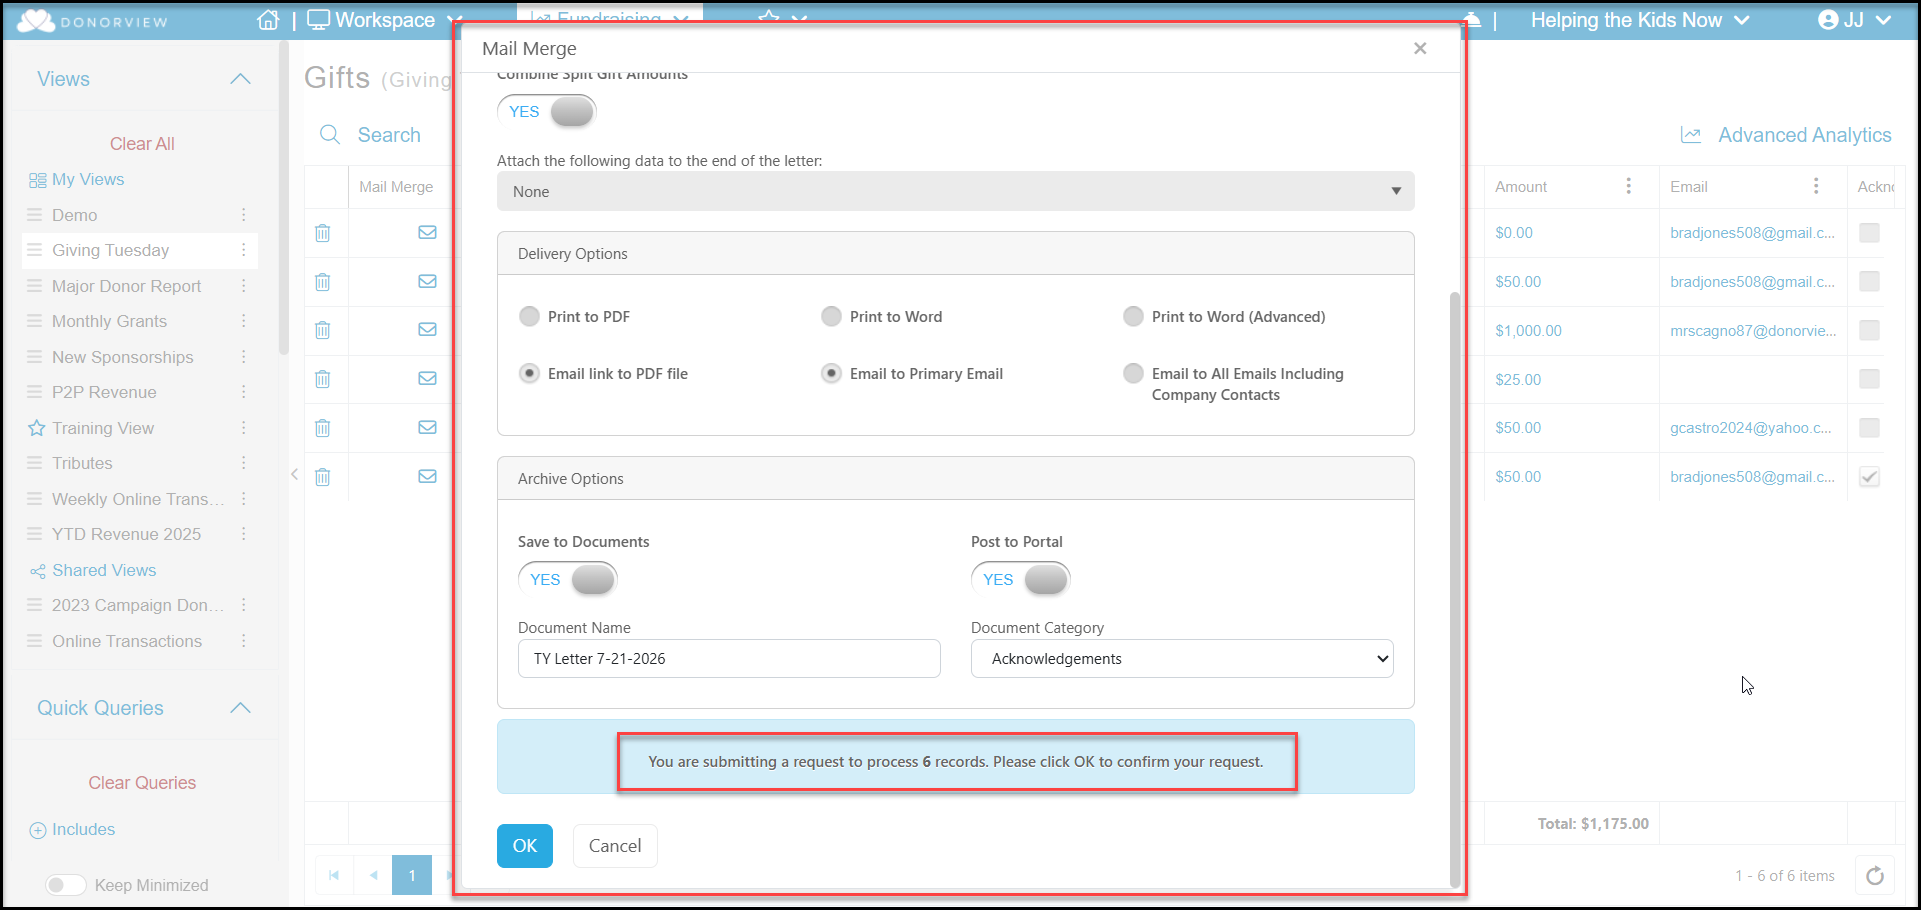
In the Archive Options, you can choose to save a copy of this letter in the constituent's Documents tab and the CRM Documents grid by marking Save to Documents as YES.
- With this marked YES, you also have the option to post this document to the portal for the donor to view if you have activated the Advanced Portal.
- You should enter a Document Name that makes it easy to identify the document.
- You can also assign it to a Document Category. This picklist is editable click on the <New/Edit> option in the list.
The blue box at the bottom of the window will indicate how many records are included in the batch.
The last step is click OK to generate the letter. For letters that are printed, the PDF file will open or the Word document will download. Clicking Cancel will close the window without generating the acknowledgement.
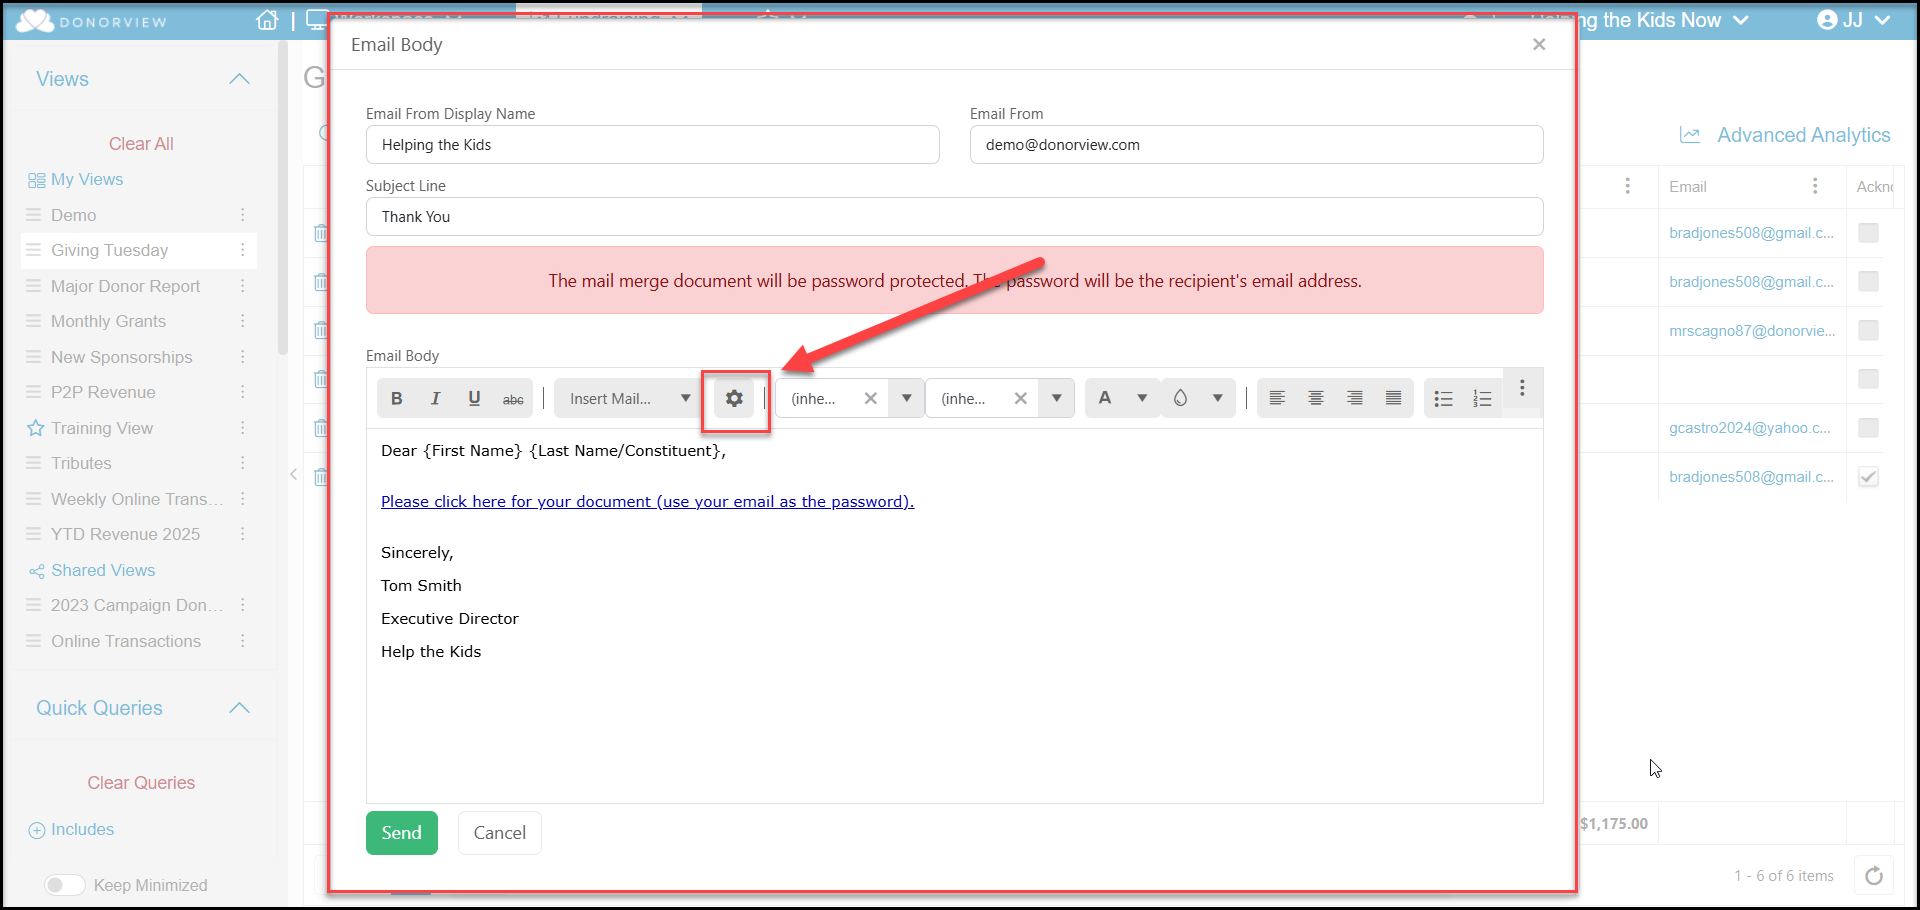
For sending via email, a new window opens as shown below.
- The Email From Display Name auto populates with your user name and Email From auto populates with your user email address. You can edit as needed.
- You can customize the Subject Line as desired.
- For security, the donor will be asked to enter their email address in order to view the document.
- You can customize the Email Body with merge fields and font preferences.
- A default link will be inserted for the donor to click to download their document as a pdf. If this link is accidentally deleted, you can insert a new one by clicking on the gear icon and entering new text for the link.
- When you have completed the email body, you can click Send to send the email. Cancel will close the window without sending the email.
- Because this letter contains financial information, there is a password protection feature that cannot be bypassed. To open the letter, the recipient will enter their email address to view the document.
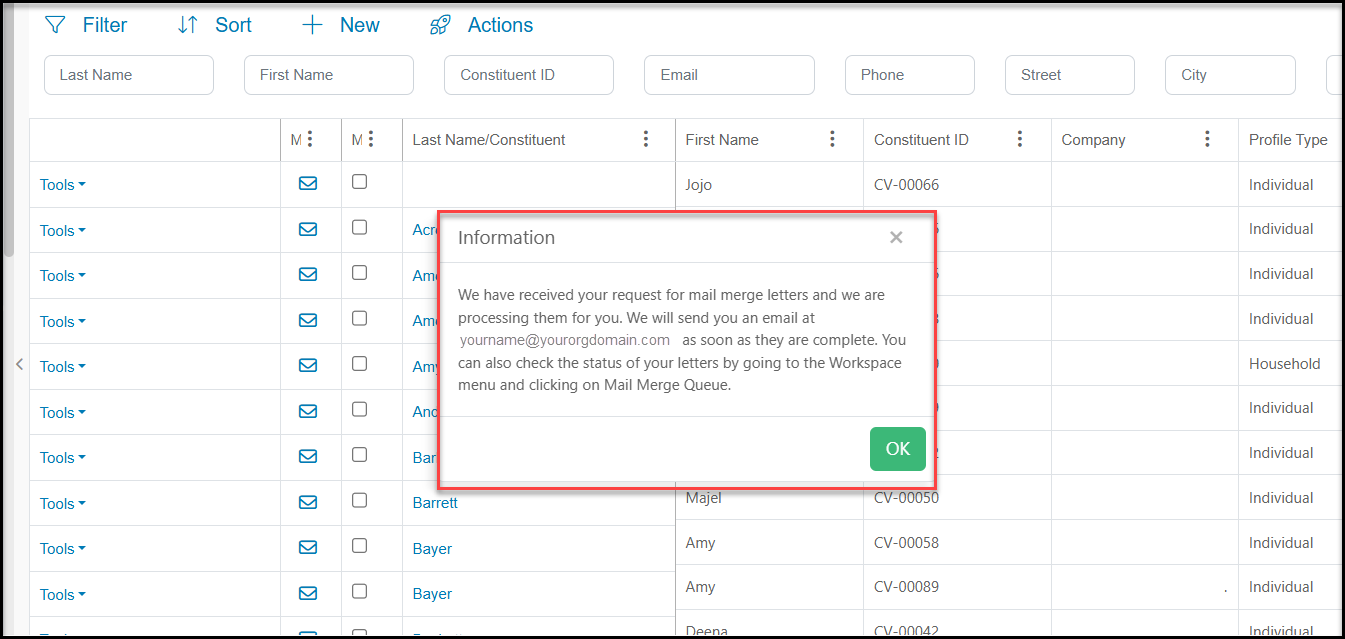
If you are creating a large number of mail merge letters, you may see a pop-up message indicating that the mail merge is working in the background and you can recover your letters from the Mail Merge Queue page.
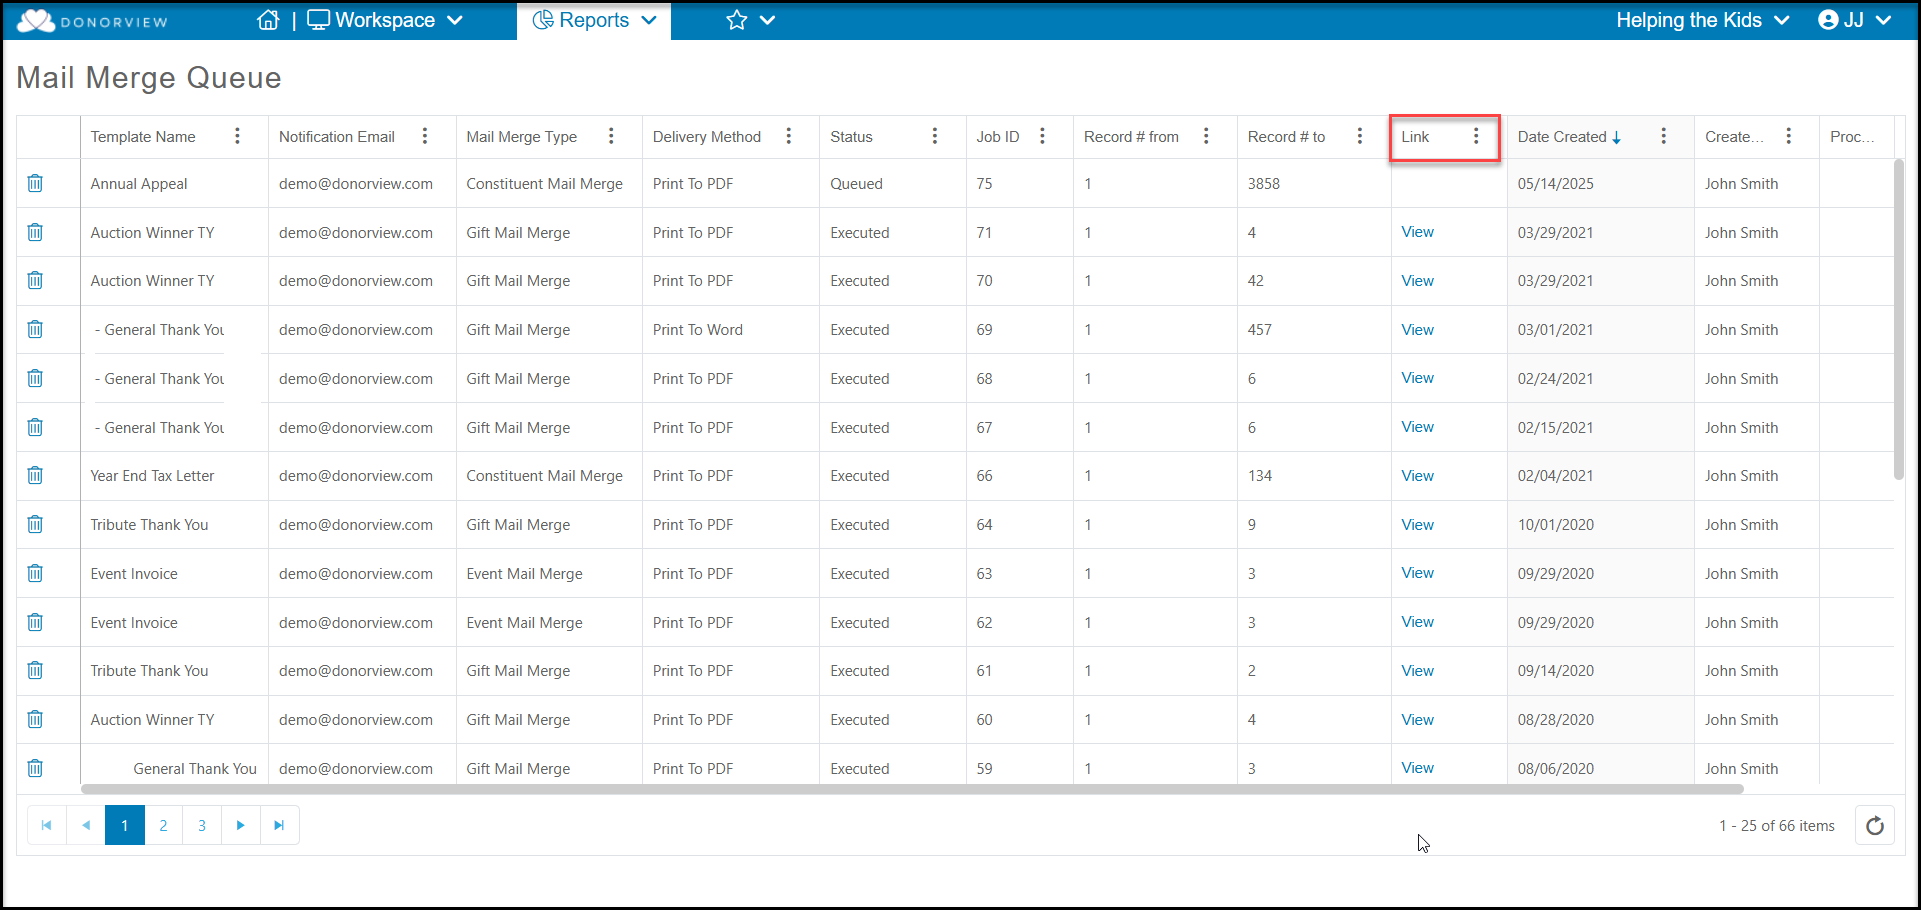
You will receive an email when your mail merge is complete. You can recover the document in the Reports module by clicking directly on Mail Merge Queue.
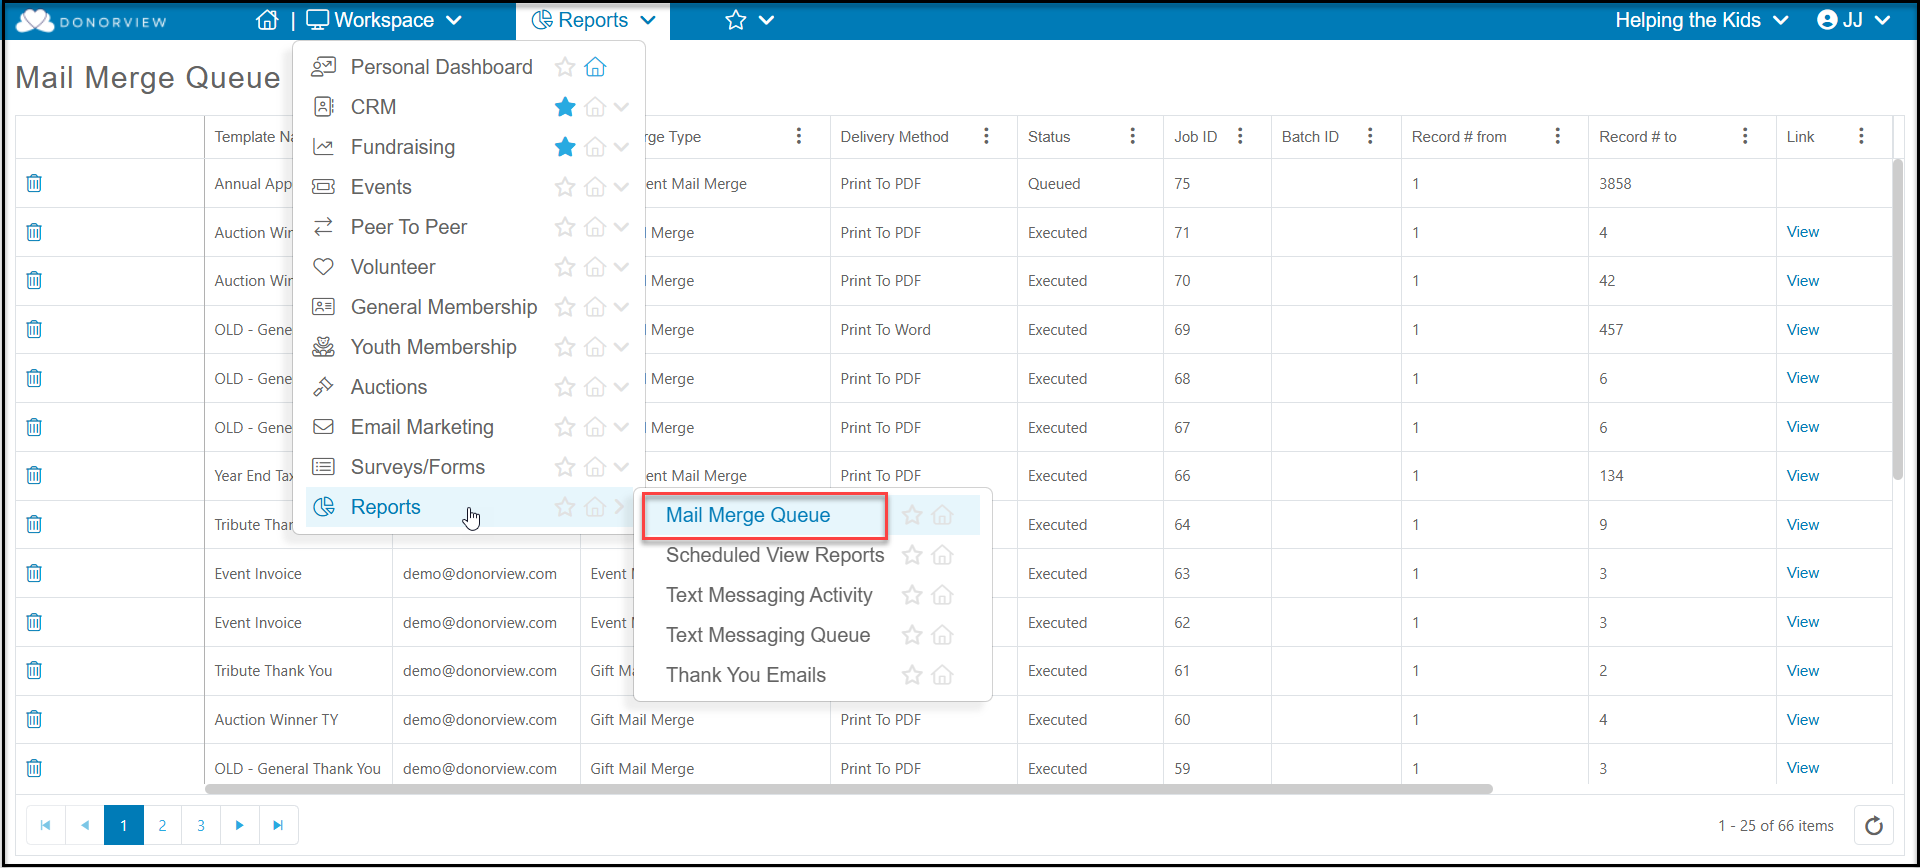
On the Mail Merge Queue grid you can see columns for Template Name, Date Created, Delivery Method, and Status.
Once the mail merge is complete, you can find a link to View in the Link column if the delivery method was Print to Word or PDF. If the message was sent via email, you will see a Email link to PDF file but no link to view. The Processed Records column will also have a link for you to view the records that were included in the message.