When creating a new event ticket level, click on + Add Level. This will open a new window to enter the information about the particular level. An event level window has four tabs, the Level Info, Upload Image, Time Tracking Defaults, and Refund/Cancellation.
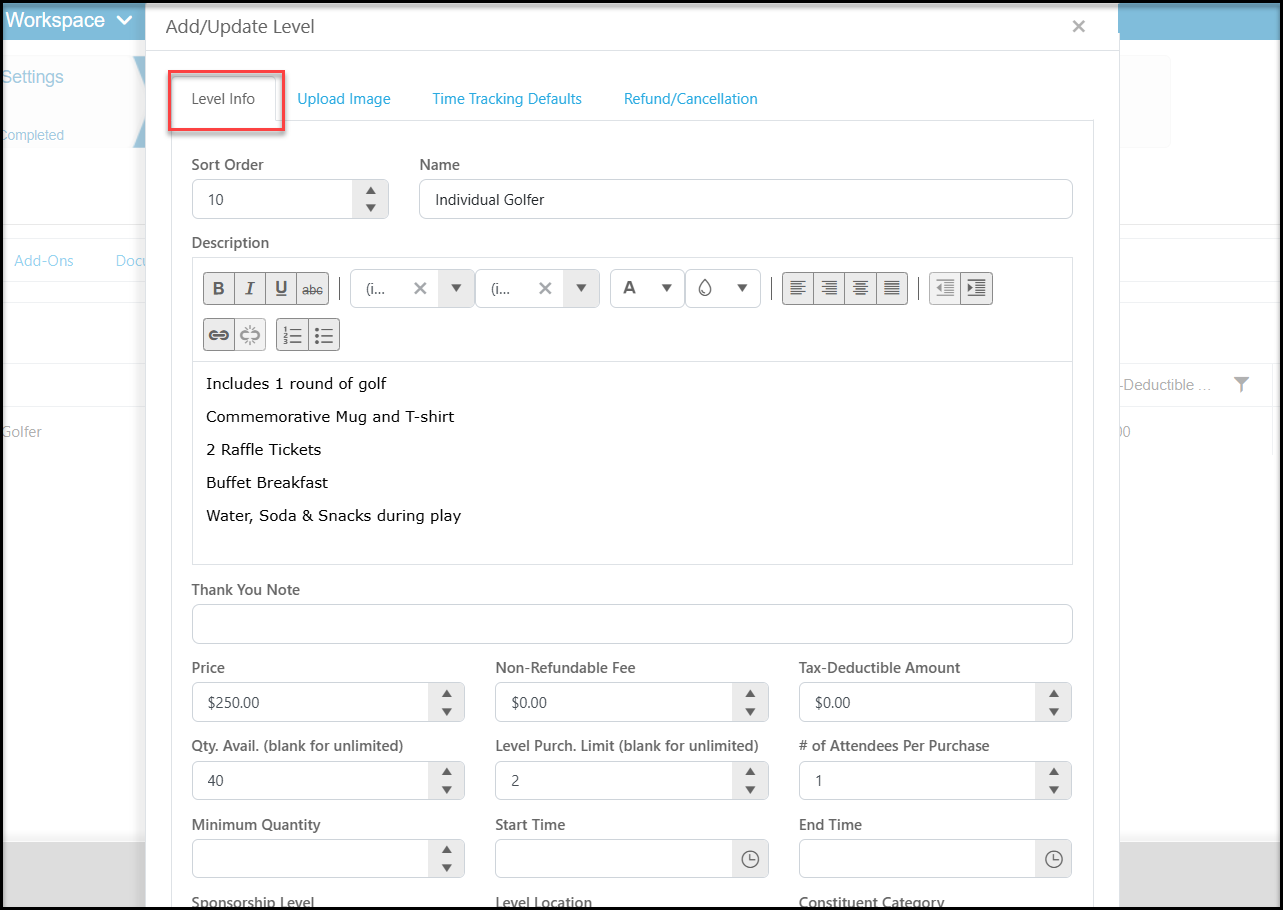
Level Info Tab:
- Sort Order - This allows you to select the order the Levels appear in, the lower the number the higher it appears.
- Name - Give your Level a name.
- Description - Give your Level a description letting people know what is included with their purchase.
- Thank You Note - This field allows you to include specific messaging to be included on the Thank You message if this event level is included in a transaction.
- Price - Enter the cost of the Level.
- Deposit Amount - appears only if you activated the feature to collect deposits on the Events Settings tab.
- Non-Refundable Fee - Enter the amount that won't be given back to the purchaser if they ask for a refund.
- Tax-Deductible Amount - Does this amount differ from the cost of the Level, enter it here for internal tracking.
- Qty. Available (blank for unlimited) - Enter the total amount of this level that is available.
- Level Purch. Limit (blank for unlimited) - Enter the total amount of this level that can be selected during a single transaction.
- # of Attendees Per Purchase - Enter how many attendees are included with this level's purchase. For example an "Individual Golfer" level admits 1, but a "Foursome" would include 4 attendees with the purchase. Likewise a "Table of 8" would include 8 attendees with purchase. If this number is "0" it indicates that this level does not include admission to your event and the registrant and their guests will not appear on the Event Attendance grid.
- Minimum Quantity - If you would like to offer a special pricing discount if a minimum number of this ticket level are purchased, you can enter that minimum quantity, otherwise leave this field blank.
- Start and End Time - Used for recurring events to establish the start and end time for this particular activity.
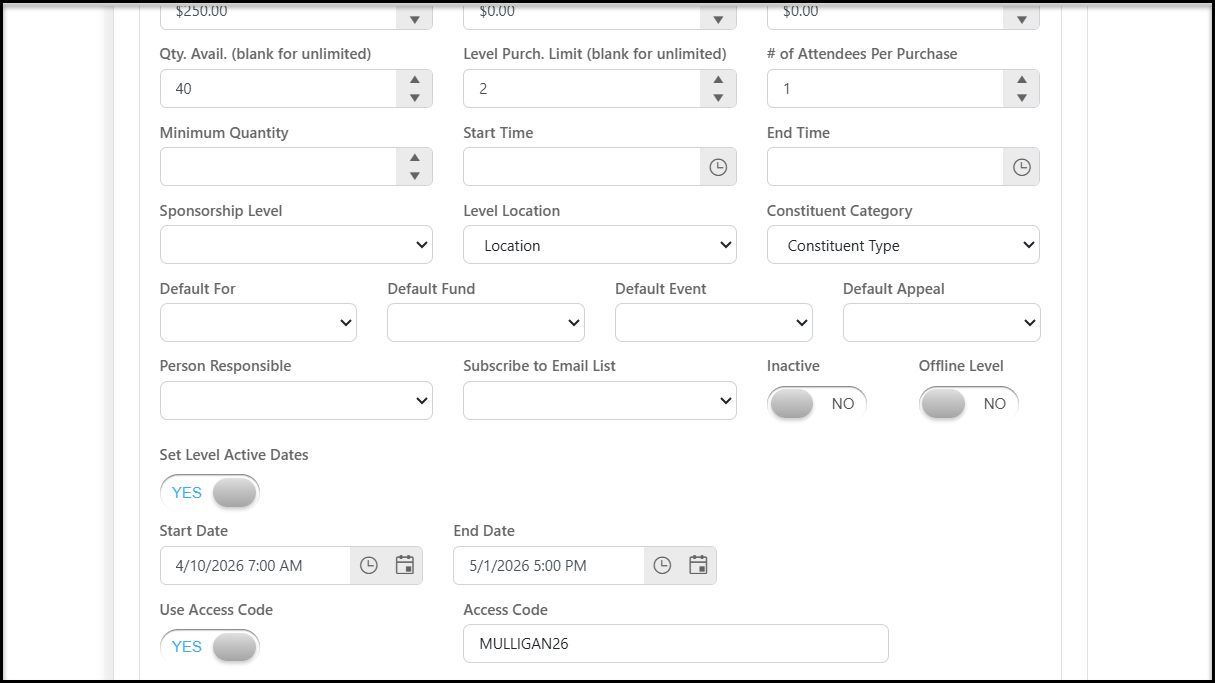
14. Sponsorship Level - Select which Sponsorship Level you wish to connect the selection of this Event Level with.
15. Level Location - You can assign a location for each level in case your event has multiple locations for the purchaser to choose from. If you enter a value in this field, you must enter a Level Location for all ticket levels. This will also require the registrant to select a level location prior to selecting their ticket level. If all your activities are at the same location, this should be blank.
16. Constituent Category - Select the Category a purchaser of this level will be automatically subscribed to.
17. Default Gift For, Fund, Event, Appeal - If this ticket level has different revenue category designations than the one you set up as the default for the whole page on the Event Settings tab, then you can select which For, Fund, Event, Appeal should be assigned to the transaction record for this Event Level.
18. Person Responsible - you can use this field to assign a specific DonorView user to view and manage the attendees for this event level. Admin users can see all event attendees, however users with the security setting of Attendance Only can only see the attendees for events and levels that they are assigned as the Person Responsible. This security setting and event level field can be utilized to give DonorView users limited access to the event module for the primary purpose of checking in and managing event attendees.
19. Subscribe to Email List - Select which Email List the Constituent who selects this Event Level should be subscribed to.
20. Inactive - If you no longer wish this event level to appear on the event form mark it inactive by setting the toggle to YES.
21. Offline Level - Allow for this event level to be hidden from the public but allow for internal selection. This is a great feature to internal guests or honorary attendees who you want to include on the Event Attendance grid, but will either be giving the ticket for free or at a reduced/special price that will be processed internally only.
22. Set Level Active Dates - Enter in a date/time range this level should appear active and be available for registration. Outside of these dates and times, the level would not be visible on the event page. This is helpful for things like early bird or late registration pricing. Be sure that your date ranges and times do not overlap if you have early bird, regular, and late registration pricing to prevent multiple ticket levels showing for the same thing.
23. Use Access Code - Setting this to YES, will allow you to create an alphanumeric code which must be entered in order to be able to purchase or register for this level. Typically used for special ticket levels that you do not wish the general public to be able to register for. Use the Access Code field to enter the code.
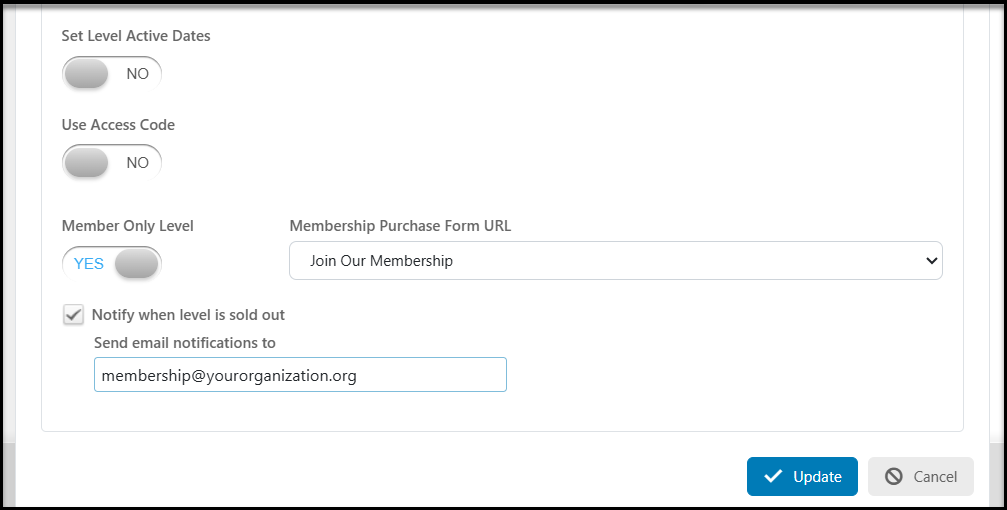
23. Member Only Level - Require anyone registering for this specific level to have an active membership connected to their constituent record. An active membership will be verified by requiring the registrant to enter in their email address or log into their portal account. You can specify which membership page and which level they must have on the new tab “Member Only Level.”
24. Membership Purchase Form URL - If the registrant does not have the appropriate active membership and level when they enter their email address, a link to a membership page will be displayed. Here you can select which membership page they will be directed to in order to purchase the appropriate membership.
25. Notify when level is sold out - Check the box and enter up to 5 email addresses that will be notified when this level sells out.
26. Click Update to save the changes made so far, or continue on to the next tab to upload an image for this level.
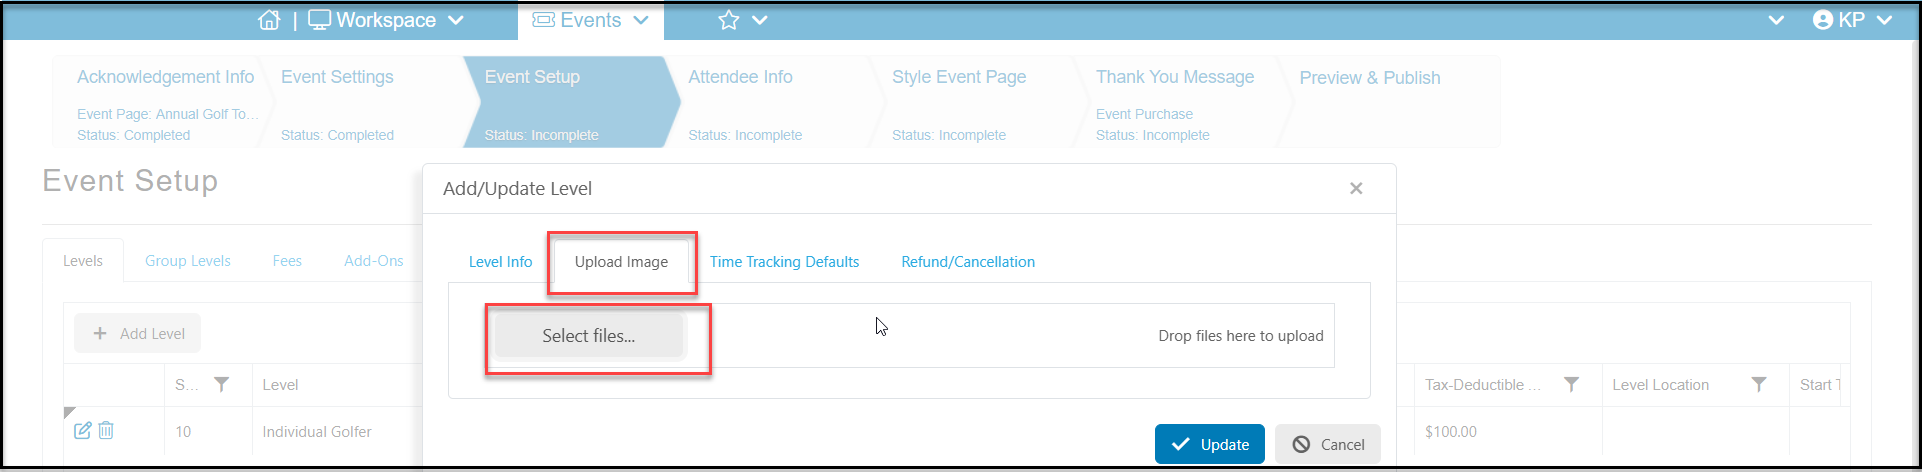
Upload Image Tab:
1. If you have elected to show your ticket levels as tile images instead of a list on the Event Settings tab, you can upload your image here. Click Select Files to upload your image or drag and drop the file into the box.
2. If you are done making changes, you can click Update to save or continue to the next tab.
Time Tracking Defaults Tab:
The fields on this tab allow you to setup the specifics for a Time Tracking record that will be created based on the selection of this Event Level and when the registrant is checked in for the Event Attendance.
- Create time tracking on check in - This setting will allow for the Time Tracking record to be automatically created when the Attendee for this Event Level is check in for the Event Attendance.
- Constituent Service Category - Select which Category will be assigned to this Time Tracking record.
- Constituent Service Category 2 - Select the second Category that will be assigned to this Time Tracking record.
- Constituent Service Category 3 - Select the third Category that will be assigned to this Time Tracking record.
- Constituent Service Category 4 - Select the fourth Category that will be assigned to this Time Tracking record.
- Use level start & end time - This setting will allow for the Start and End Date/Time for the Time Tracking record to be taken from the Event Attendance Check In and Out.
- Hours/Minutes - If you are not using the previous setting then you can enter the specific Hours and Minutes that will be assigned to the Time Tracking record.
- Dollar Value - Enter a Amount that will be assigned to the Time Tracking record.

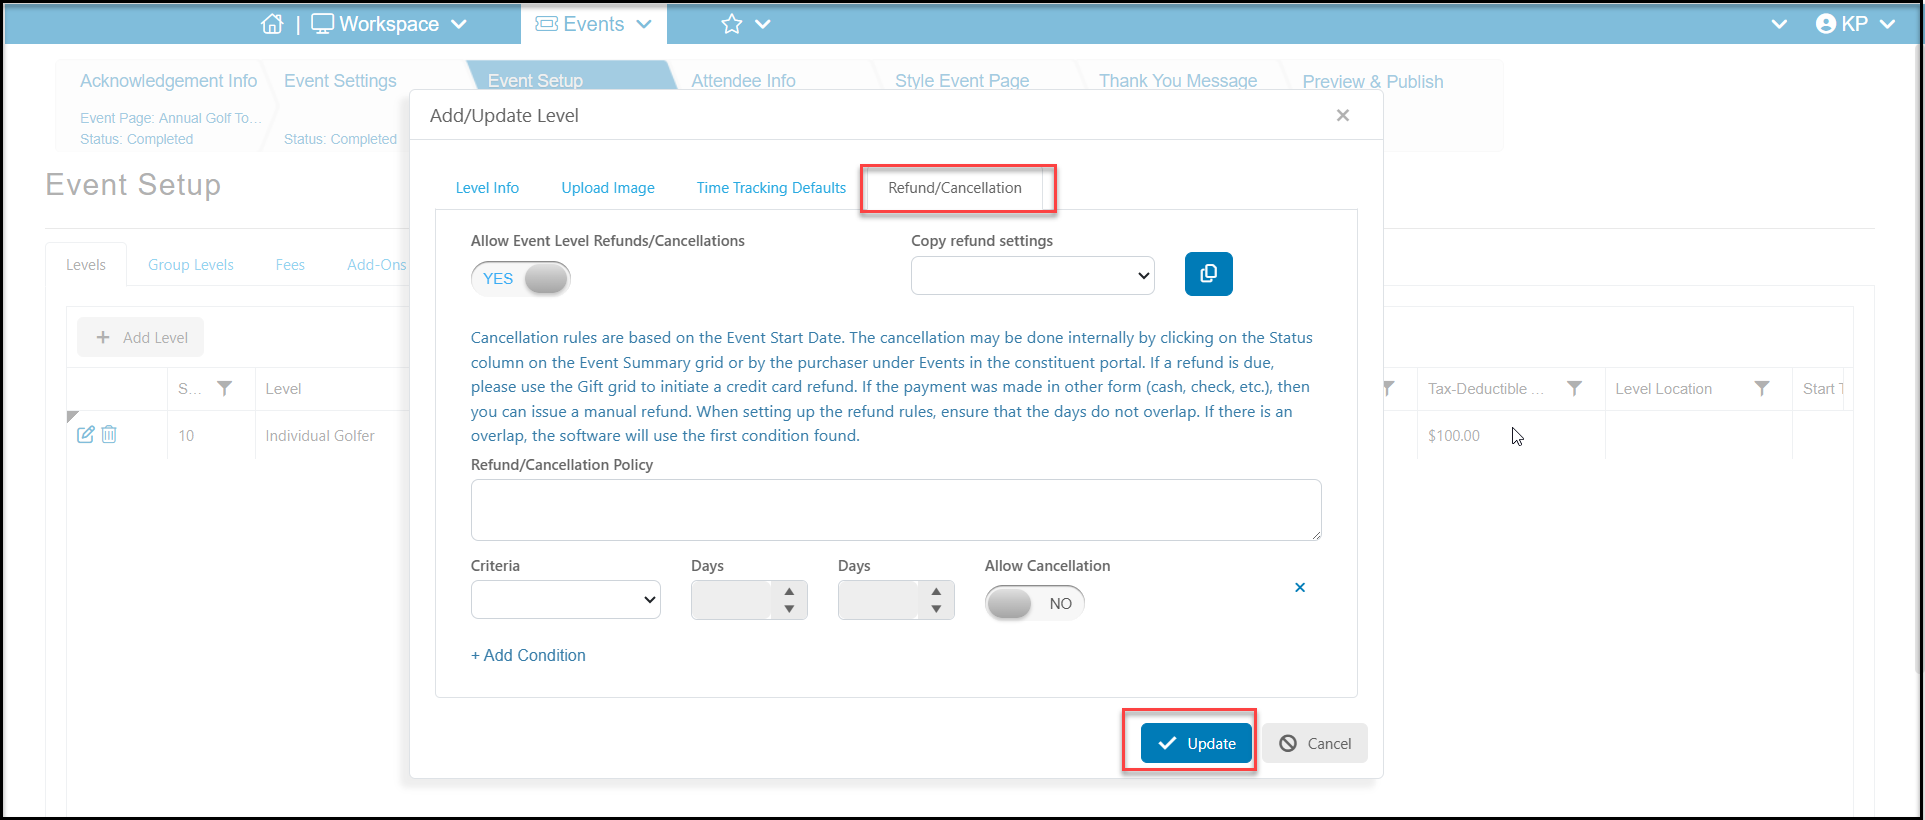
Refund/Cancellation Tab:
You can set up a Cancellation/Refund Policy directly within the setup of your event level (or add-on). Please note that this feature is currently only available for one-time and recurring events. You can learn more about setting up your refund and cancellation policy in this article "Event Level and Add On Cancellations Setup."
- To activate this feature for a specific level or add-on, toggle the "Allow Event Level Refunds/Cancellations" switch to “YES.”
- Once activated, you will have the option to either:
- Copy refund settings from another level or add-on from the Copy Refund Settings drop down menu OR
- Set up new settings from scratch in the Refund/Cancellation Policy field.
Search Options Tab:
Under the Search Options Tab you will be able to assign which Search Terms will be connected to this specific Event Level. Only one Search Term per Category can be assigned to the each Event Level. These selections will then be visible on the Event Registration form for the registrant to use for filtering the Event Levels.

Multi Day Attendance Tab:
If you have activated the Recurring Event, 1 Registration Covers All Days option on the Event Settings tab, the Multi Day Attendance tab will allow you to internally select which days a specific level will occur. This second option is ideal for situations where you have classes or sessions that meet multiple days a week or month but the registrant only needs to purchase a single level.
- Enable Multi Day Attendance – When set to Yes, this will allow you to make your multi day selections.
- Class Start Date – Enter or select the first day this level will occur on.
- Class End Date – Enter or select the last date this level will occur on.
- Days Available – Select which days of the week this level will occur on.
- Start Time – Enter or select the recurring start time for this level.
- End Time – Enter or select the recurring end time for this level.
- Calendar – Fine tune which days this level will occur on by adding or removing dates. Ctrl + mouse click on a specific date will mark the date as selected. Selecting a date from a specific view without using the Ctrl key will deselect all previously selected dates.
