# Youth Member Fee Setup
> Source: https://support.donorview.com/youth-member-fee-setup | Updated: 2026-10-12T20:40:30Z
Independent fees can now be charged to a Youth Member’s record without requiring a Membership or Program enrollment.
To set up a fee, navigate to:
**Workspace > Youth Membership > Programs/Fees**
Above the grid, hover over the **+ New** button and click **Fee**.
The setup process consists of three steps, detailed below:
---
### 1. Fee Acknowledgement Information
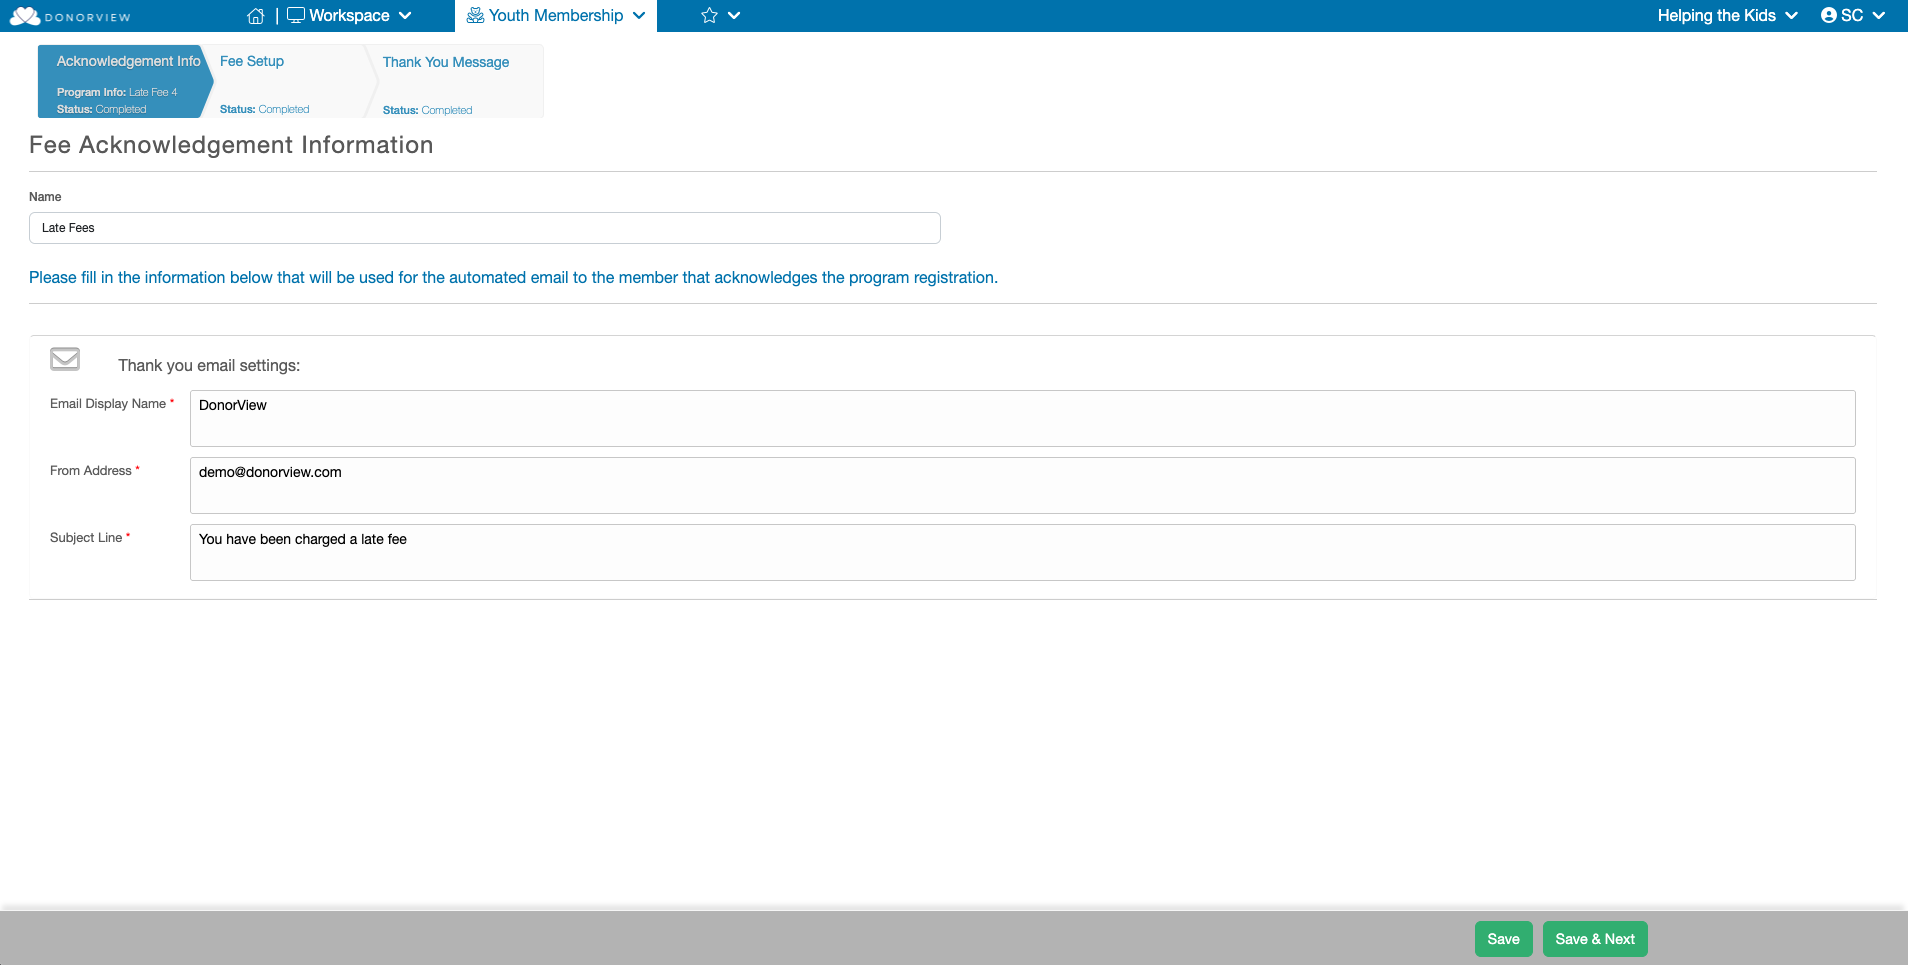
In this step, you can enter a **Name** for the group of fees. Each setup can contain multiple fees, but this name identifies the overall fee grouping.
You can also configure the **automated email** sent to the Youth Member’s Head of Household after a fee is processed. This includes:
- Sender Name
- Sender Email Address
- Email Subject Line
Once you've entered all necessary information, click the green **“Save & Next”** button in the lower right corner to continue.
 ---
### 2. Program Setup
This step allows you to define the **individual fees** that can be charged.
At the top of the grid, there are four dropdown fields:
- **For**
- **Fund**
- **Event**
- **Appeal**
---
### 2. Program Setup
This step allows you to define the **individual fees** that can be charged.
At the top of the grid, there are four dropdown fields:
- **For**
- **Fund**
- **Event**
- **Appeal**
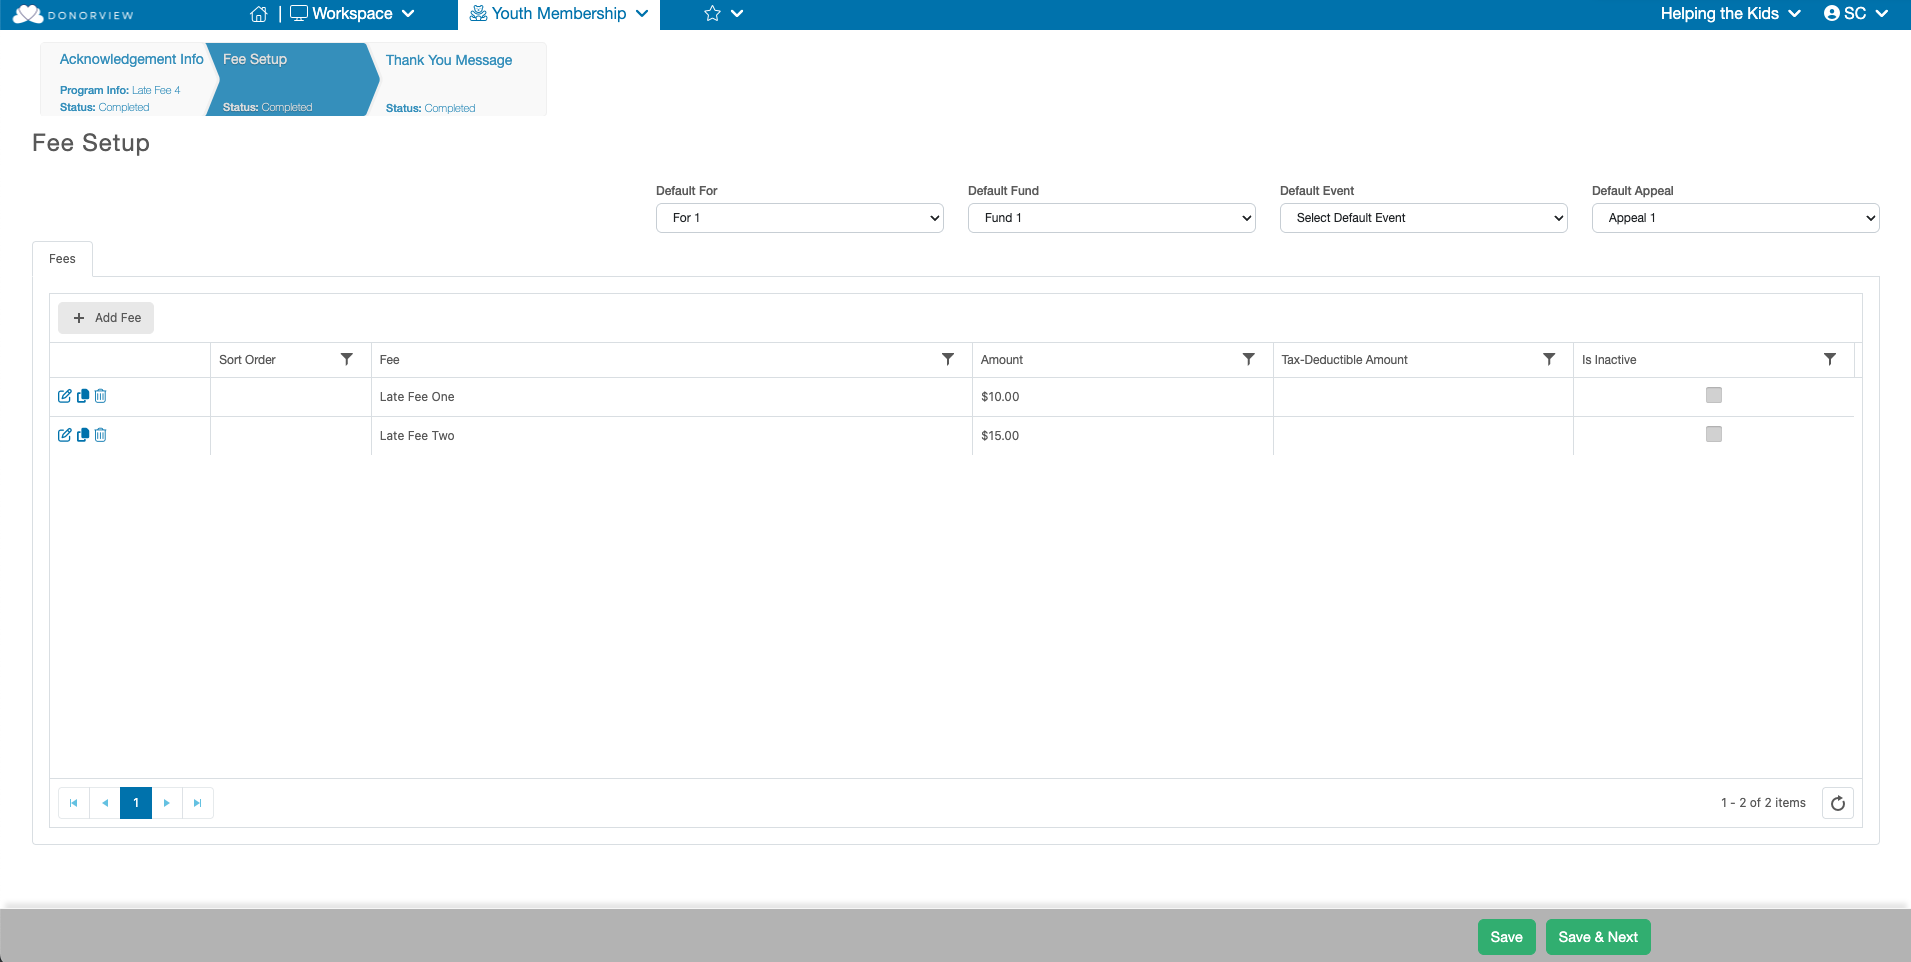 The selections made here will apply to the fee transactions and help categorize them for accounting purposes. These fields are consistent with other transaction areas in the software.
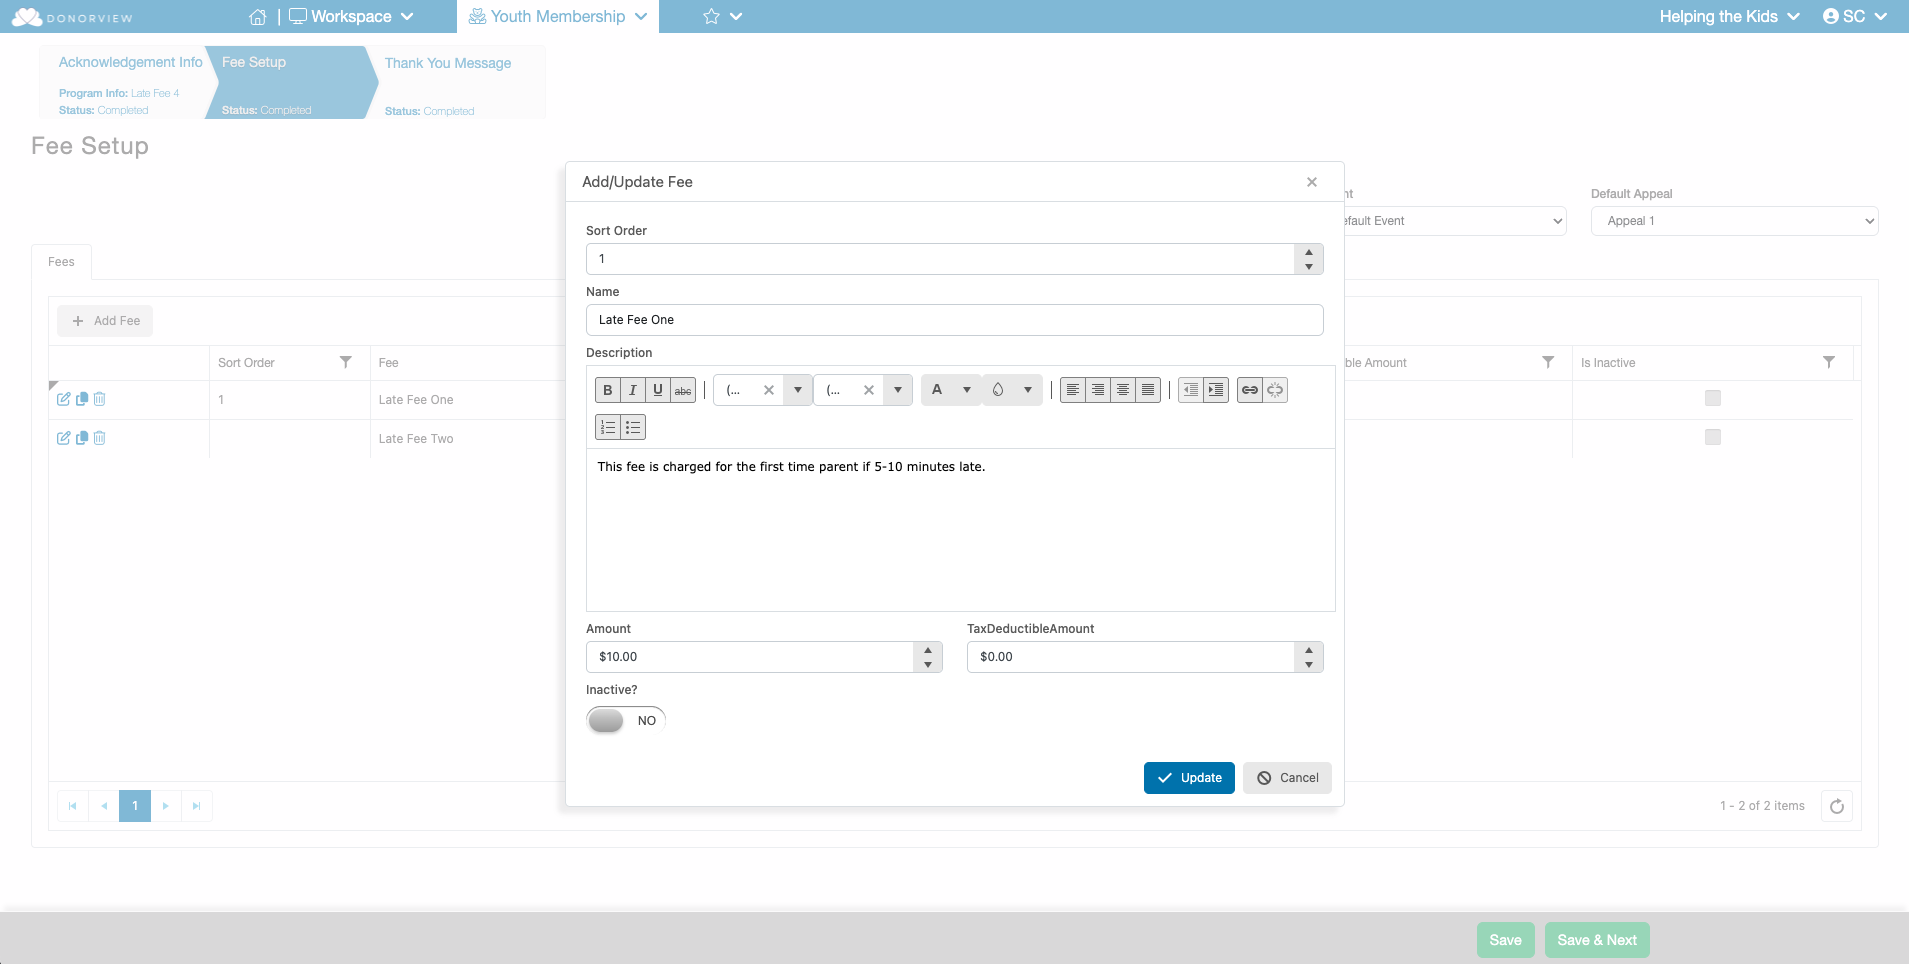
To add a new fee, click the **“+ Add Fee”** button. A dialog box will appear where you can input the following details:
- **Sort Order** – Controls the display order of the fees (lower numbers appear first).
- **Name** – The name of the fee.
- **Description** – A brief explanation of the fee.
- **Amount** – The fee amount.
- **Tax Deductible Amount** – The portion (if any) that is tax-deductible.
- **Inactive** – Toggle to “YES” to hide this fee from the list.
After entering the information, click the blue **“Update”** button to save the fee. You may continue adding additional fees or edit, copy, or delete existing ones as needed.
The selections made here will apply to the fee transactions and help categorize them for accounting purposes. These fields are consistent with other transaction areas in the software.
To add a new fee, click the **“+ Add Fee”** button. A dialog box will appear where you can input the following details:
- **Sort Order** – Controls the display order of the fees (lower numbers appear first).
- **Name** – The name of the fee.
- **Description** – A brief explanation of the fee.
- **Amount** – The fee amount.
- **Tax Deductible Amount** – The portion (if any) that is tax-deductible.
- **Inactive** – Toggle to “YES” to hide this fee from the list.
After entering the information, click the blue **“Update”** button to save the fee. You may continue adding additional fees or edit, copy, or delete existing ones as needed.
 When finished, click the green **“Save & Next”** button to continue to the final step.
---
### 3. Thank You Message
This step allows you to customize the **Thank You** message that the Youth Member’s Head of Household will see after the fee is submitted.
By default, the message includes:
- Standard text and colors
- Purchase details
To make changes, click the **“Edit Message”** button in the bottom right. This opens the message in the **email template editor**, where you can customize the content as needed.
When finished, click the green **“Save & Next”** button to continue to the final step.
---
### 3. Thank You Message
This step allows you to customize the **Thank You** message that the Youth Member’s Head of Household will see after the fee is submitted.
By default, the message includes:
- Standard text and colors
- Purchase details
To make changes, click the **“Edit Message”** button in the bottom right. This opens the message in the **email template editor**, where you can customize the content as needed.
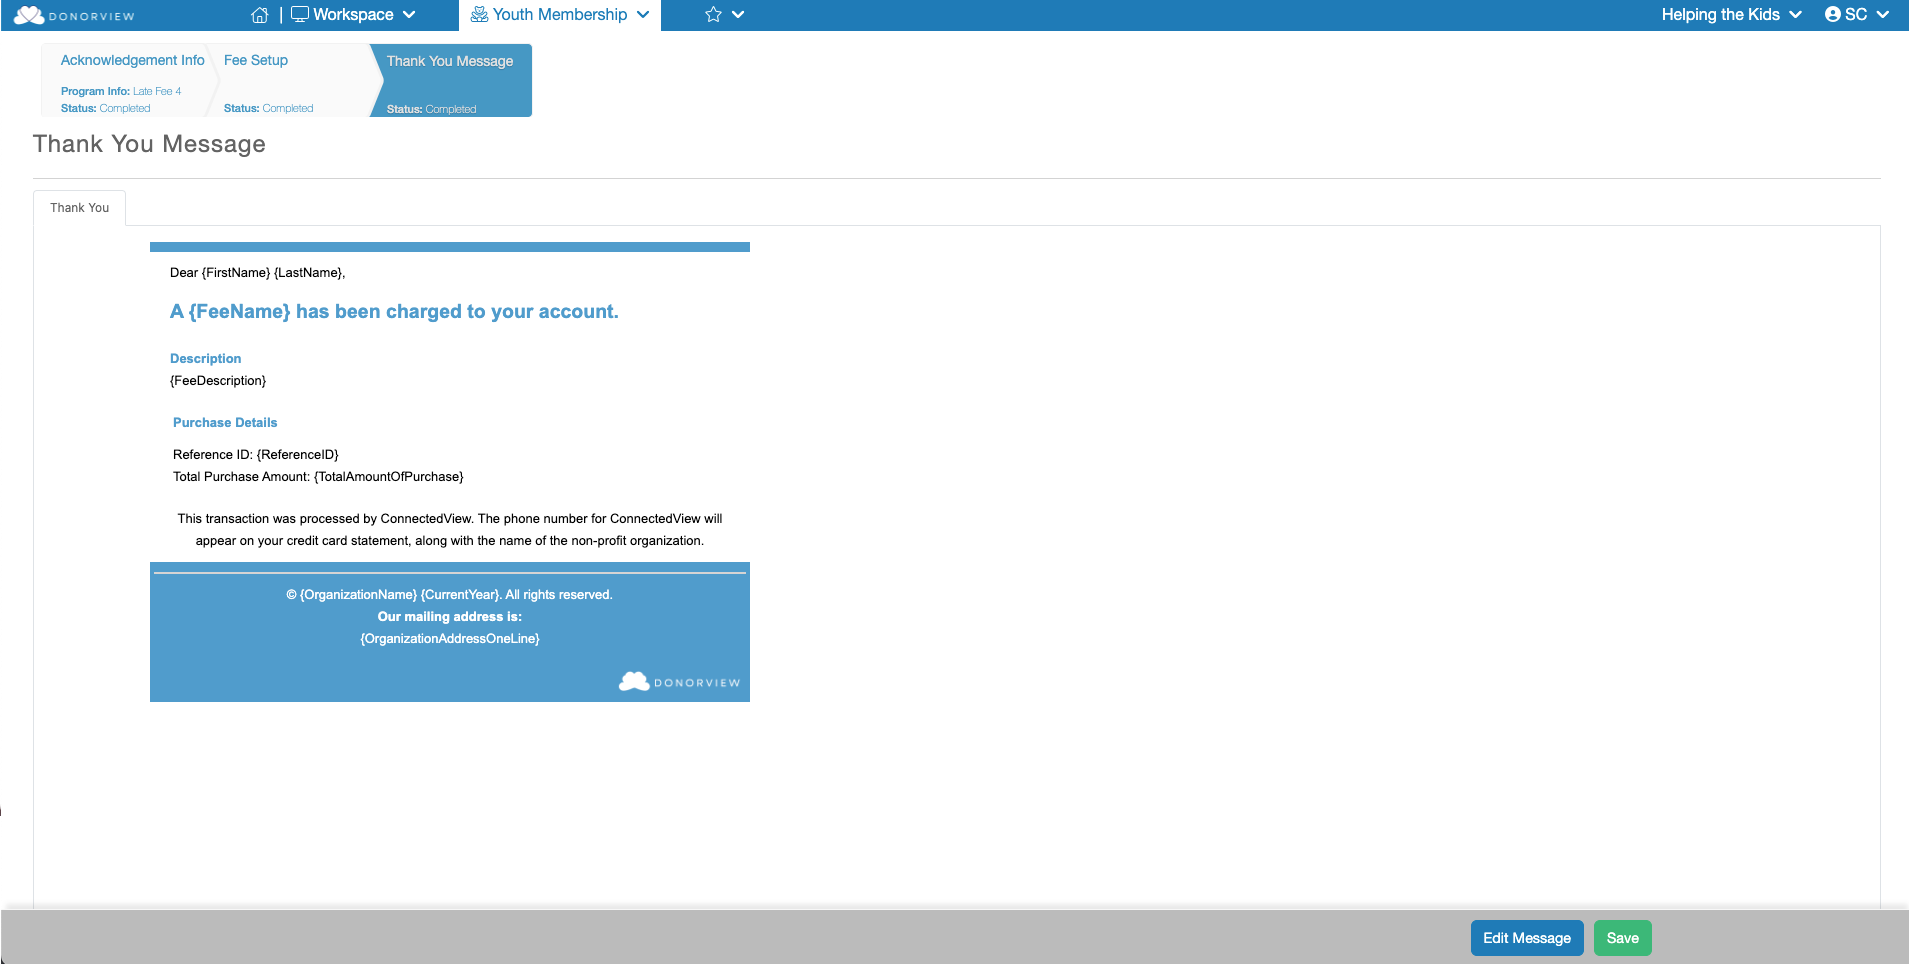 Once you're finished editing your Thank You email(s), click **“Save & Next”** to proceed.
---
### Completion
After completing Step 3, your fee setup is complete. Return to the **Programs/Fees** main grid to:
- Add more fee setups
- Copy existing setups
- Delete setups no longer in use
Learn how to process a fee by clicking here.
Once you're finished editing your Thank You email(s), click **“Save & Next”** to proceed.
---
### Completion
After completing Step 3, your fee setup is complete. Return to the **Programs/Fees** main grid to:
- Add more fee setups
- Copy existing setups
- Delete setups no longer in use
Learn how to process a fee by clicking here.