The Settings tab is where you establish the different options you want to activate on your donation page. All of these fields are optional, so you can customize the page for your campaign needs.
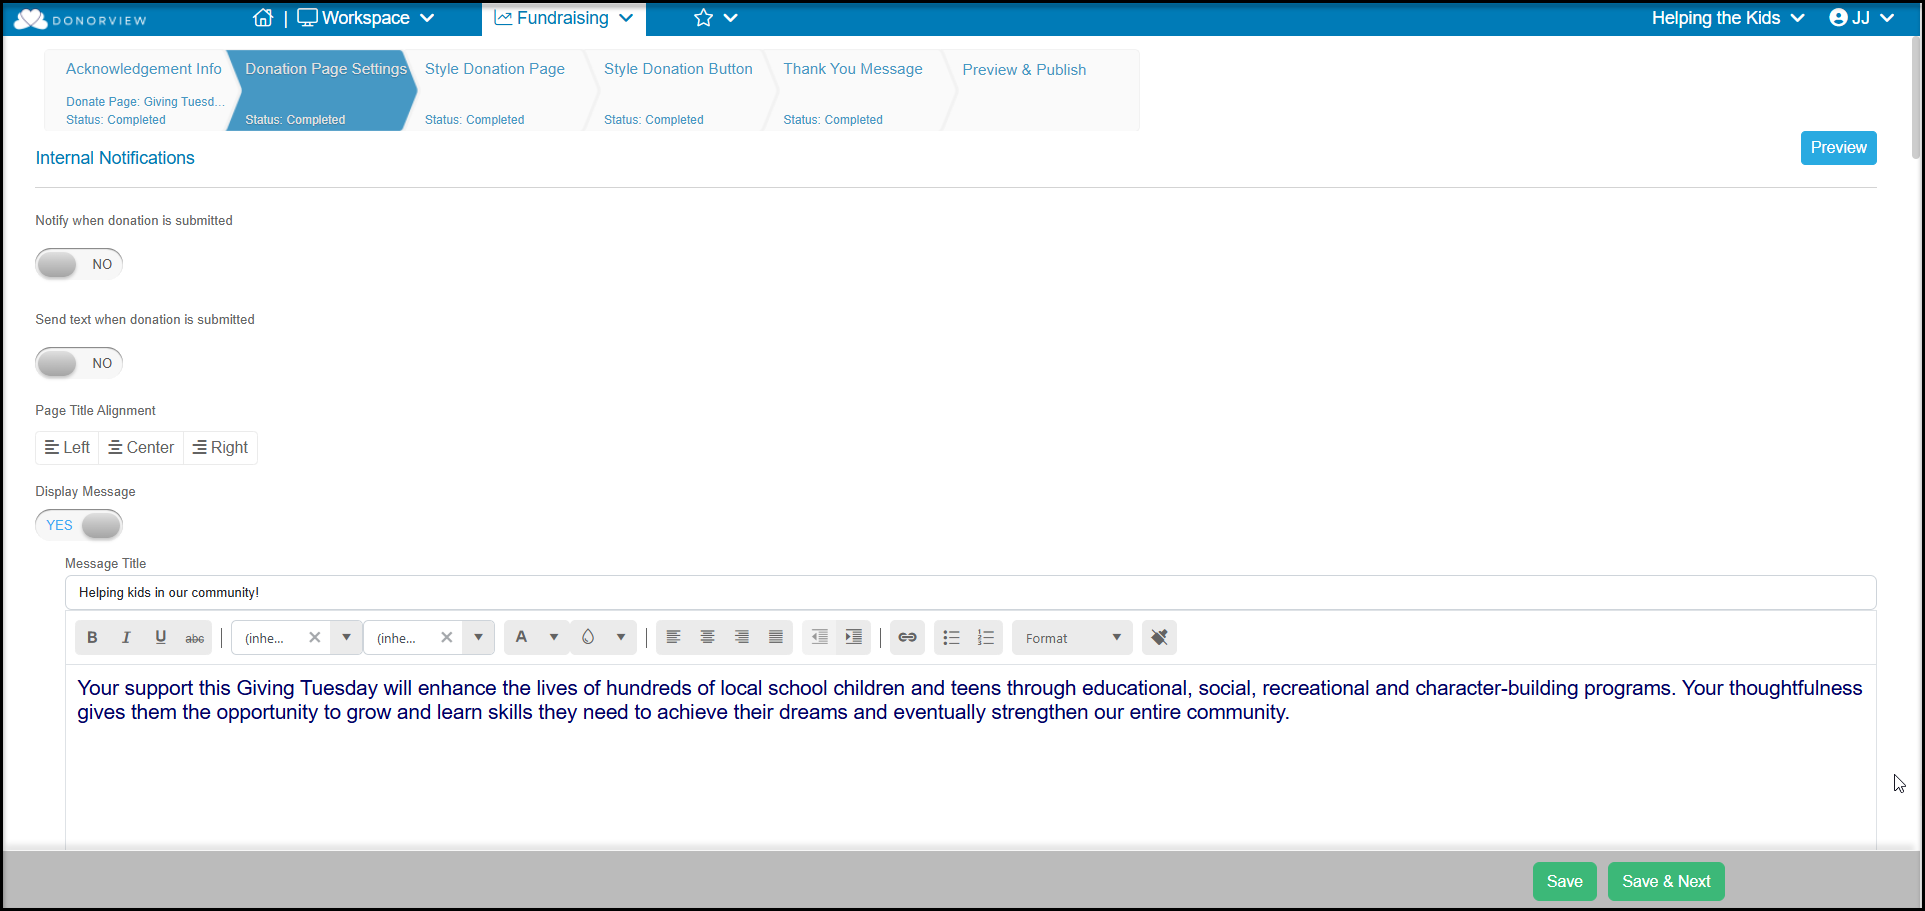
- At the top of the page is the Internal Notifications section where you can turn on Notify when donation is submitted to set up notification emails or Send text when donation is submitted. You must have text messaging activated to receive a text notification.
- You can set your Page Title Alignment and turn on Display Message to include text at the top of your page.
- The name you gave your page in the Acknowledgement Info page will automatically be displayed at the top of the page, but you can also add an optional Message Title.
- In the body below the message title is where you can add information about your programs and this fundraising campaign. The text is customizable here with font formatting and the ability to add hyperlinks with the link icon.
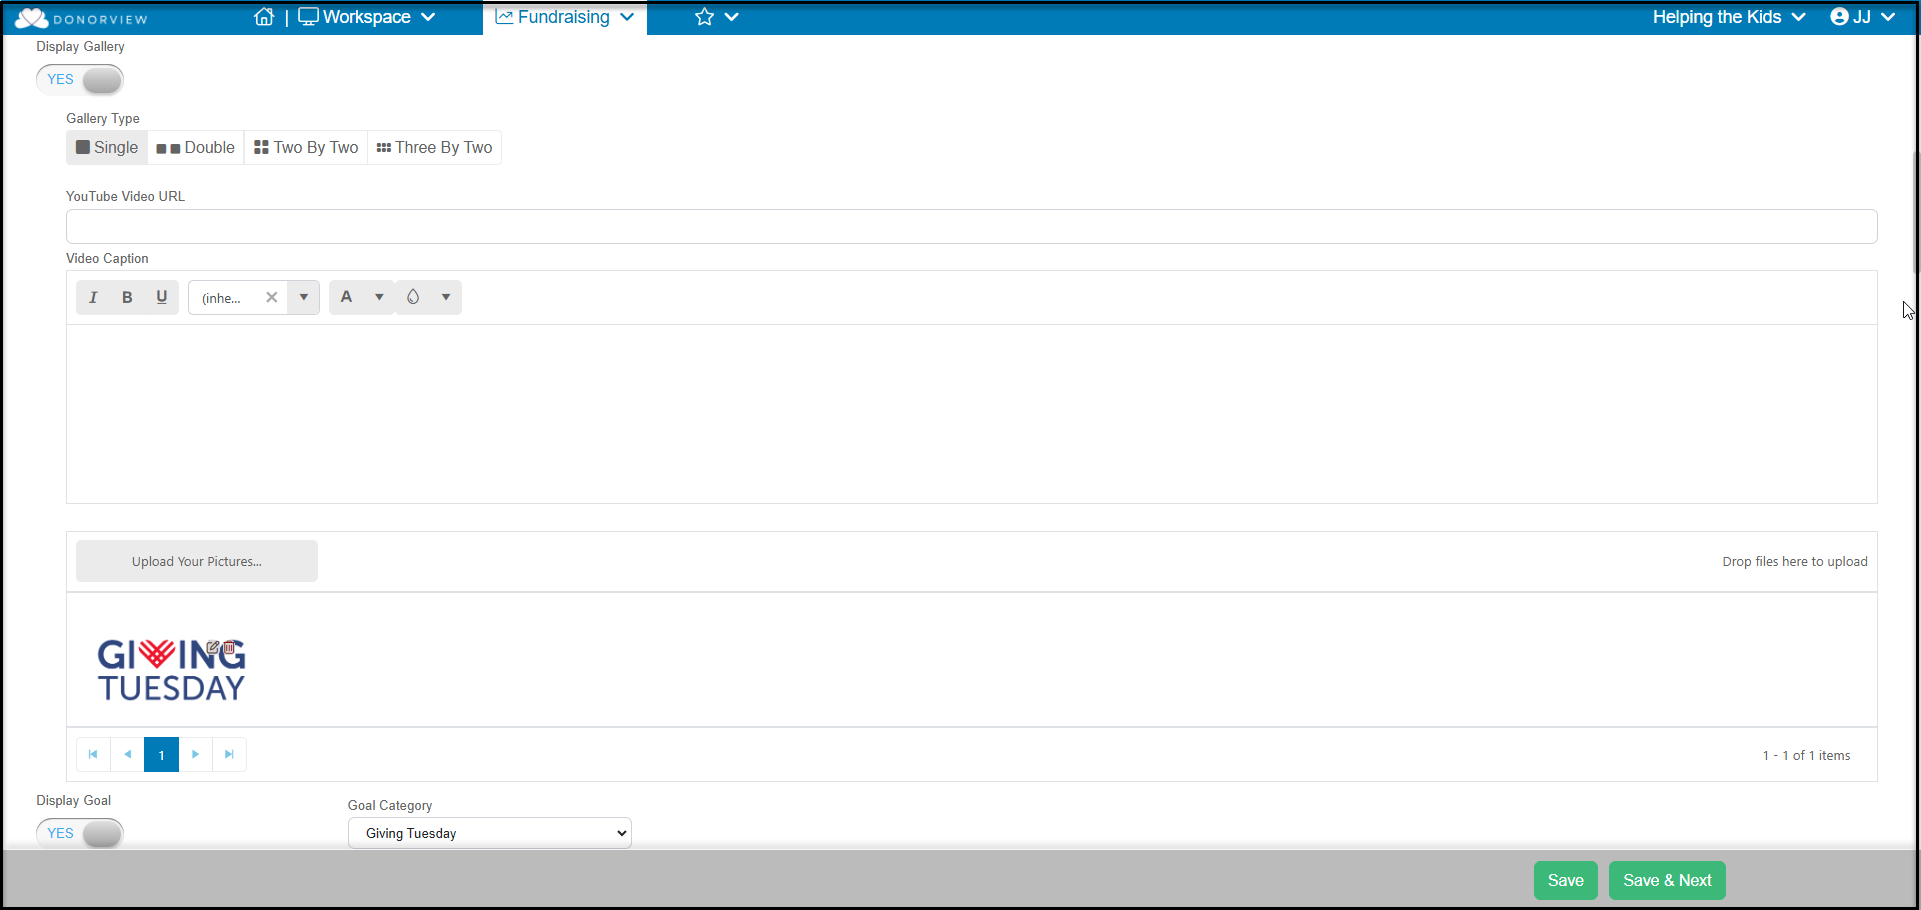
- Continuing down the page you can also turn on Display Gallery to add images to your page.
- You will need to crop and edit the images prior to importing them.
- You can display the images as Single with one large image with arrows to scroll or show them as Double, Two By Two or Three By Three if you would like more of a gallery display.
- Images will be displayed in the order they are uploaded.
- Clicking the edit icon you can add or edit a caption for your image.
- You can delete an image by clicking on the small trash can icon in the top right corner of the image.
- You can also upload a YouTube video to play on your page. The image displayed will be the thumbnail you have established for your video in YouTube.
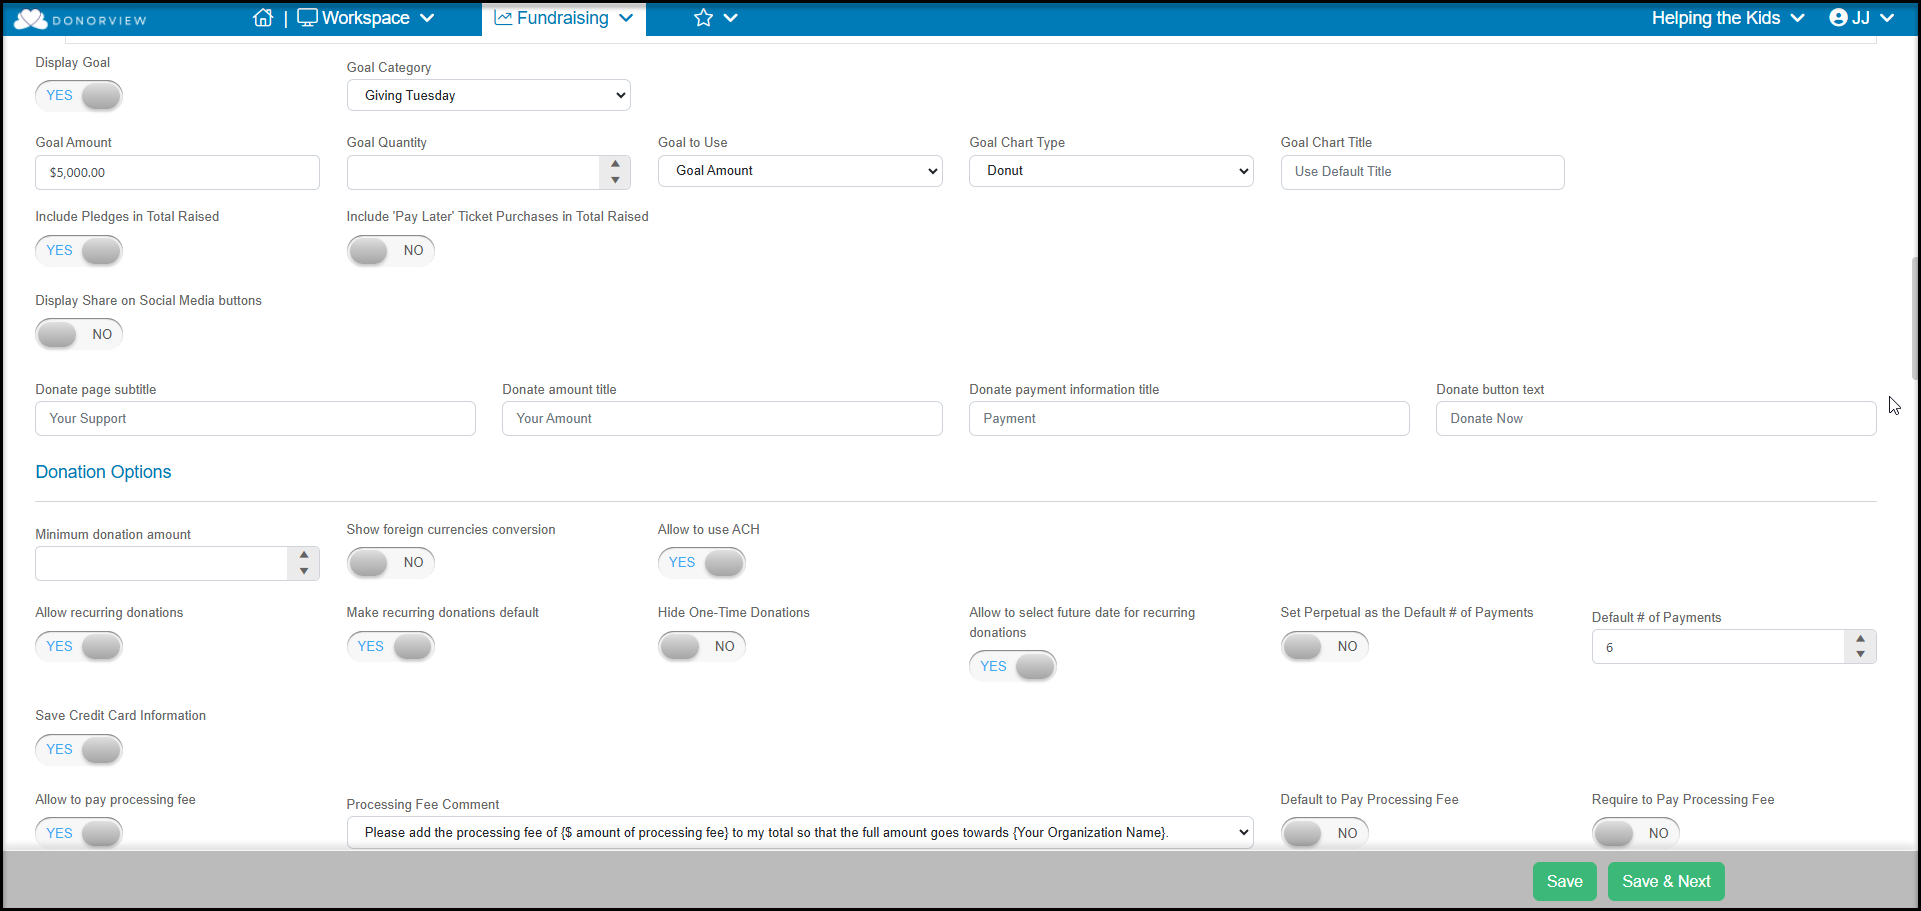
- Below the page display information is an option to Display Goal. This will add a goal progress graphic to you page.
- In order to effectively use this feature, you must also select a Goal Category (also shown as Fundraising Goal Category on the Gifts grid and gift entry pages. Any transactions applied to the same Fundraising Goal Category selected here will affect the goal progress displayed.
- Enter the Goal Amount if you prefer to show the progress based on total amount raised, enter your financial goal.
- Use Goal Quantity if you prefer to count the number of transactions that are recorded instead of the dollar amount.
- Goal to Use is the dropdown you can select whether the goal should be based on a total Goal Amount or Goal Quantity.
- You can choose from a thermometer, donut, or bar chart in the Goal Chart Type dropdown list.
- Under Goal Chart Title you can type in a name you would like to display above the goal progress.
- Include Pledges in Total Raised will include the total amount of the pledge in the progress.
- If you are also using the same Goal Category for an event page, you can also Include “Pay Later” Ticket Purchases in Total Raised
- Display Share on Social Media buttons will show links to social media sites for the donor to open in order to share your donation page with their followers. It does not open your organization's social media sites.
- You can customize the labels applied to the page including Donate page subtitle, Donate amount title, Donate payment information title, and Donate button text at the bottom of the page.
- Under the Donation Options section, you can require a Minimum Donation Amount.
- If you will be sharing your page with countries outside the US, you can Show foreign currencies conversion as an option to allow contributions in foreign currencies.
- If you have the ACH payment options activated in your Account Settings, you can turn this feature on for this page with Allow to use ACH.
- Allow recurring donations enables your donors to set up pledges within the software. Pledges set up through a donation page that are not “pay later” will be auto-charged and auto-acknowledged.
- You can set this up to Make recurring donations default, and, if desired, even Hide One-Time Donations.
- If you would like to give your donors the option, you can Allow to select future date for recording donations.
- If you would like all the pledges to be set up as perpetual, meaning it continues until the credit card expires or the donor requests to cancel the pledge, turn on Set Perpetual as the Default # of Payments.
- Alternatively, you can enter a Default # of Payments for the pledge, which is editable by the donor.
- Save Credit Card Information will save the credit card in the constituent's Payment Options tab in their record. This feature is automatically enabled for recurring donations made with a credit card.
- Allow to pay processing fee can be enabled to with give the donor the option of helping to offset processing fees, or you can make that Required.
- The Processing Fee Comment allows you to choose from several statements to describe the processing fee.
- After selecting processing fee options, you have the option to Allow One-Time Pay Later Donations and establish a Pay Later Due Date. This will create a one-time pledge for the constituent. You will need to manually remind the constituent to make the pledge payment.
- You can also allow the option for Allow Recurring Pay Later Donations, this will also require manual reminders for each pledge payment that is due.
- These pay later options can also be internal only with Allow Internal Only To Pay Later. This allows a DonorView user to enter pay later transactions, but it is not visible to the public.
- When allowing pay later options, you can also customize the text for Pay Later Comment to ensure the constituent understands what they are requesting when they check this box.
- Activating Allow predefined amountsshow new options to enter recommended amounts to contribute.
- You can include a short caption to explain how that amount will impact your organization.
- You can also upload a thumbnail image 200 x 200 pixels for that amount.
- The Other option will always be enabled to allow the constituent to enter in any amount equal to or above your minimum donation amount.
- GDPR Consent Required? is for organizations that fundraise in the European Union and must comply with their messaging requirements. It will activate a new field to enter the text for your message in GDPR Compliance Message.
- Do not allow donations on behalf of a company/organization will turn off a button to allow contributions for a company-type constituent.
- Default to donations on behalf of a company/organization will assume that most contributions will be from a company-type constituent and will include company name and company email by default.
Under the Additional Options area, you can turn on a variety of specialty donation features including:
- Show Anonymous to allow the constituent to elect to mark their gift as anonymous.
- Show Matching to allow the constituent to enter the name of their organization and mark it as a potential matching gift on the Gifts grid. With this set to YES, if you also have Double the Donation subscription, you can turn on this feature on the page.
- Auto Acknowledge set to YES will add the check mark to the Acknowledged column on the Gifts grid so that you know the constituent has already received an automatic thank you message. With this activated, you can also indicate Acknowledged How.
- Show Tribute will allow the constituent to select if the donation is in tribute of someone and enter the tribute information. This information will also be included on the Gifts grid.
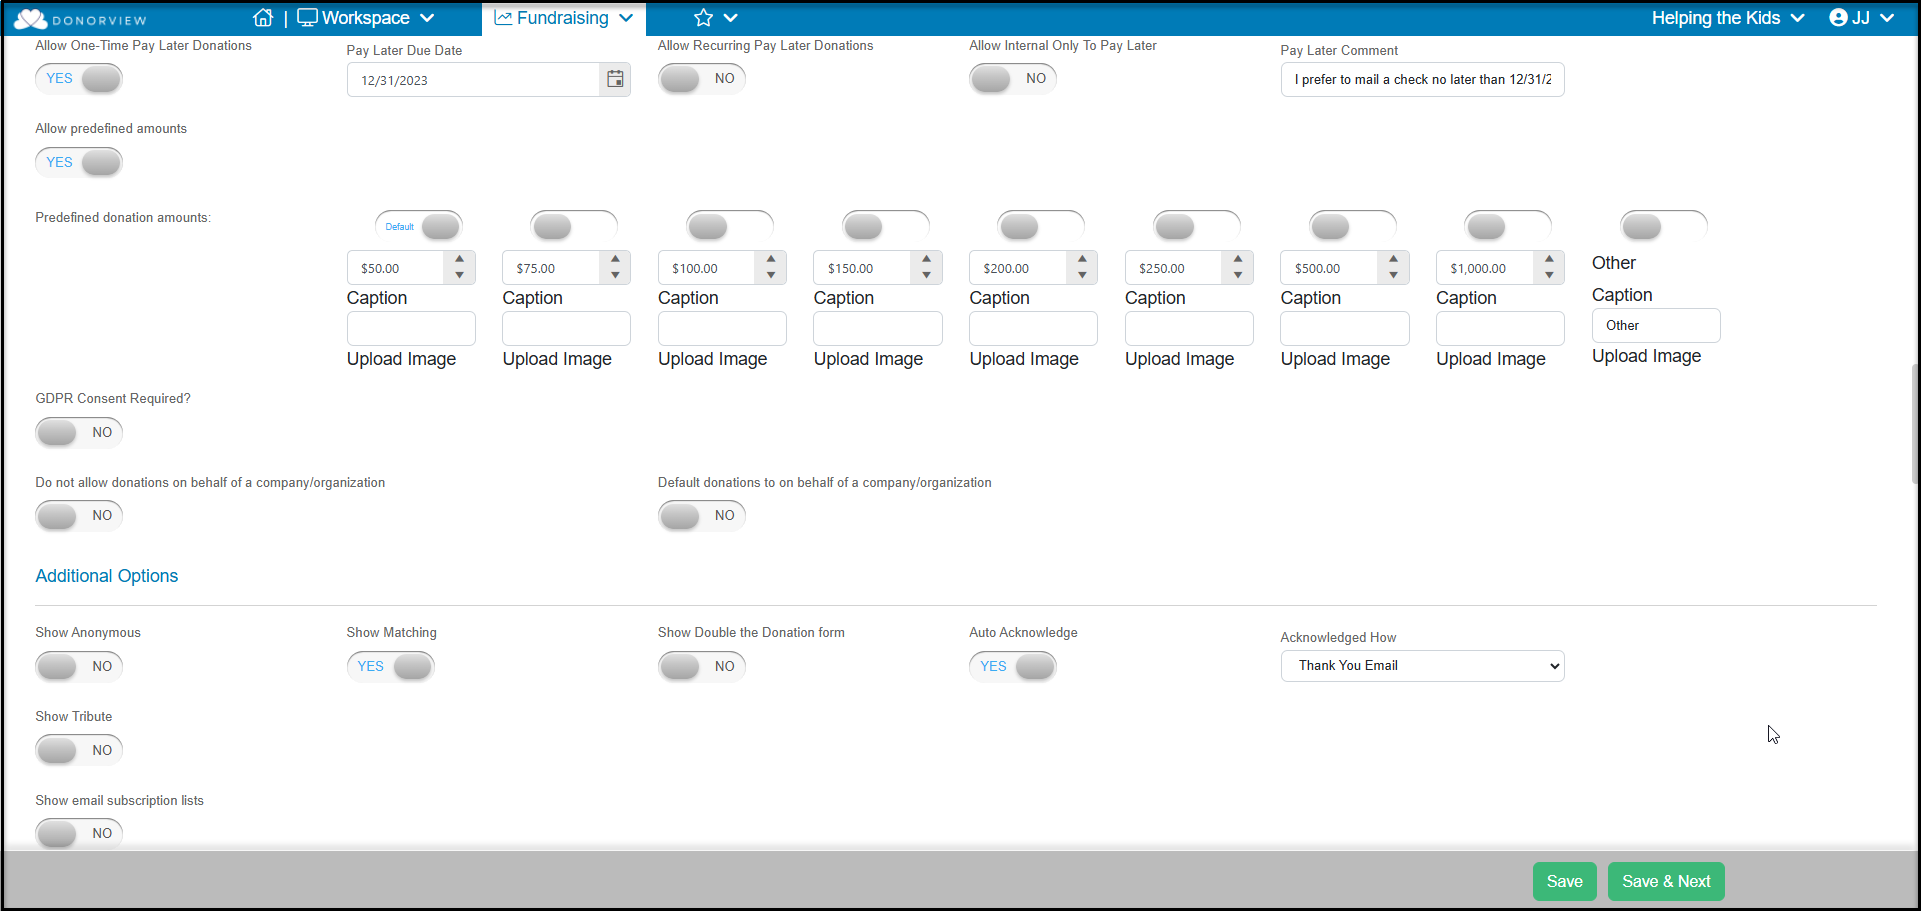
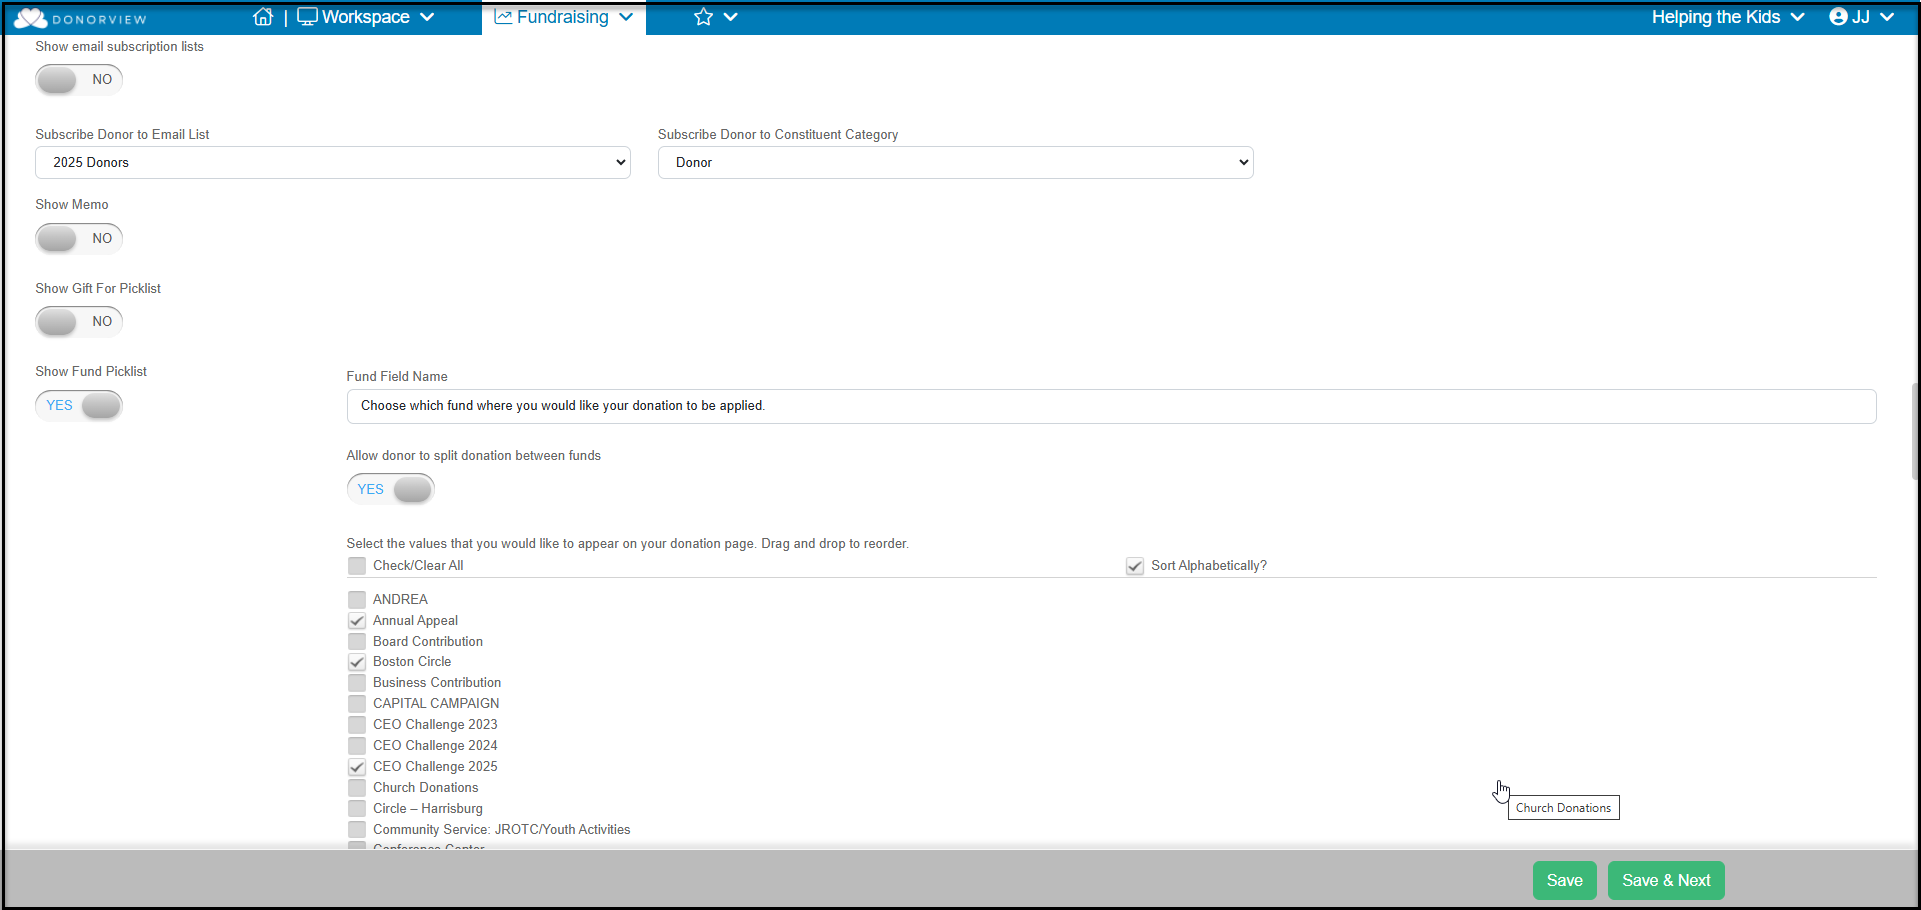
- Show Email Subscription lists will allow the constituent to select which Email Marketing List Categories they wish to subscribe to.
- You also have the option to automatically subscribe the constituent to a list with Subscribe Donor to Email List.
- Subscribe Donor to Constituent Category will assign the constituent to a category such as Donor, Supporter or other category you have set up.
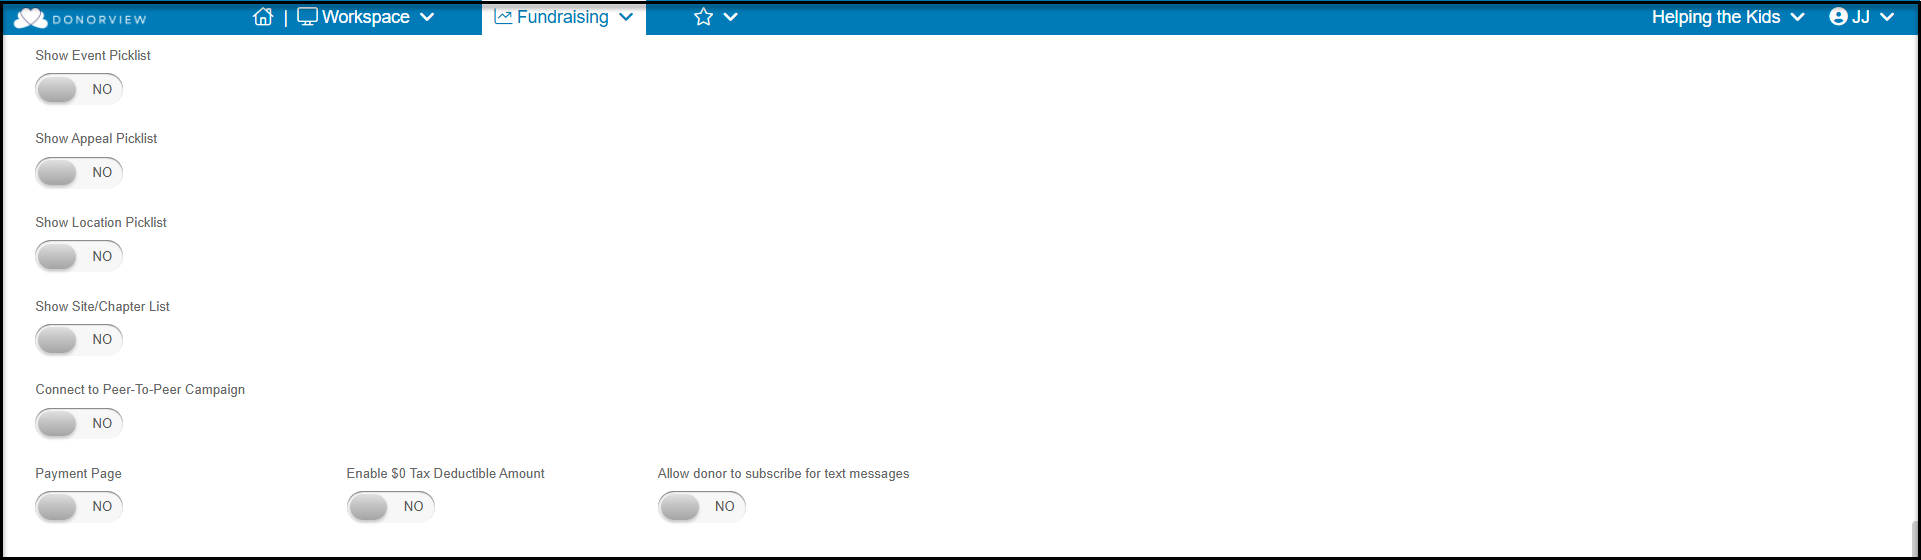
There are also options for the constituents to select how their contribution is applied to your revenue categories. While the Show Gift For, Fund, Event, Appeal, and Location picklists are all available. We recommend that you only choose one or two of these. Allowing constituents who do not understand your revenue categories to select from all of these can detrimentally affect your financial reporting.
The Show Fund Picklist option is the only one that allows split gifts and constituents can choose from the funds you have checked and choose how much to apply to each fund they select.
- If your organization has Sites/Chapters activated AND you are a National user, you would see an option to Show Site/Chapter List.
- Connect to Peer-to-Peer Campaign will link the donation page to an existing campaign and allow the constituents to choose the participant or team to support with their contribution.
- If this page is being used as a Payment Page instead of a donation page, setting this to YES will change the word Donate to Payment throughout the page the constituent sees.
- Enable $0 Tax Deductible Amount if you want your transaction to automatically apply a $0 in the tax-deductible amount field.
- If you have Text Messaging activated, you can Allow donor to subscribe for text messages.
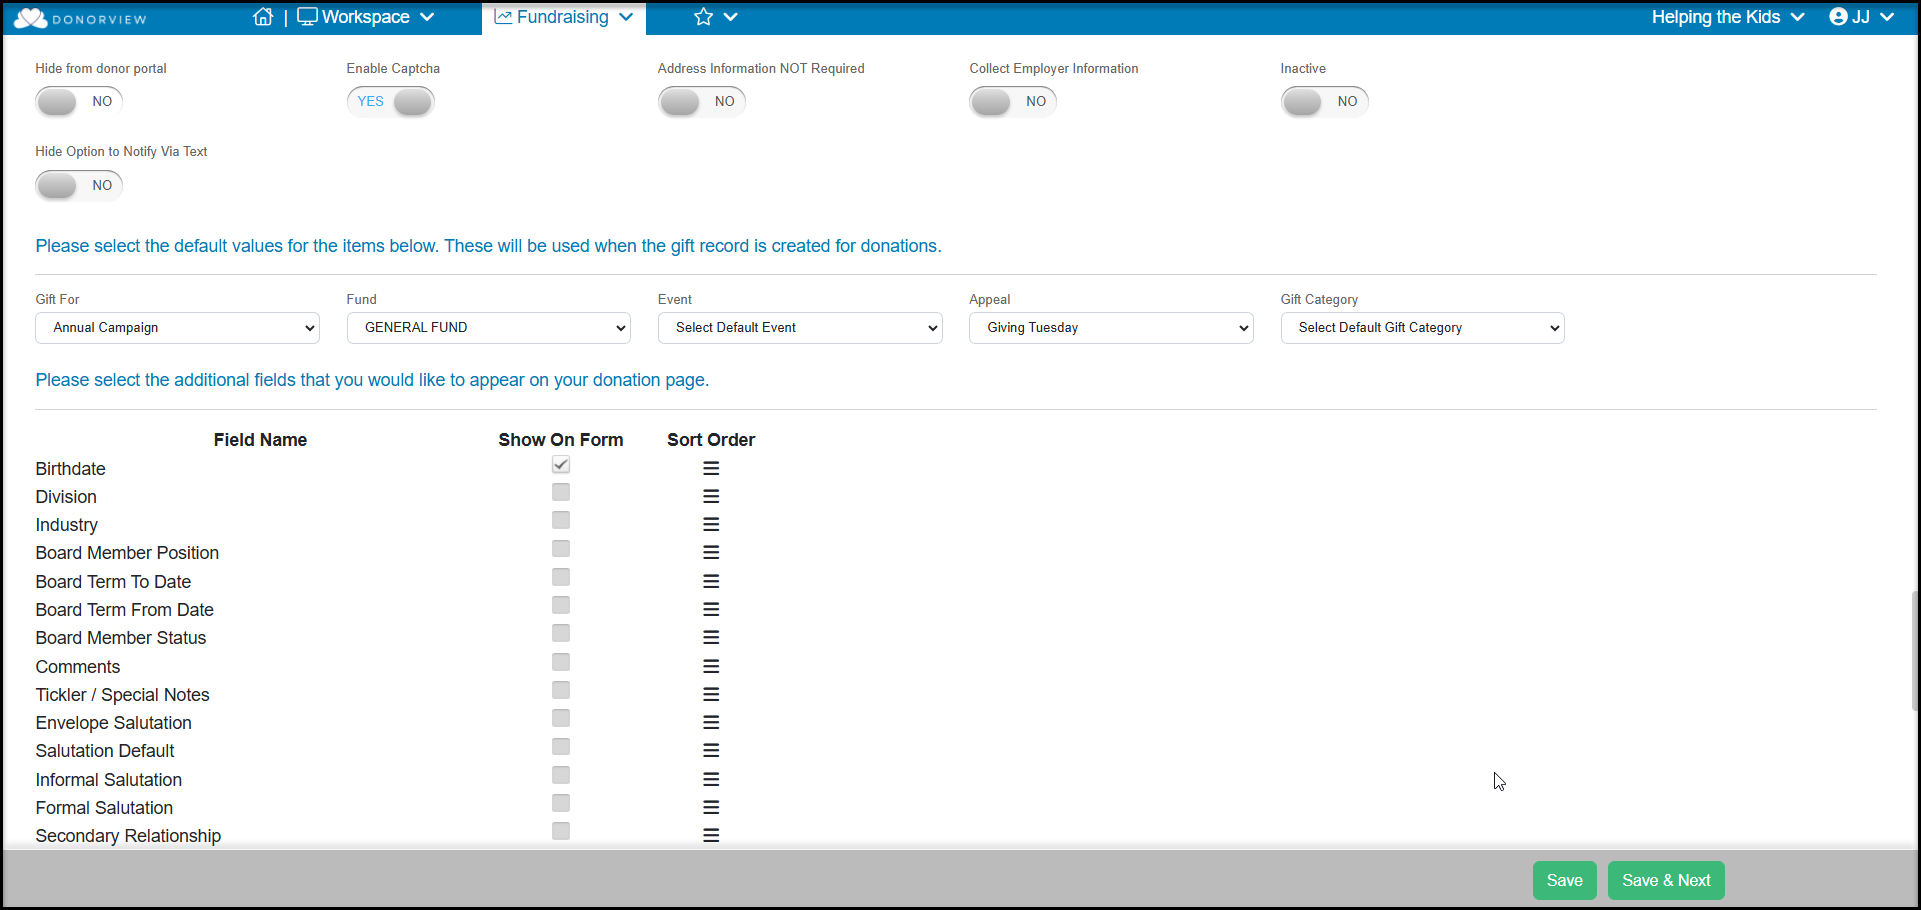
- Hide from donor portal will remove this donation page from the list of options a constituent can select from the Donations icon. This option will only affect organizations using the Advanced Portal.
- Enable Captcha includes a check mark on the bottom of the page the constituent must check to show they are not a robot. It also may require other types of verification like selecting pictures from a popup.
- Address Information NOT required will remove the physical address fields from the page only requiring name and email to complete the form.
- Collect Employer Information is used for organizations that collect contributions for Political Action Committees (PACs) which require collecting employment information from the constituent. This information is saved in the transaction record only and does not populate any fields on the constituent's profile page.
- Inactive will deactivate the page and anyone clicking on the URL will receive an error message.
- Hide Options to Notify Via Text, will hide a box to receive text message notifications. Text Messaging must be activated.
- There are also option to select the default fields for the revenue categories which all transactions made through this page will be applied. You can select the Gift For, Fund, Event, Appeal, and Gift Category from the drop down lists or create new ones with the <View/Edit> feature at the top of each list.
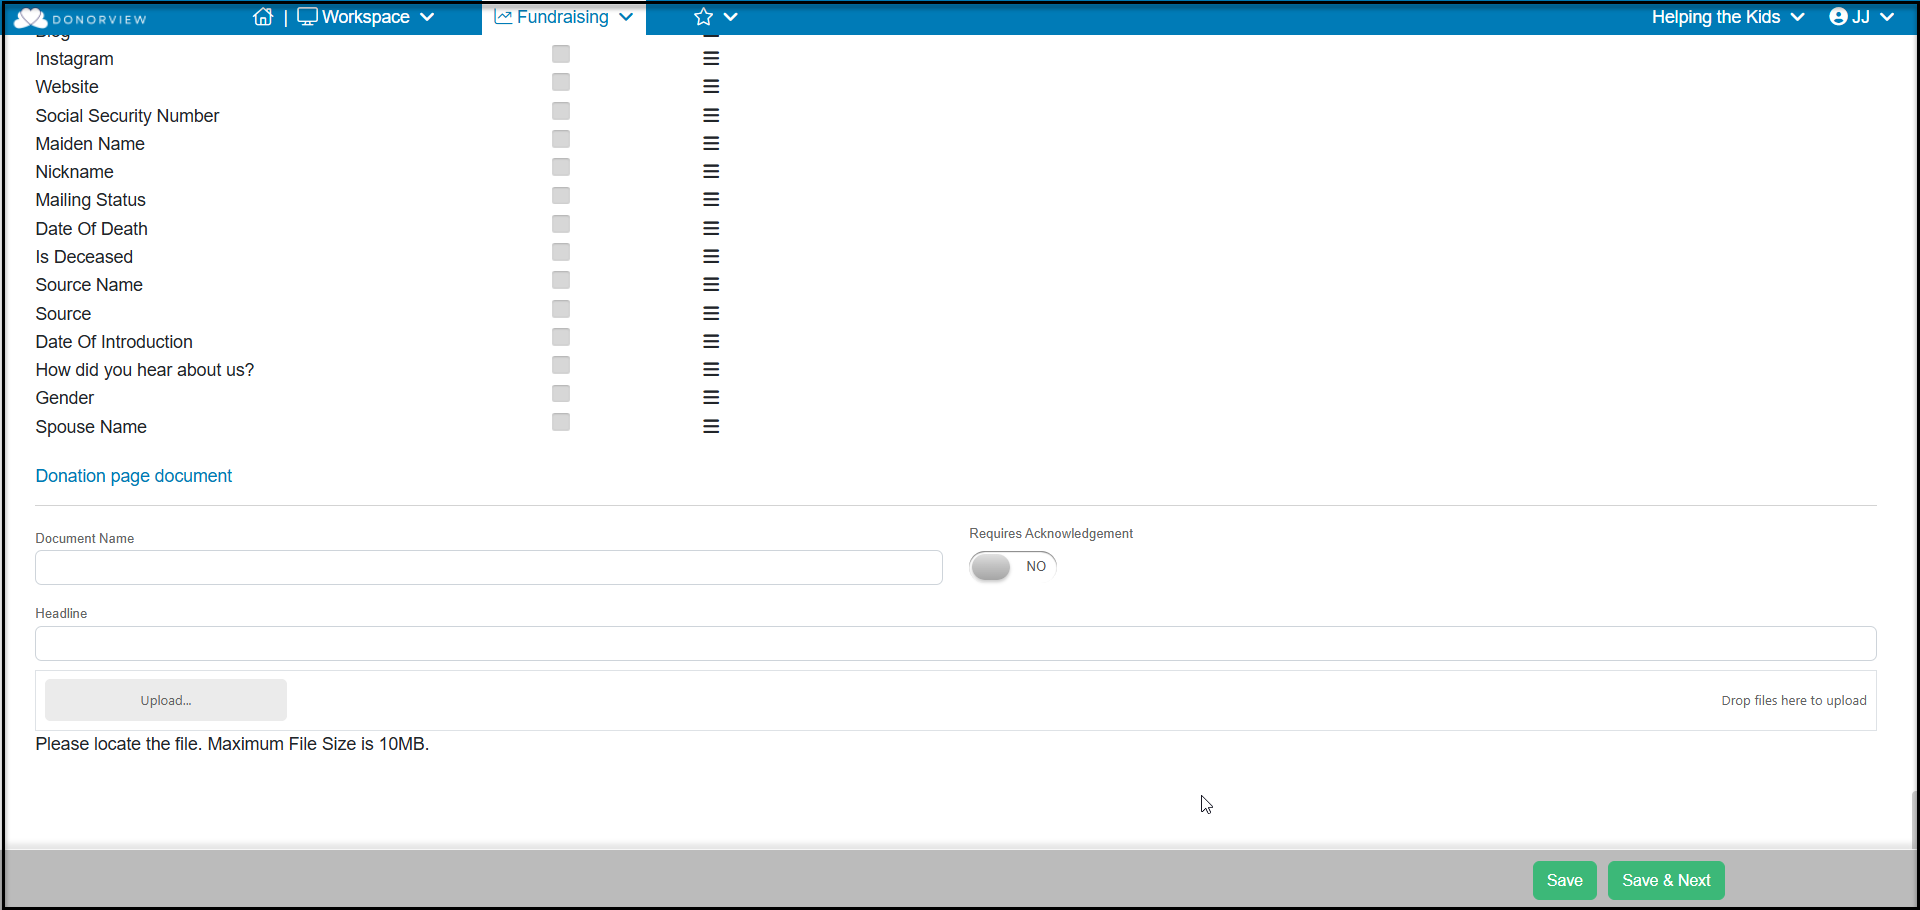
- If you would like to collect information that will be added to the constituent's profile page, you can choose which additional Field Names to include on the form. These fields are optional for the constituent. You can change the order by dragging and dropping the selected fields using the Sort Order column.
- At the very bottom of the page you have the option to upload a document onto the page for the constituent to view/review.
- Enter the Document Name to displayed on the hyperlink to open.
- If the document Requires Acknowledgment, setting this to YES will require the constituent check the box to confirm.
- Headline is the sentence prior to the document name link to describe what this document is.
- Upload allows you to choose the Word doc, pdf, png or jpeg document to upload.
- Click Save to save your changes and keep working on this page. Click Save & Next to proceed to the next step.