
You can customize the layout of the Profile, Guardian, and Medical tabs within a Youth Member’s record by clicking the blue “Edit Layout” button. This opens the Layout Editor, allowing you to:
- Rearrange the order of fields
- Hide or remove unnecessary fields
- Mark specific fields as required
- (On the Profile tab only) Add custom fields
Layout Editor Overview
Once launched, the Layout Editor displays:
- Right Panel: All currently visible fields in the order they appear on the page
- Left Panel: Inactive fields and (on the Profile tab) available custom fields
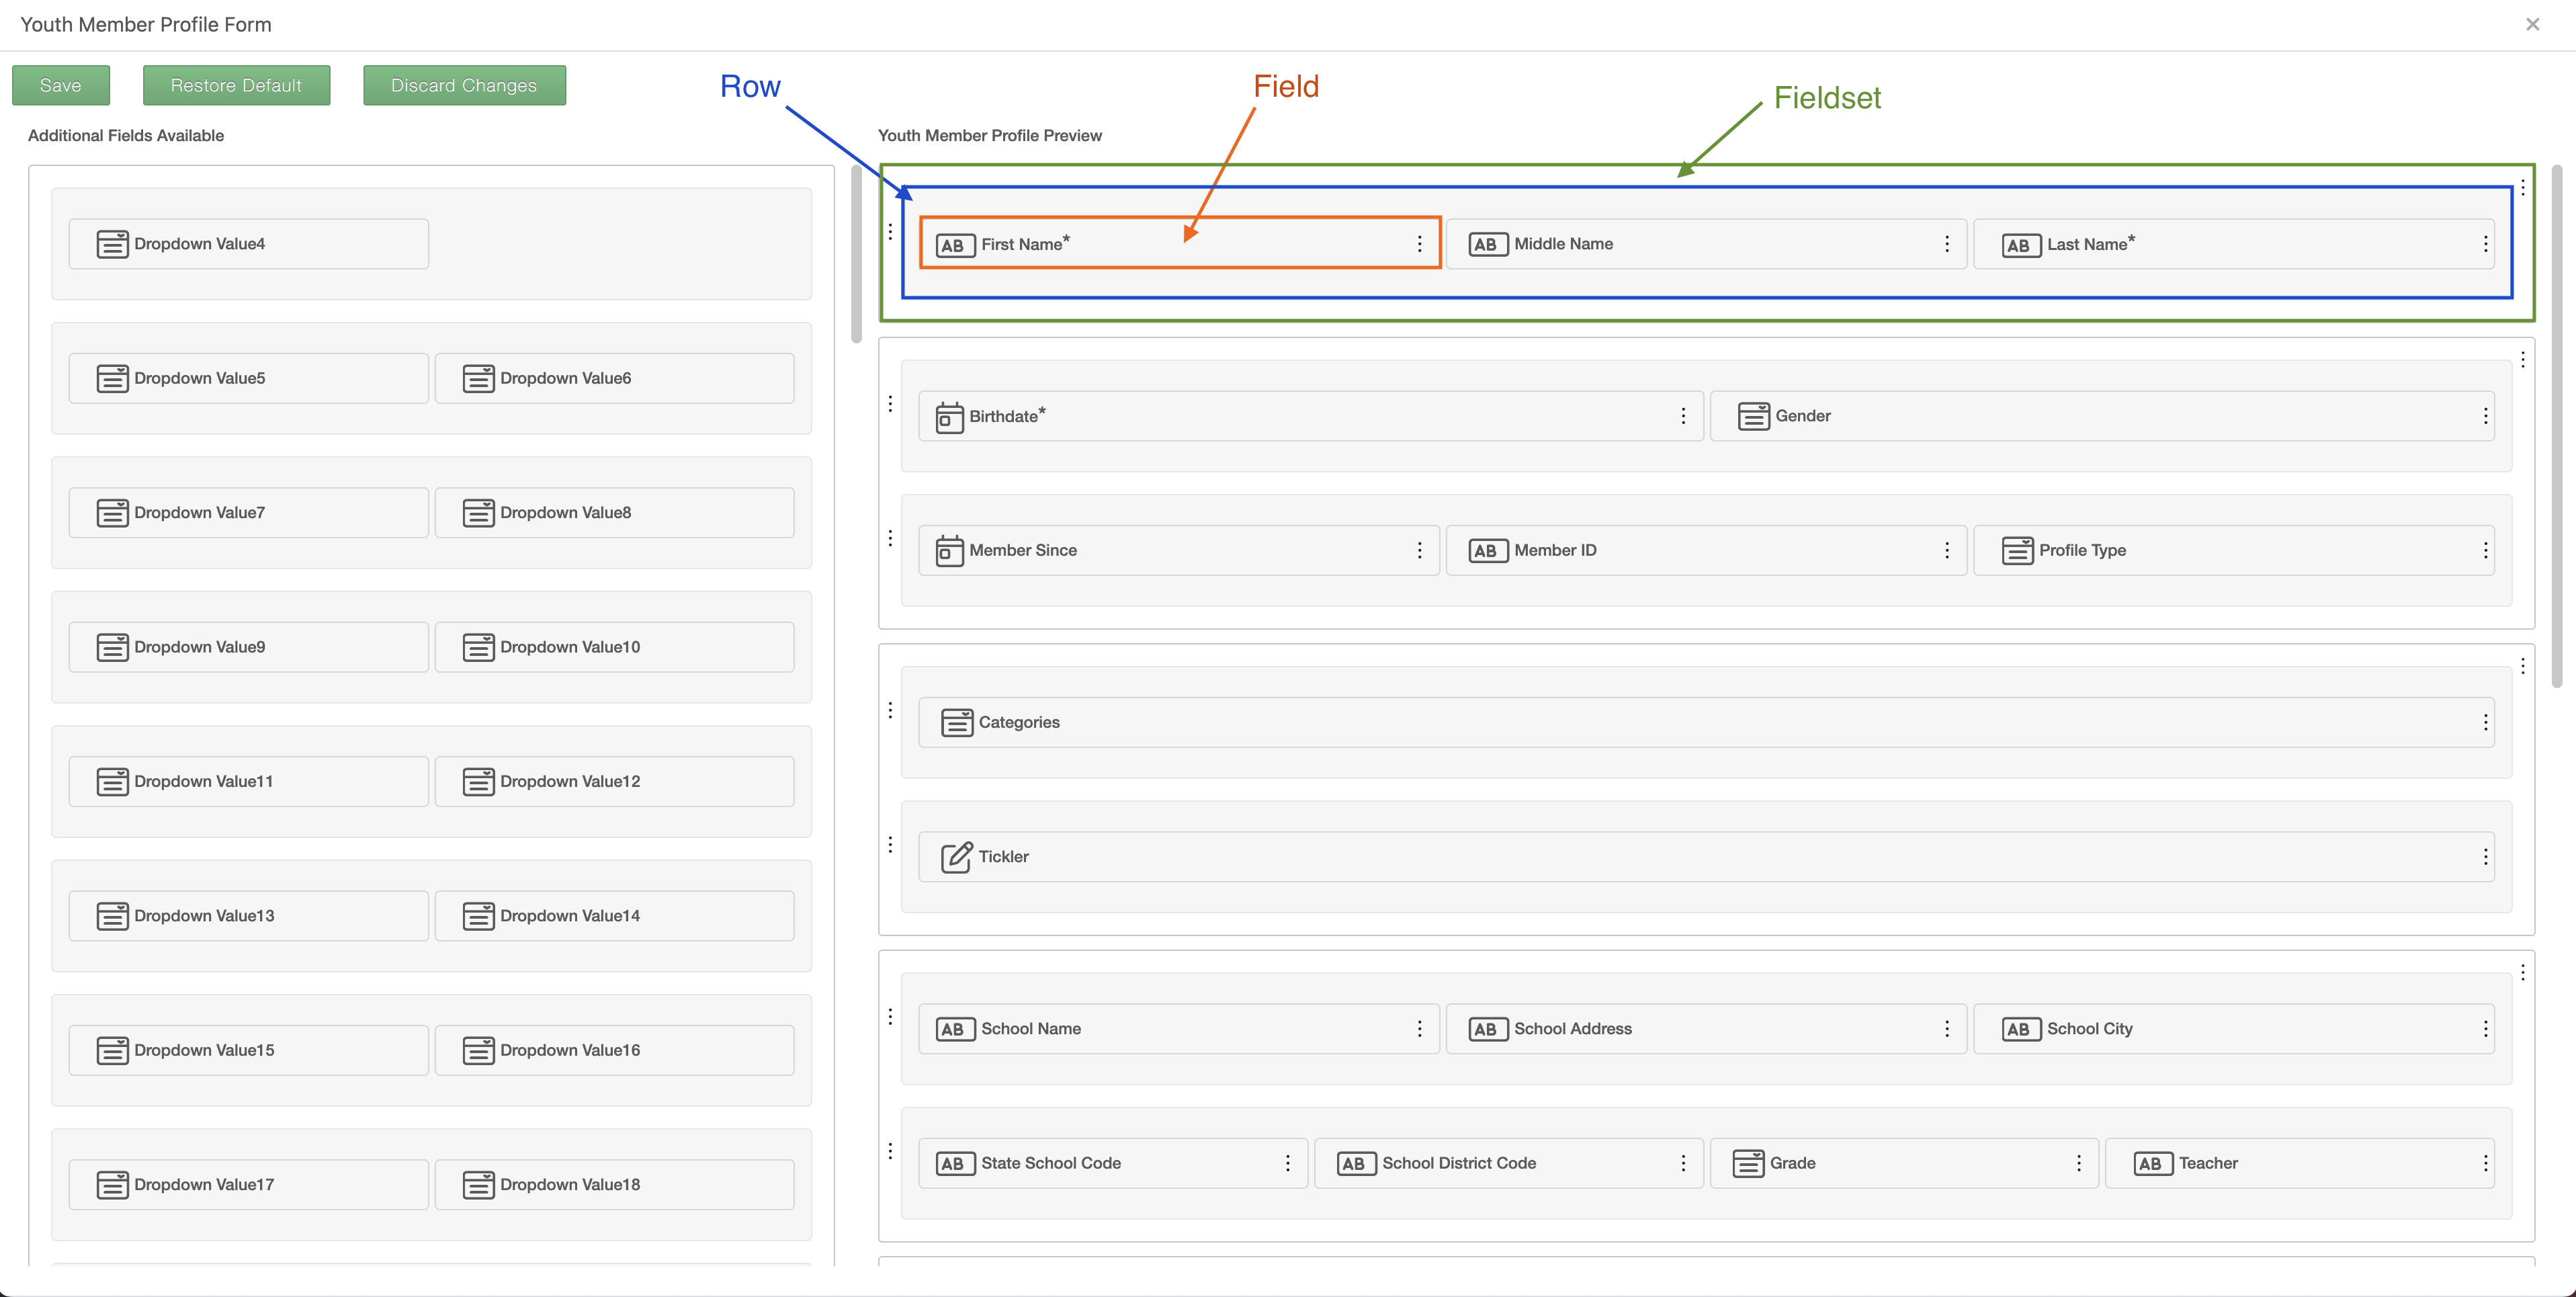
Fields are organized in the following structure:
Fieldsets (sections) → Rows → Fields
You can rearrange any of these elements by dragging and dropping them into new positions.
Editing Options
Each Fieldset, Row, and Field has its own menu (accessed via the three-dot icon) with the following options:
Fieldset Options
- Add Fieldset Above – Insert a new blank section above the current one
- Add Fieldset Below – Insert a new blank section below the current one
- Hide Fieldset – Remove the entire section, including all rows and fields within it
Row Options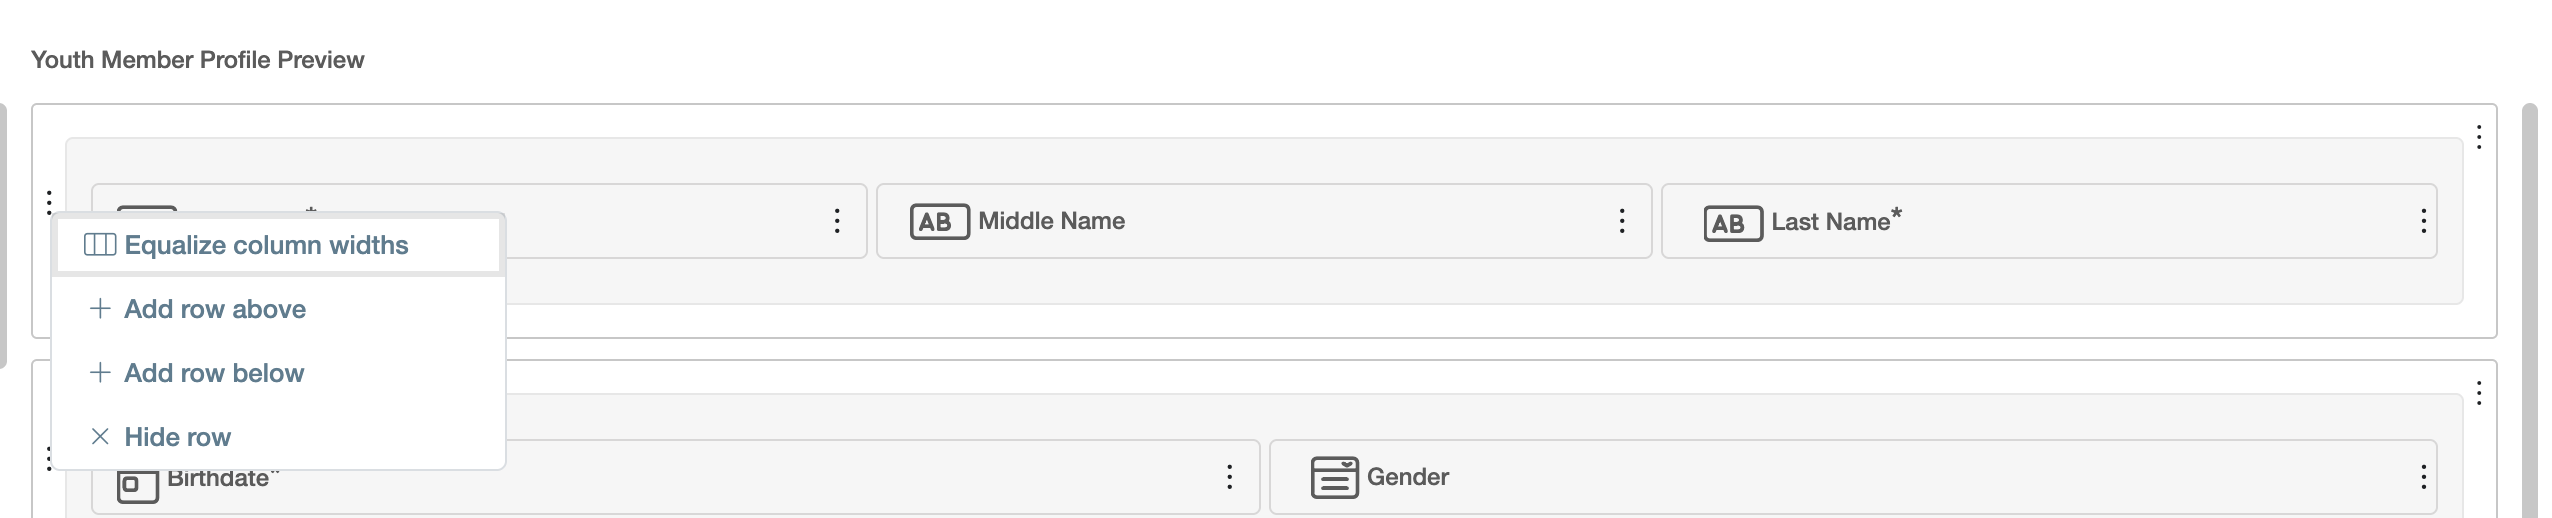
- Equalize Column Widths – Make all fields within the row equal in width
- Add Row Above – Insert a new blank row above the current one
- Add Row Below – Insert a new blank row below the current one
- Hide Row – Remove the row and all fields within it
Field Options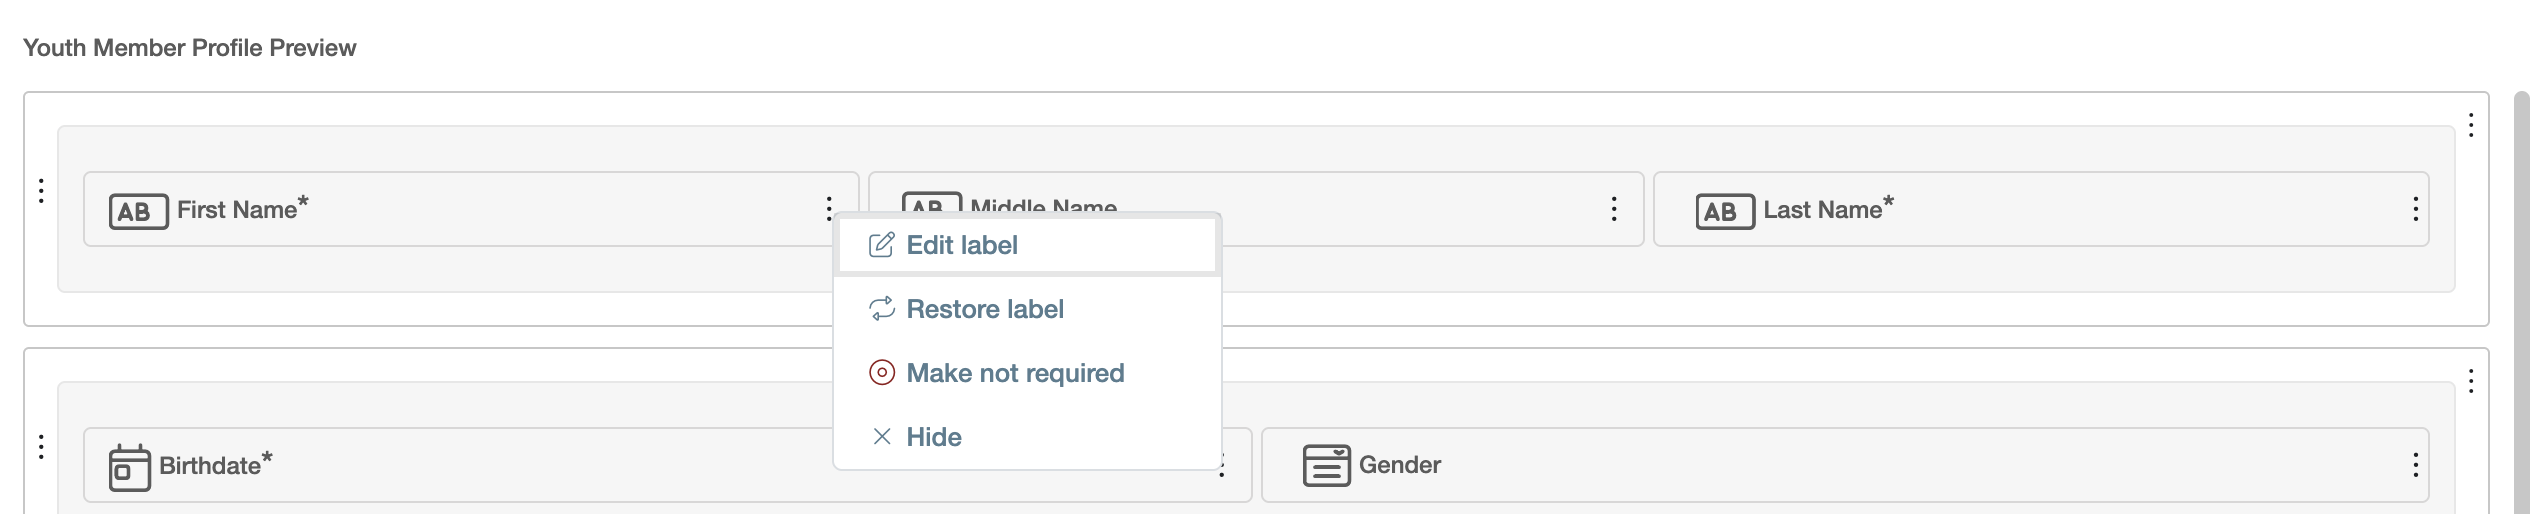
- Edit Label – Change the text label of the field
- Restore Label – Revert the field label to its default
- Make Required– Require entry in this field before the page can be saved
- Make Not Required – Remove the required status
- Hide – Remove the field from the layout
Additional Notes
Resizing Fields:
You can manually adjust the width of a field within a row. Hover your mouse between two fields until the cursor changes to a two-sided arrow, then click and drag to resize. The adjacent field will automatically adjust to fill the remaining space.
Adding Inactive Fields:
Inactive fields shown on the left panel can be added to the layout at any time. Drag the desired field into your chosen position on the right panel to activate it.
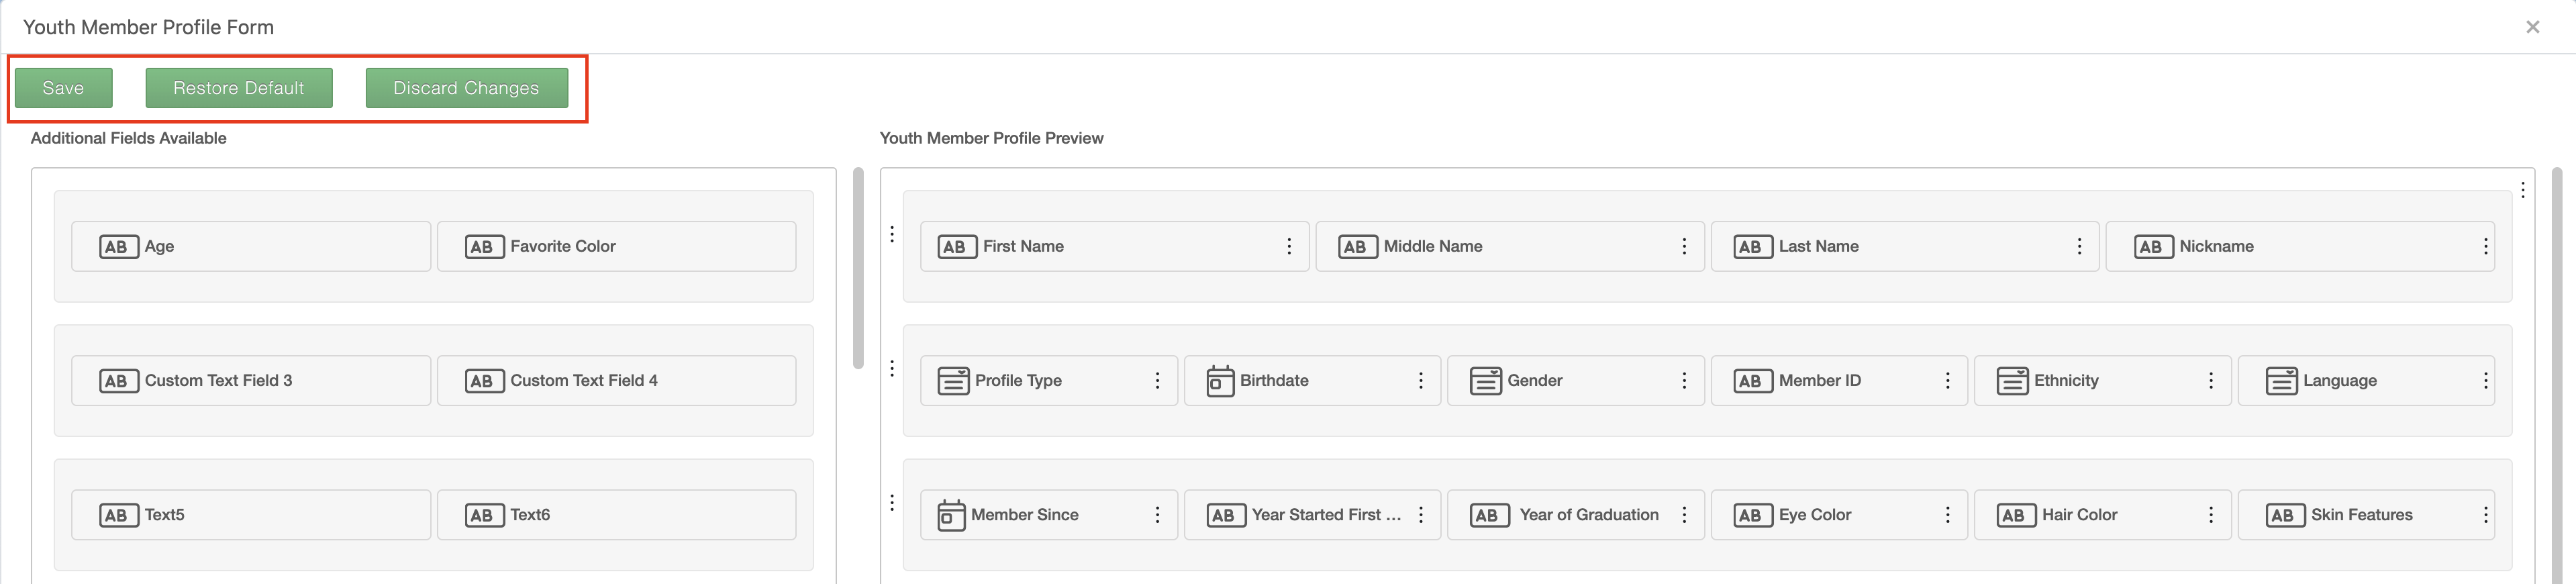
Once the customization of the page is complete click the green "Save" button in the top left corner of the Layout Editor. There are also buttons available to revert the page back to its default layout or to discard any changes made since the last time the layout was saved.