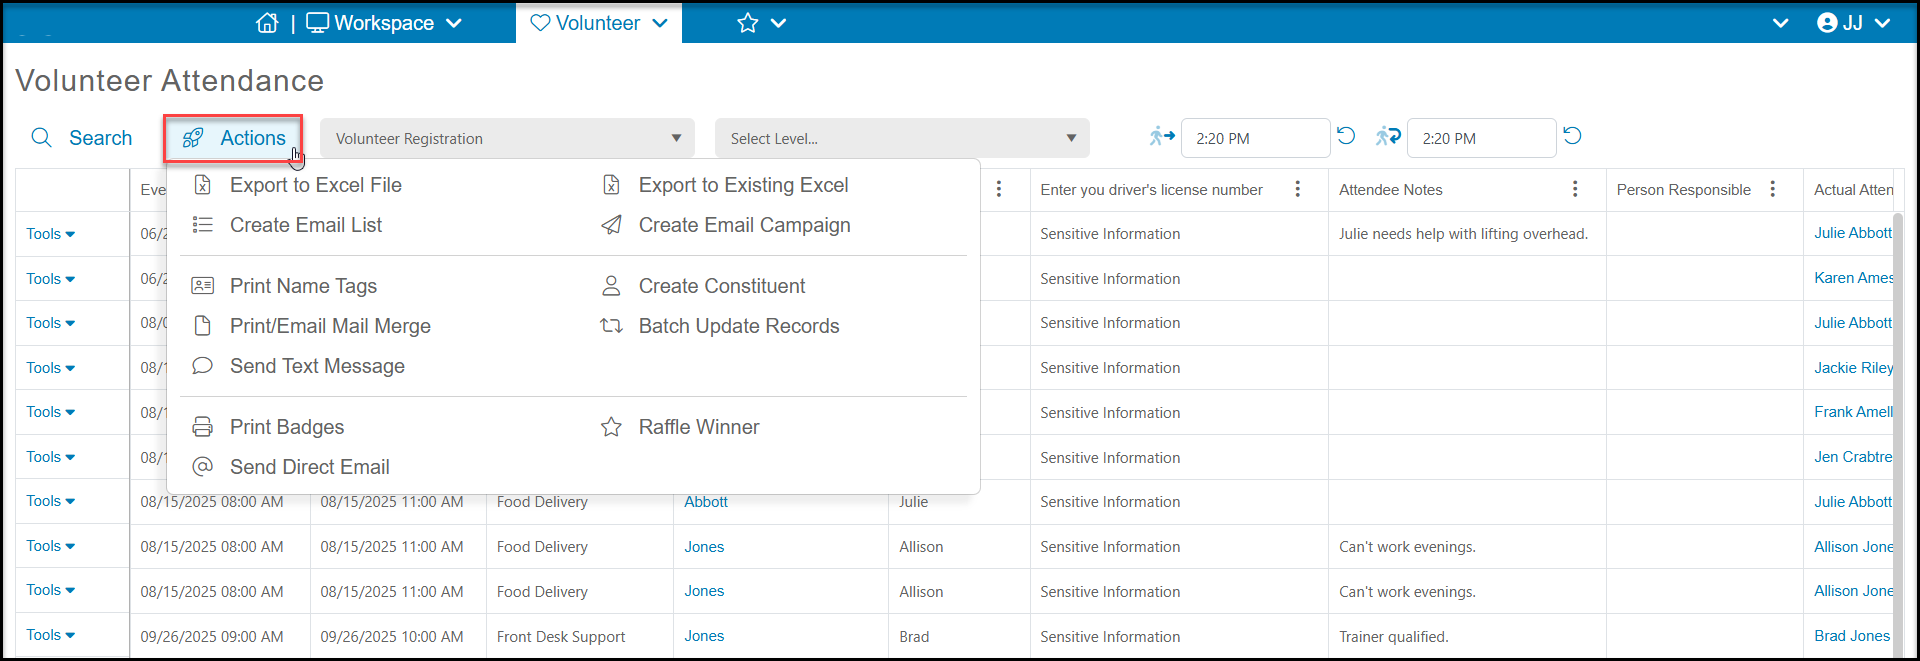
The Volunteer Attendance grid allows you to see the details of the attendees for a specific volunteer event. You can view and update attendee information and check attendees in and out for the volunteer event. With the Actions menu you can also export data, send emails and texts, print badges and name tags, and batch update records.
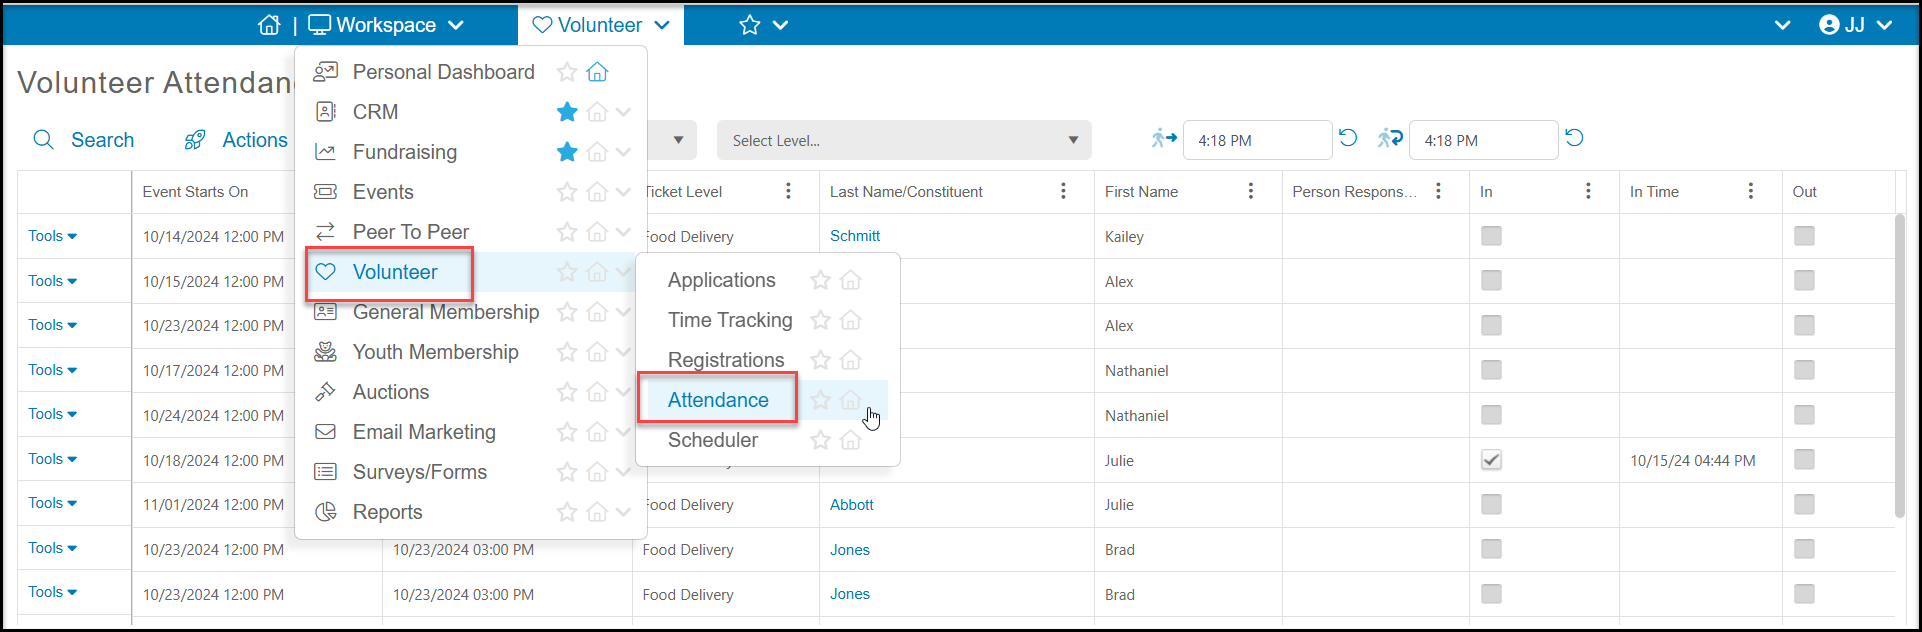
The Volunteer Attendance grid works slightly differently than some of the other grids in the software as there is no view builder associated with this grid. The software will save the visible columns you selected and order of your columns for each event. Each user can customize their own views and will not affect other users.
The registrations are shown in date order by default with the oldest or earliest registrations shown at the top of the list.
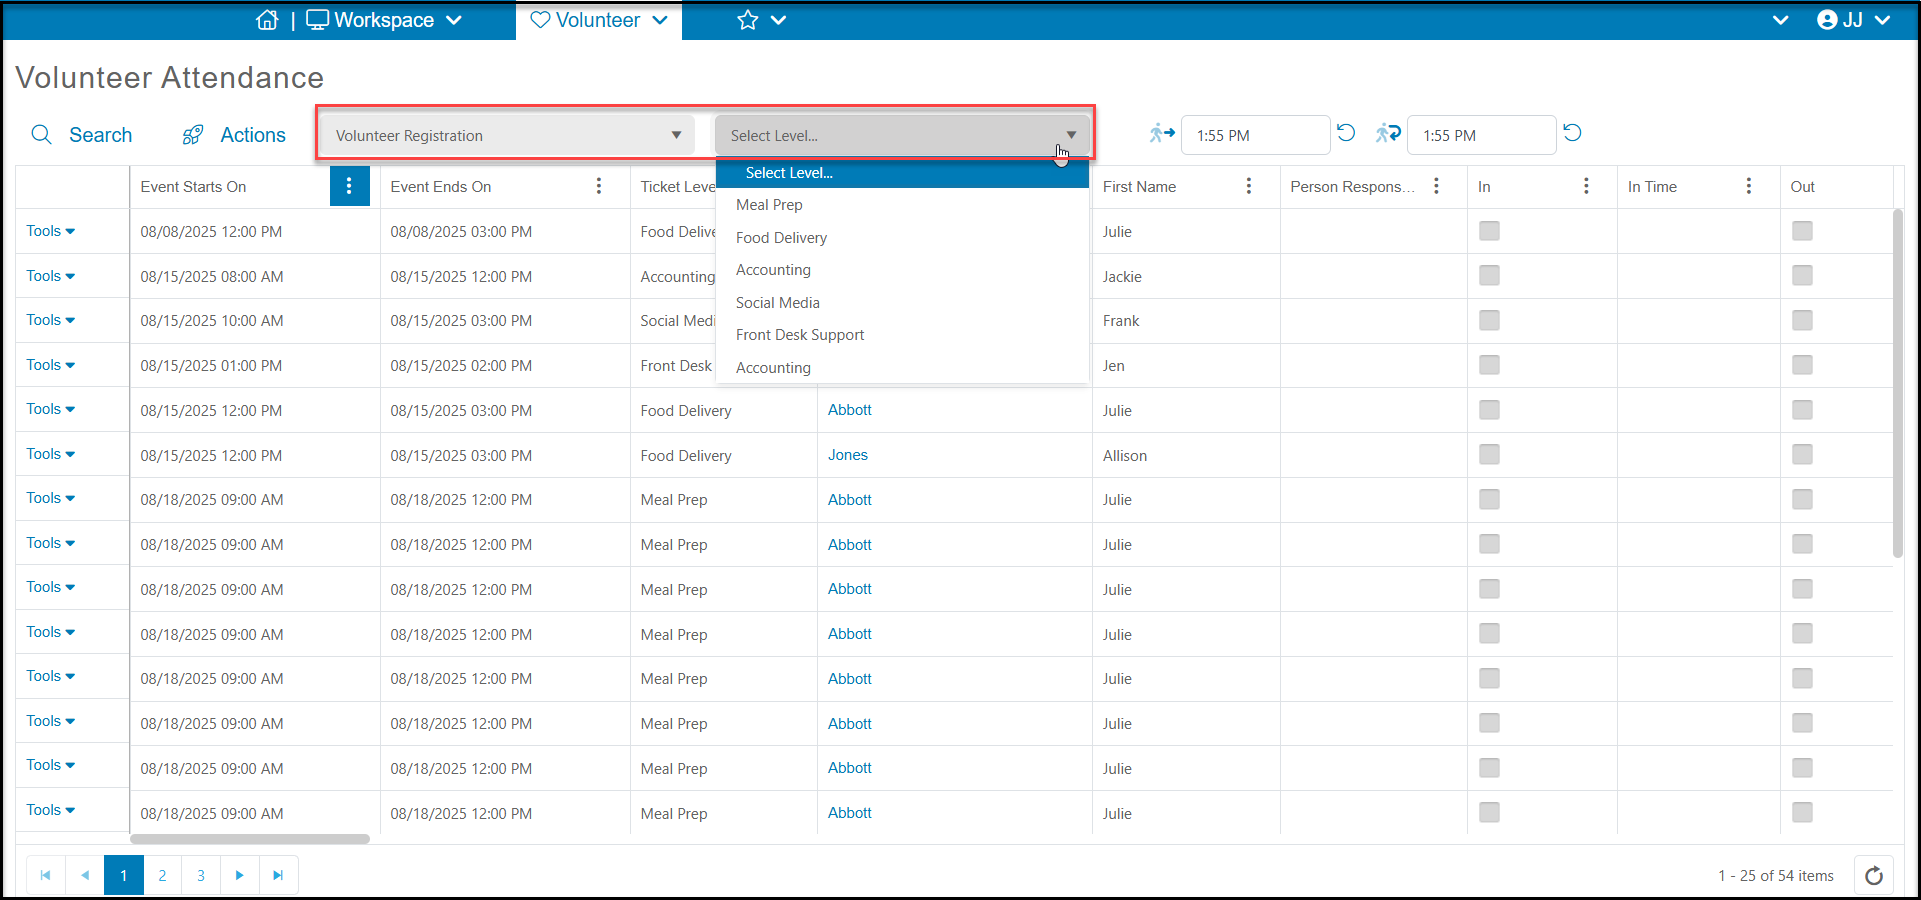
In the drop down box at the top of the grid next to Actions, you will select the volunteer event to manage. On this grid, only one volunteer event is visible at any time. The drop down list is organized to show the volunteer events in order of most recently modified.
You can also select just a specific ticket level to view from the Select Level dropdown list.
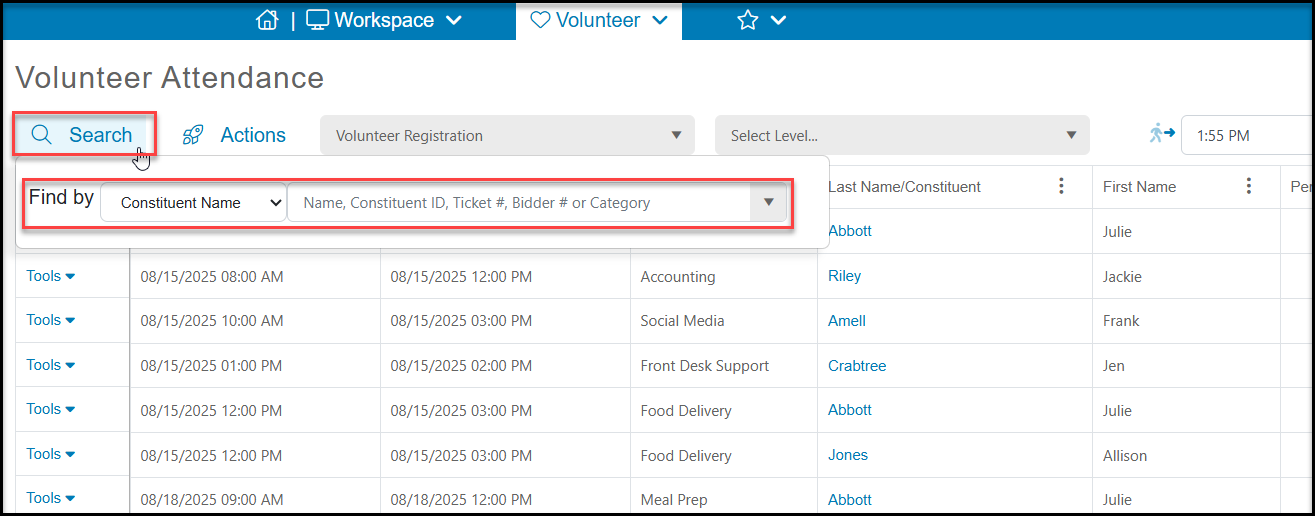
The Search feature will allow you to search for a specific attendee using:
- Constituent Name - you can enter a first or last name in the field to see a list of matches on the grid.
- Constituent ID # - you can enter all or part of a constituent ID number to locate a specific attendee.
- Ticket ID # - you can enter all or part of a ticket ID number to locate a specific attendee.
- Category - which is a search for constituent category. You must know the names of your constituent categories and enter it to search for an attendee or group of attendees who have that specific category assigned to their profile record.
Customizing Your View
- With a volunteer event selected, you can edit which columns are visible using the Grid Columns Builder in the Actions menu.
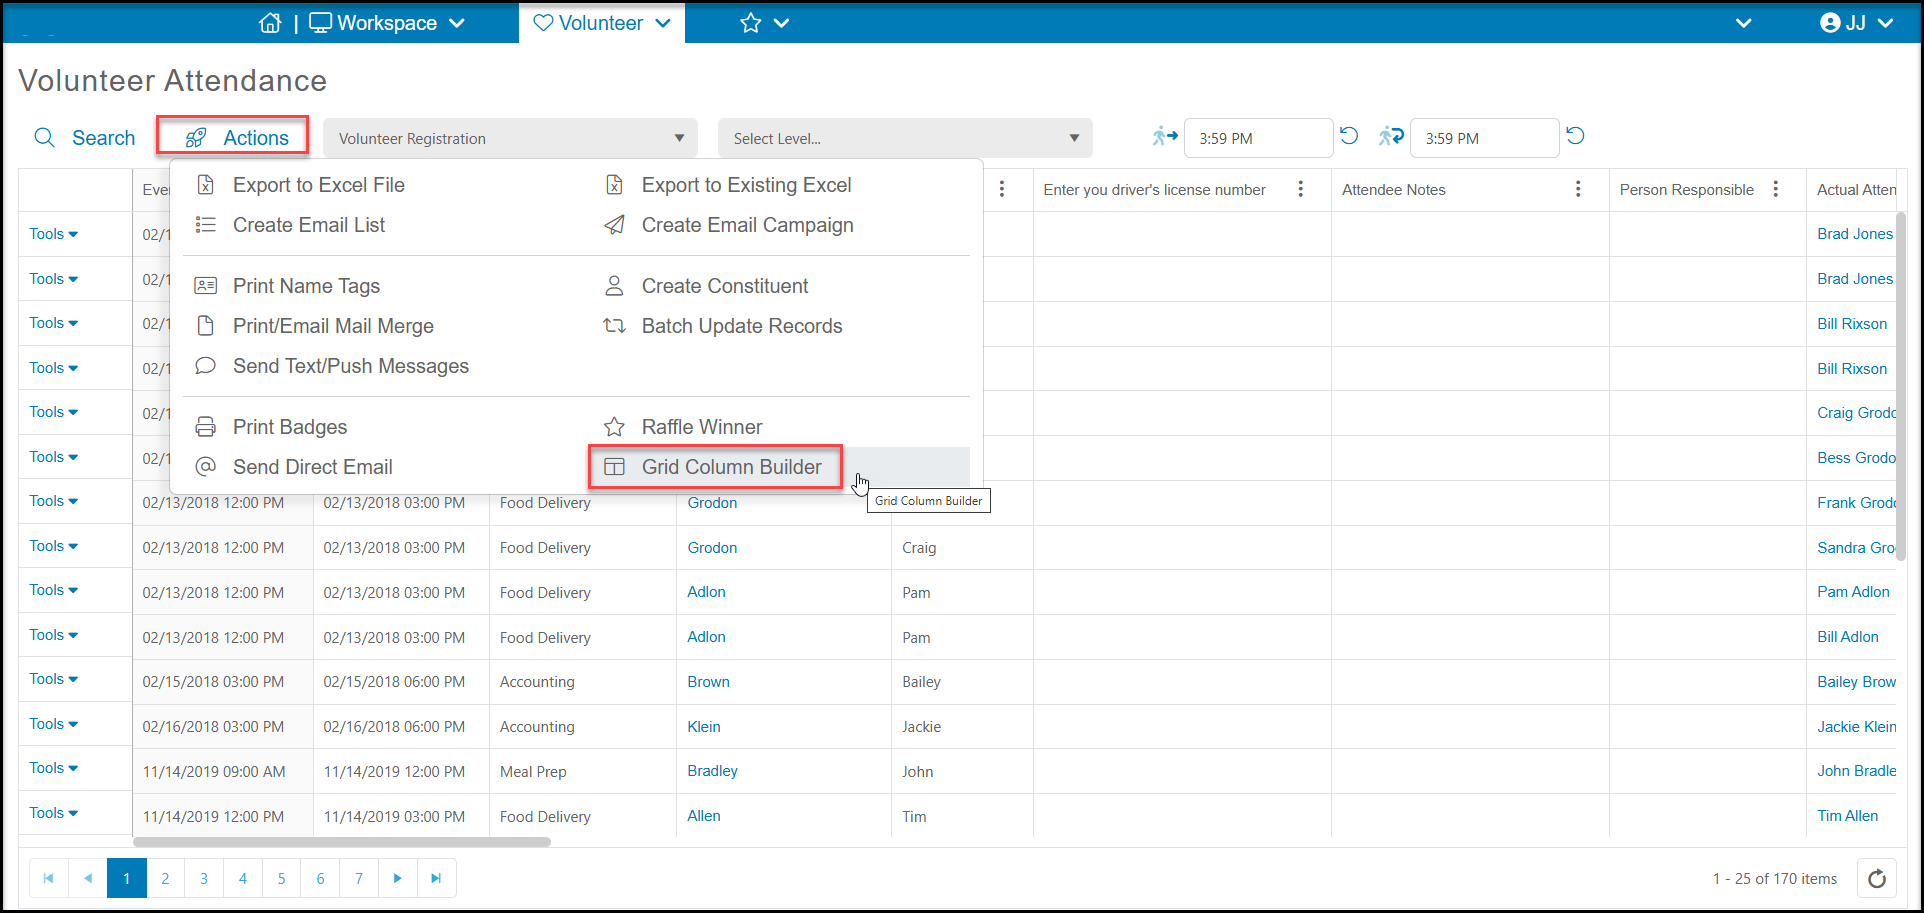
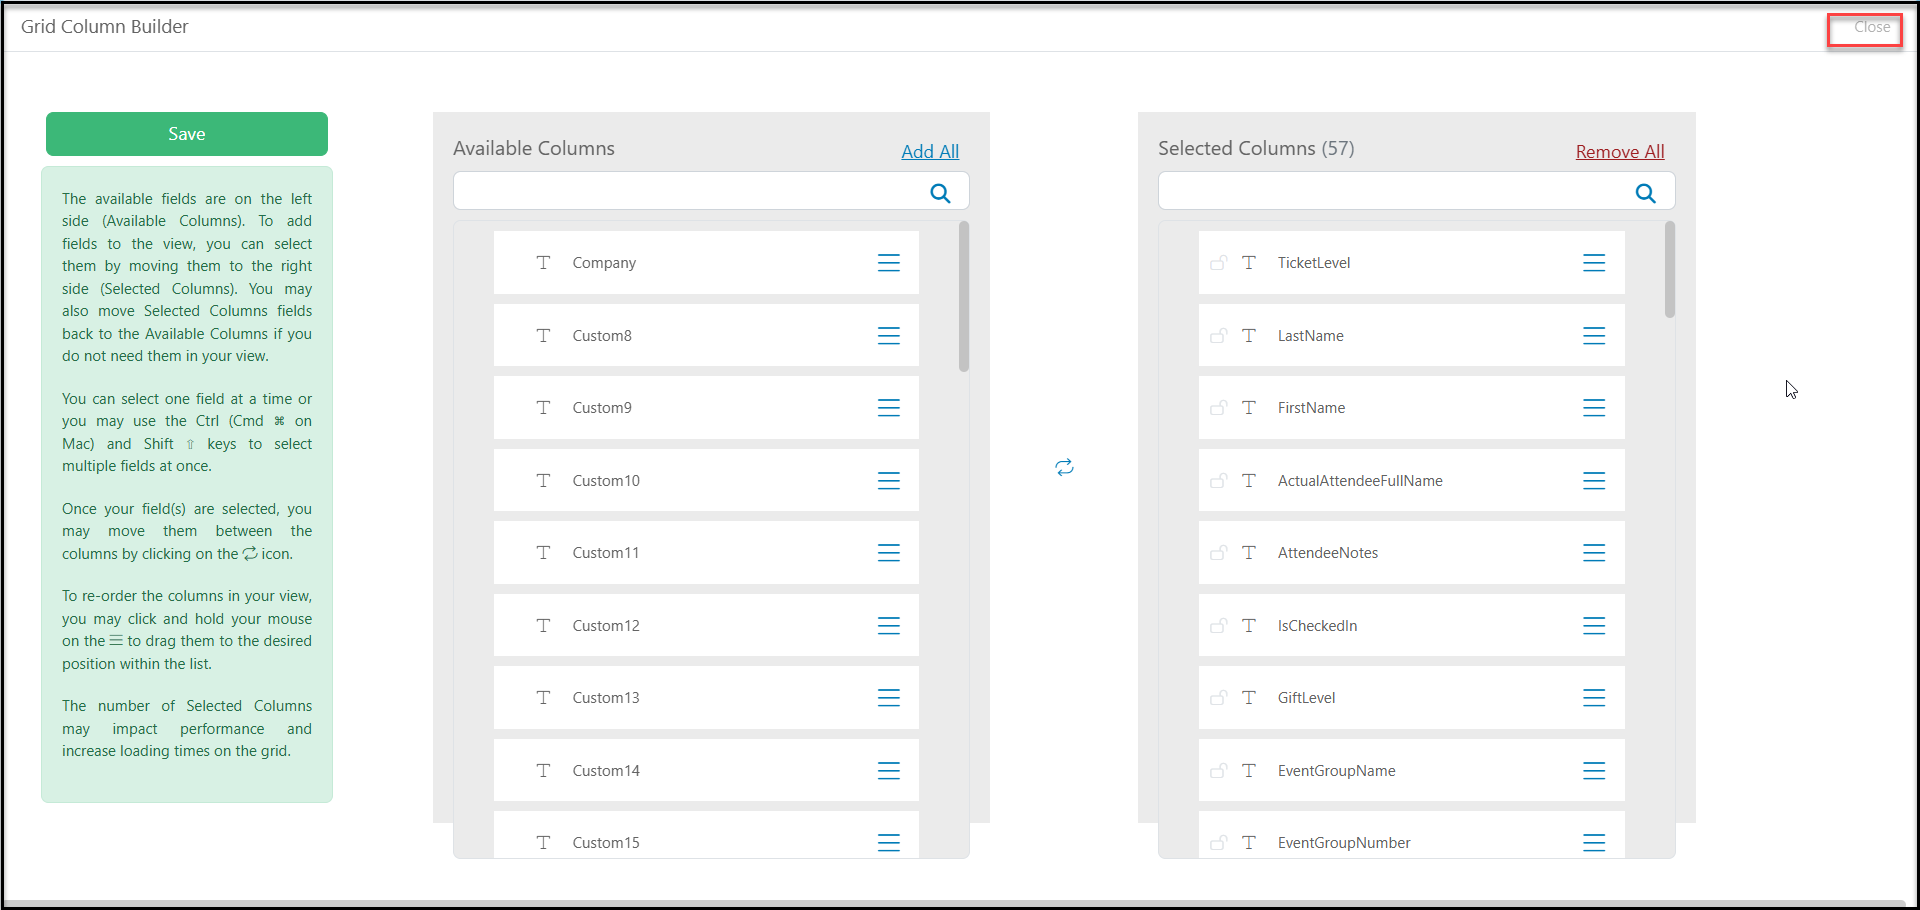
- The Grid Column Builder allows you to choose which columns are shown under the Selected Columns on the right side of the page. Those listed under the Available Columns are hidden from the view. You can drag and drop the columns from one side to the other, or highlight the column and use the blue arrows between the columns to move them from one side to the other.
- Columns labeled as "Custom #" are the custom attendee and event questions you can add when you create your event page. Be sure to include these columns in your view as needed to see the responses to any questions you created for your event page.
- When you are finished selecting your columns, click on the green Save button. This will take you back to the grid. If you wish to close the Grid Column Builder without saving your changes, you can click on the Close link in the top right corner.
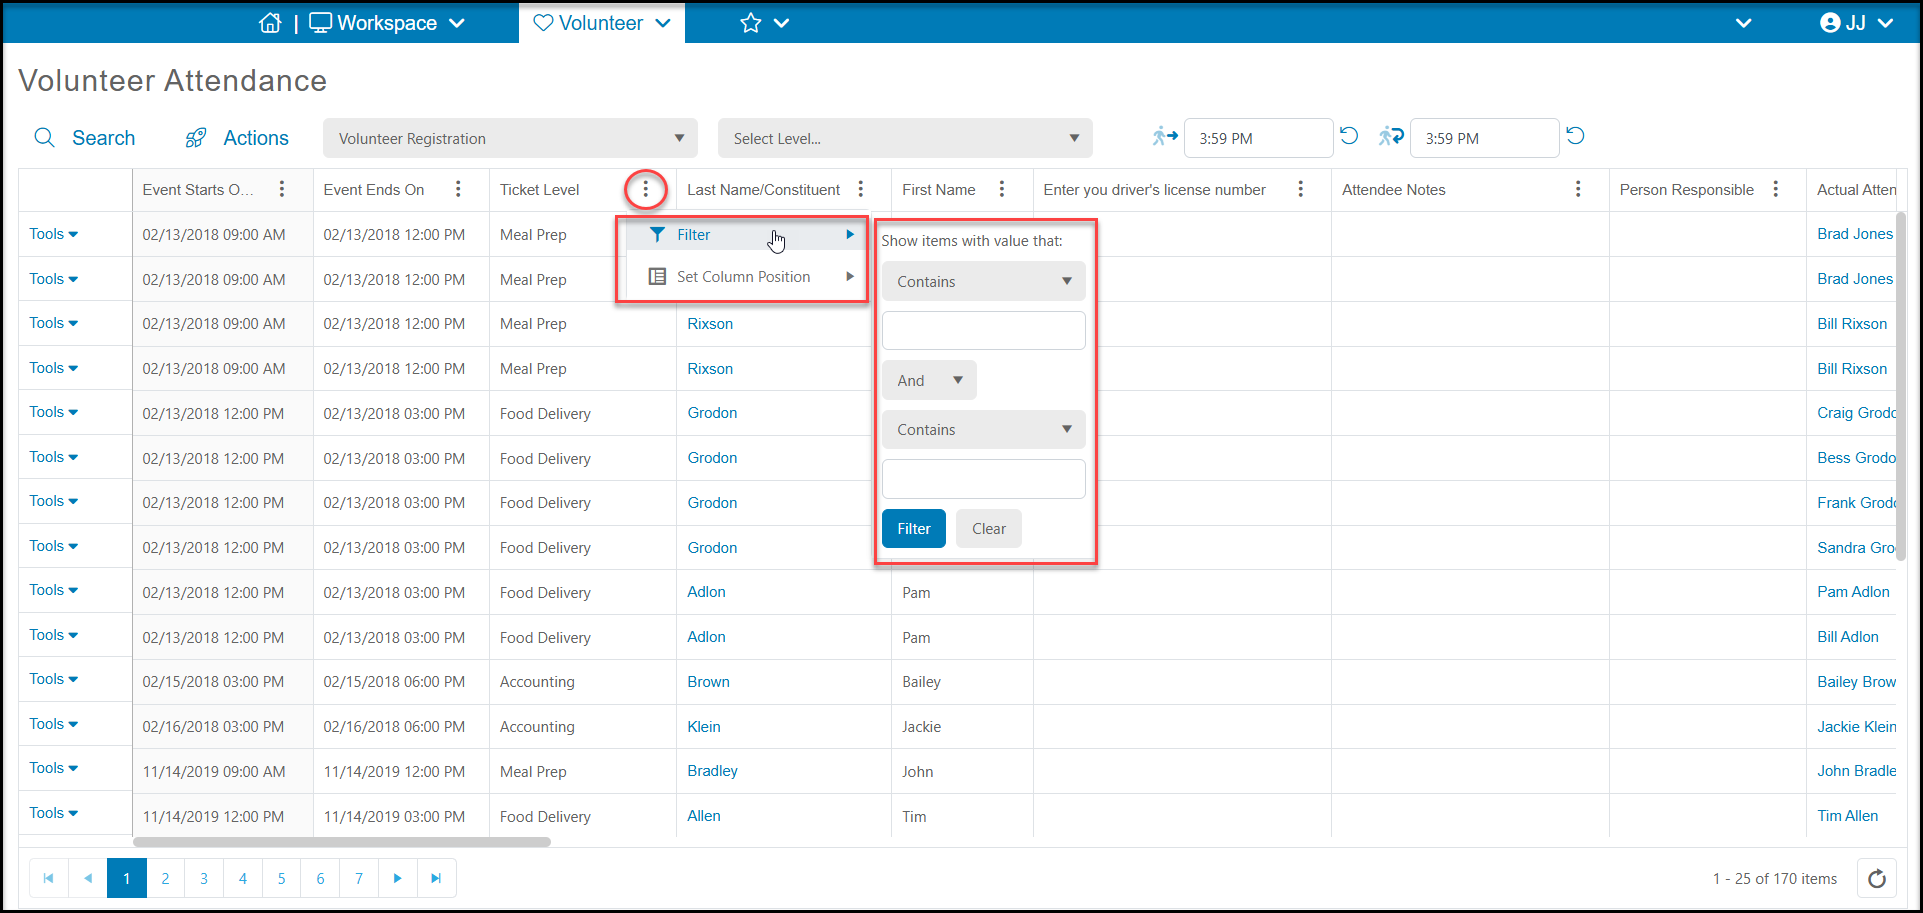
- You can also lock a column in place on the left side of the grid using "Set Columns Position."
- You can drag and drop columns into a different order on the grid.
- You can also add filters using the columns settings, but filters will not be saved if you navigate away from the grid.
- Each user will be able to establish their own Attendance grid view for each volunteer event.
Helpful Columns on the Volunteer Attendance Grid
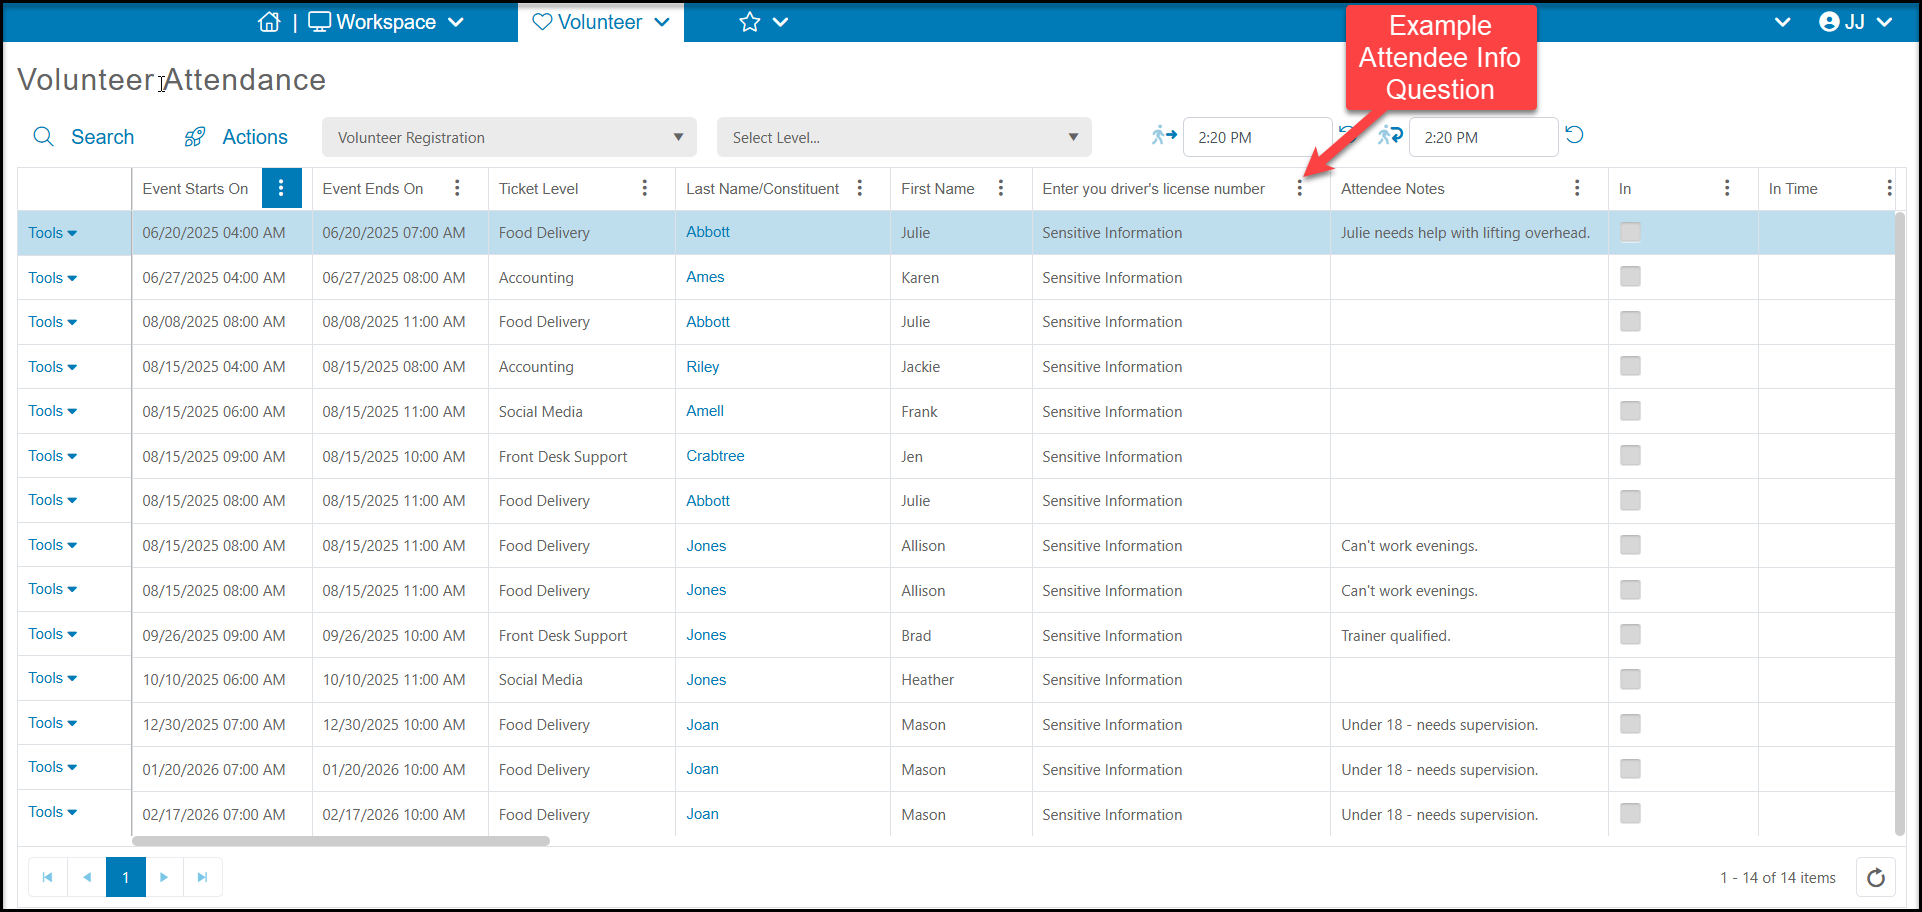
The Event Attendance grid is the only place to see responses to any Attendee Info Field custom questions you created. Each Attendee Info Field will show as its own column on the grid.
- Events Starts On and Event Ends On - Will show the start and end time for the registration.
- For single day/occurrence events, this will be the same for all the records.
- For recurring events selected from the calendar, you will see the selected day and time for the volunteer activity.
- For recurring events where one registration signs the volunteer up for all occurrences, you will see the same Event Starts On and Ends On dates for all the records, but there will be a new column called Attendance Date assigned to each occurrence.
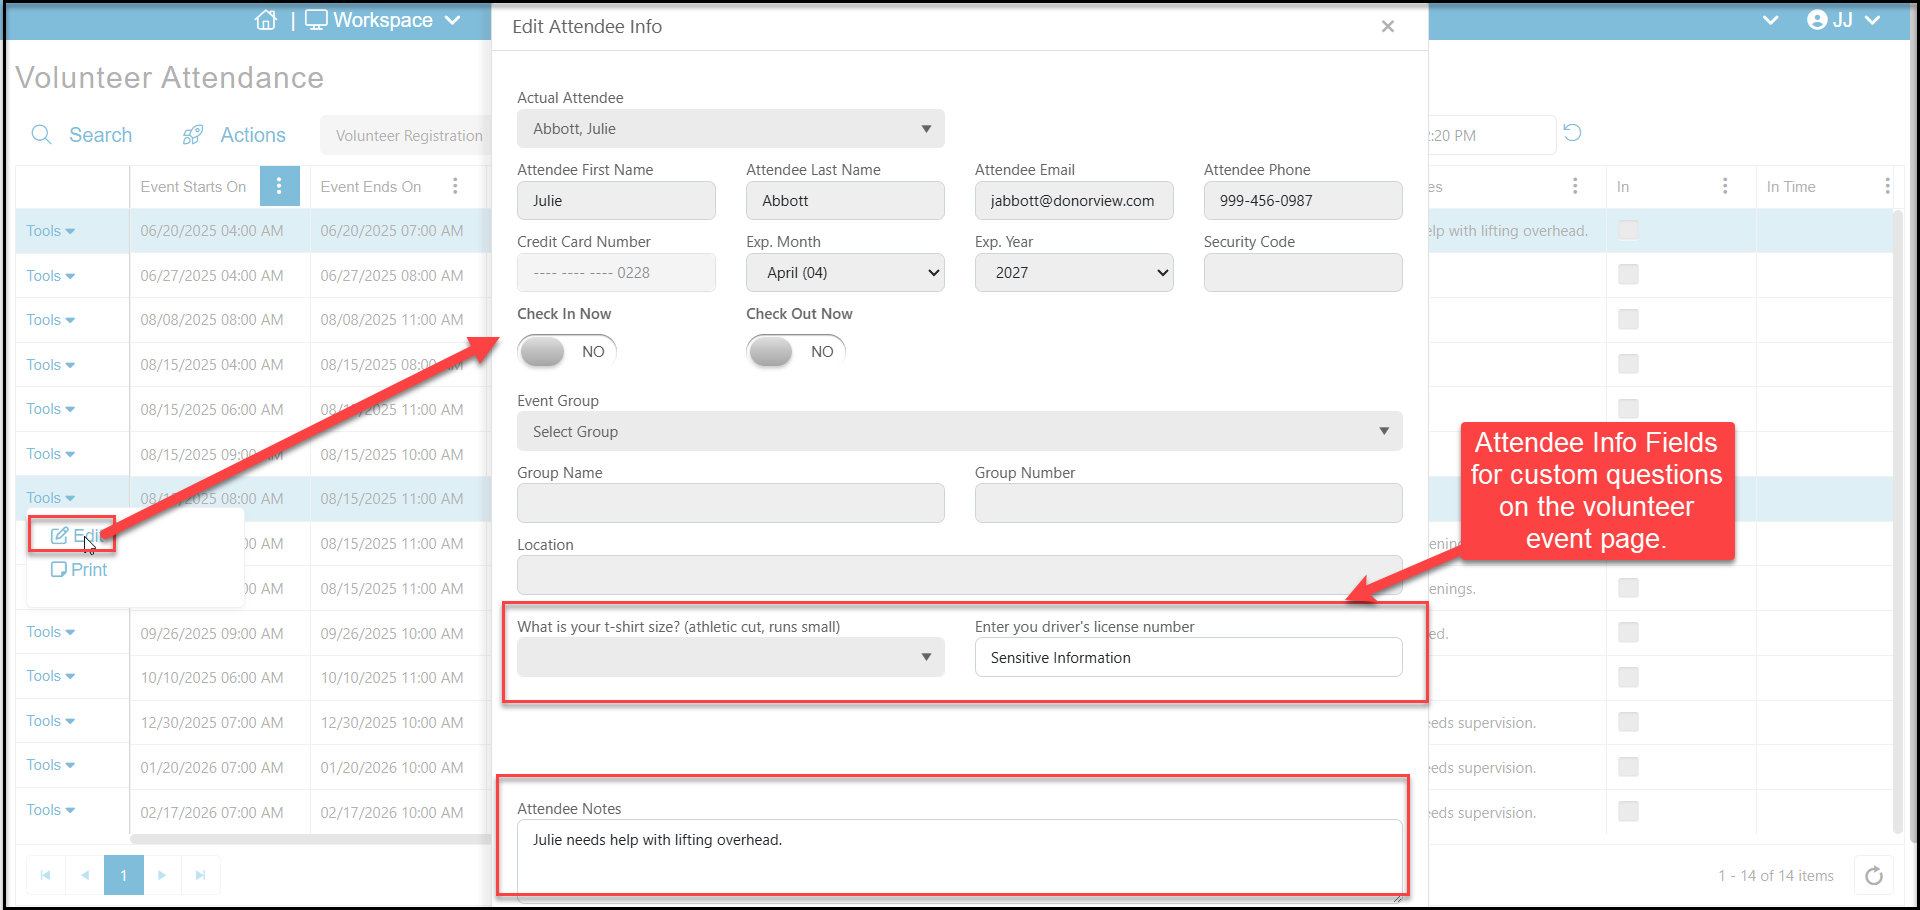
- Attendee Info Fields - shows responses for any custom questions you created on the event page's Attendee Info tab. In the example below we collected Driver's License Number on the event registration page, but it is a “sensitive” field so it is hidden on the grid. These fields are available only on the Attendance grid, not on the Registrations grid.
- Attendee Notes - a field to enter notes about the volunteer, accessible from the Tools menu.
- Last Name/Constituent - the name of the individual or company constituent that registered/purchased the ticket levels.
- Actual Attendee Fields - the information about the people who are actually going to be in attendance. This could be the person who registered along with the names of their guests.
- Actual Attendee Name (combination of first & last name)
- Actual Attendee Last Name
- Actual Attendee First Name
- Actual Attendee Email
- Actual Attendee Constituent ID
- Actual Attendee Formal, Informal, and Envelope Salutation
- Ticket Level - the ticket level (volunteer activity) the volunteer is registered for.
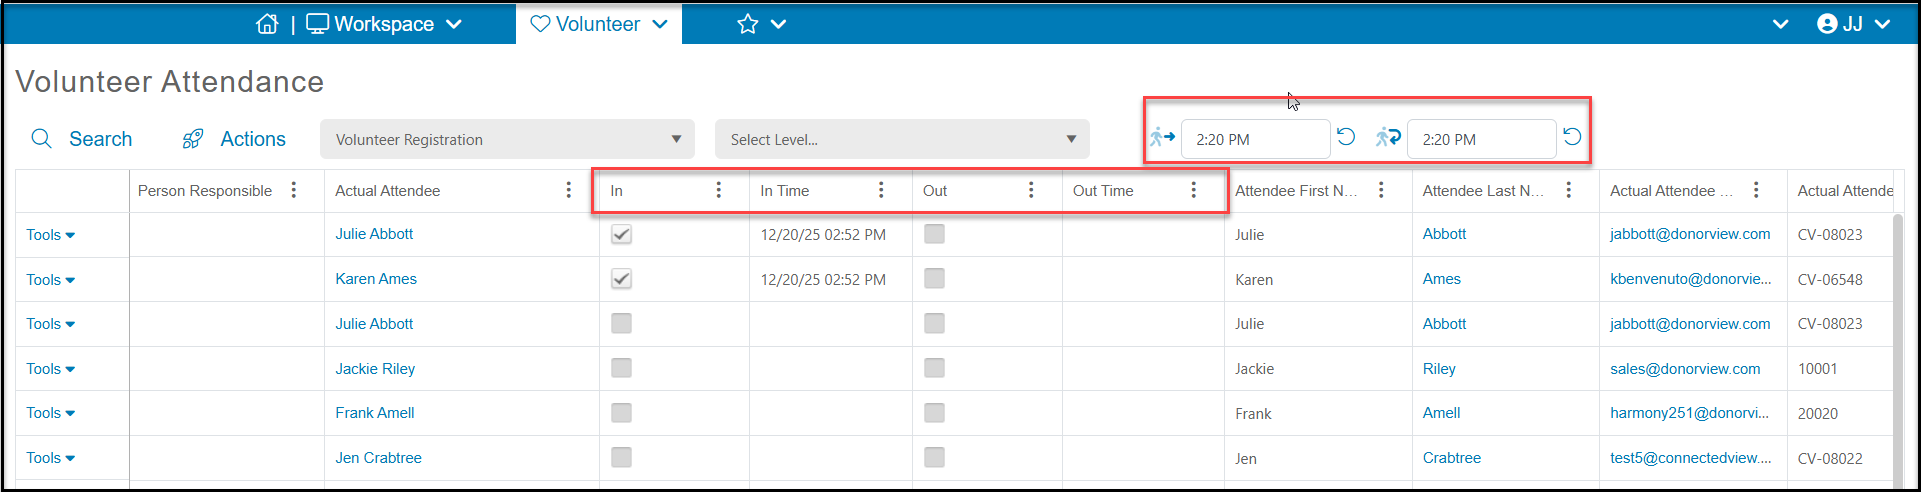
- In/Out Time In/Time Out- This is where you check in and out your volunteers when they arrive and leave for their shifts.
- There will be a checkmark under the "In" to show who you have checked in as well as what time that occured, and if you are also checking people out, a checkmark under the “Out” column.
- If you have set up any automated time tracking along with the event level, it will be imperative to check the volunteers in to populate their time records.
- Person Responsible - If the ticket levels are set up with a specific (user) person responsible, their name will show in this column.
- Group Name, Number, Leader - for volunteer events linked to the Group Assignments feature, you can see the name of the group, the group number and the group leader for that attendee.
- Credit Units - for volunteer time that is also assigned credit units, you can see the total credit units assigned for the activity.
- Document - if the event page required uploading a document on the Attendee Info fields, this link opens the volunteer's Documents tab to view their document.
- Survey Completed - if the event was linked to a survey in the Event Setup tab, this will indicate YES if they did complete the survey, it will be blank for any registrants who did not complete it.
- Survey Results - if the event was linked to a survey in the Event Set tab, this will have a "View" link in the column to view the responses.
Tools Menu - Edit Attendees and Print Name Tags
The Tools menu on the left side of each row is used to update attendee information and print individual name tags or badges. New registrations cannot be done through the Volunteer Attendance grid. The registration must be completed using the volunteer vent page or the Volunteer Scheduler in order to add or update any attendee (volunteer) information on this grid.
Update Attendee Information
- Click on Tools then left side of the row for the attendee which needs to be updated.
- The Last Name/Constituent field is the name of the person/company who completed the event registration form. If you only allow volunteers to register for themselves, the Last Name/Constituent and First Name fields will be the same as the Actual Attendee fields. If you need to update who is actually coming to volunteer, particularly if you allowed your volunteers to register guests, click on the arrow on the right side of the name under Actual Attendee.
- Use the search bar in the top of the window to see if the constituent already exists in the database.
- If the constituent already exists in the database, click on their name to identify them as the attendee.
- If no matching constituent is found, click on New Attendee to enter the name and email address to create a new constituent record.
- Changing the name of the Actual Attendee does not change who registered for the event, only whose name is shown in the Actual Attendee fields.
- If you are using the Group Assignments feature, you can mark this attendee as the Group Leader.
- You can Check In Now or Check Out Now by toggling them to YES.
- If you are using the Group Assignments feature you can add/edit the Event Group they are assigned to, and this selection will update the Group Name, Number and Location fields.
- You can update any of the Attendee Info fields that you created on your event page. These are the custom questions you added to the event page.
- The bottom field, Attendee Notes, is where you can enter any additional information about this attendee you would like to add.
- Be sure to click the blue Update button at the bottom of the window to save your changes.
Printing a Single Name Tag or Badge
The Tools menu will also allow you to print a single name tag or badge.
- A name tag include just the attendee's first and last name.
- A badge includes the attendee's first and last name, the Ticket #, and the QR code for the ticket number which can be scanned to check the person into the event.
To print a single badge or name tag:
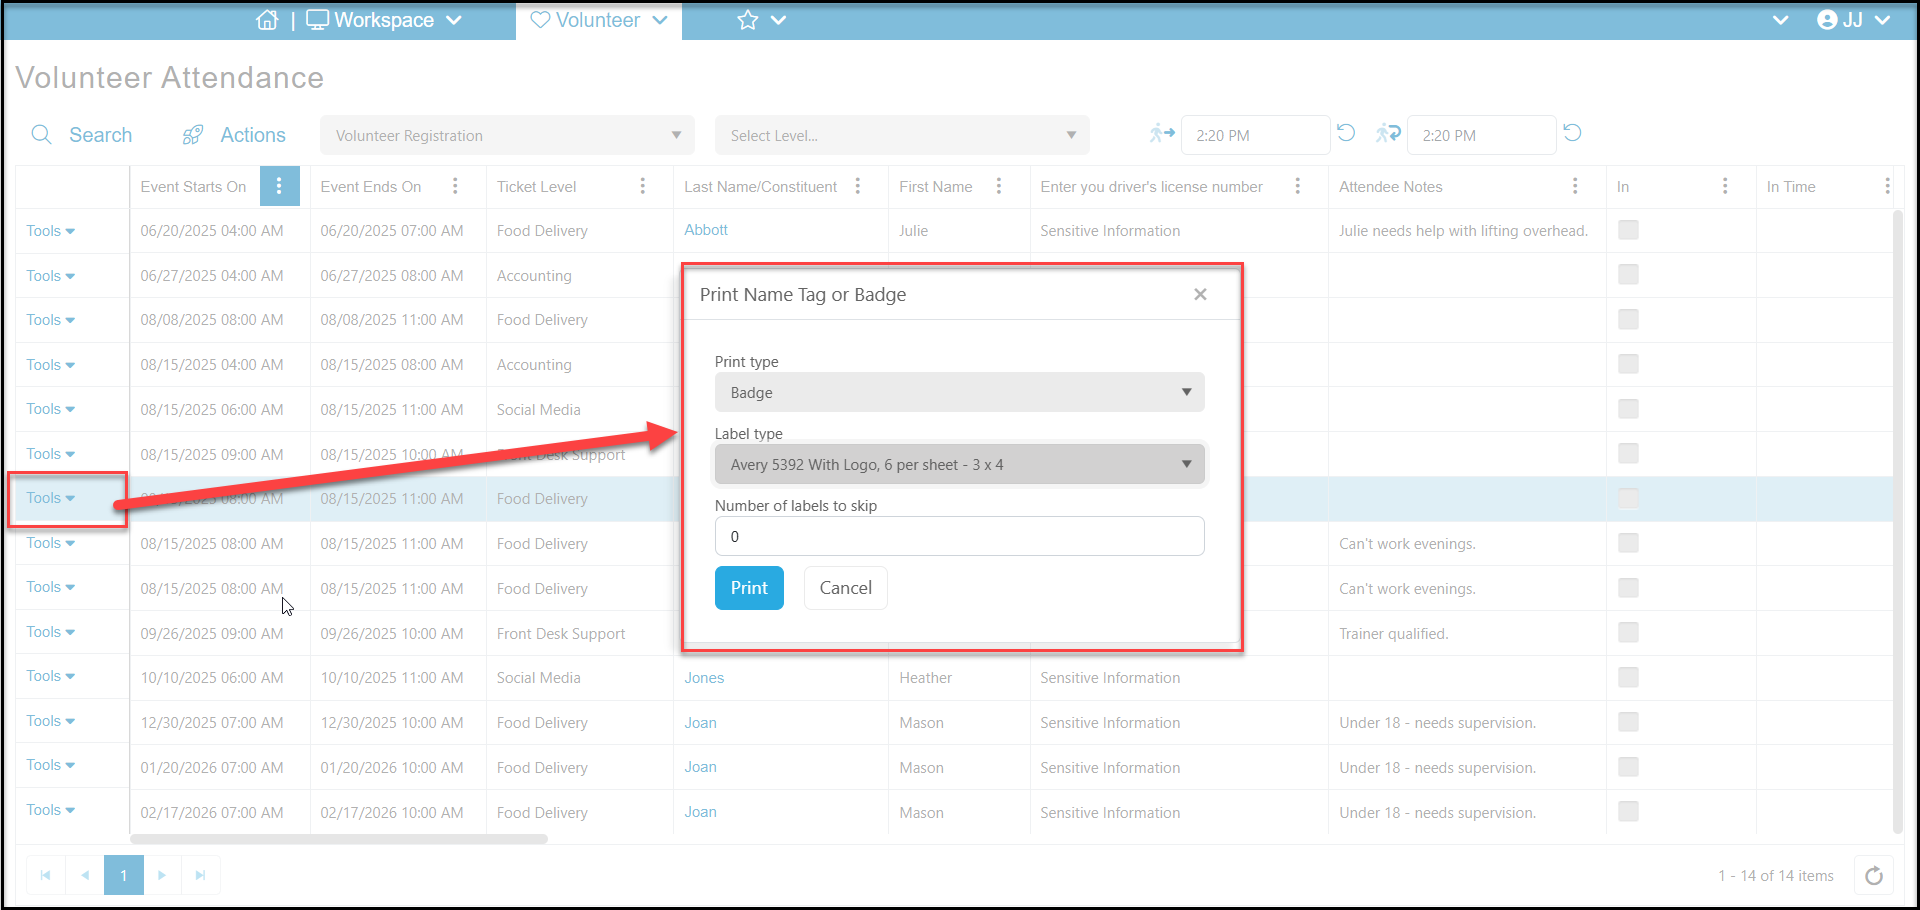
- From the Tools menu, click on Print.
- In the new window, select Name Tag or Badge from the dropdown under Print type.
- Choose the type of label to print on from the dropdown under Label type.
- Click Print to create a pdf file that you can open from your Downloads folder to print.
Checking Volunteers In and Out
The Volunteer Attendance grid allows you to check your attendees In and Out. You can check the In box on the attendee's row to check them in and the same to check them out. The In Time and Out Time will show the time and date that the box was checked.
You can also check in all attendees using the link at the top of the grid with the person and the arrow next to it. You can undo the group check in with the circle arrow next to the box. You can use the same process to check everyone out at the same time in the next box.
The check In and Out boxes are important for features linked to time tracking in the CRM and Volunteer modules. The check In columns also update summary data on the Constituents grid for Cumulative Events Attended and Last Event Attendance Date.
If you should forget to check in or out your volunteers, you can do it later, however it will show the later day and time that the check in actually occurred.
If you did not set up Time Tracking Defaults with your volunteer event, you can still do a batch update from the Actions menu to add the time tracking to any volunteers who were checked in for your event. You would filter for “Is True” on the “In” column to show a list of all those checked in.
Communicating with Volunteers
You can send emails, text, and mail merge letters to your volunteers using the Actions menu. You can also create an email list and send an email campaign.
Reminders can be sent for upcoming volunteer shifts using the Events Module's Auto Reminders features. You can learn more about this in the article "Event Auto Reminders."