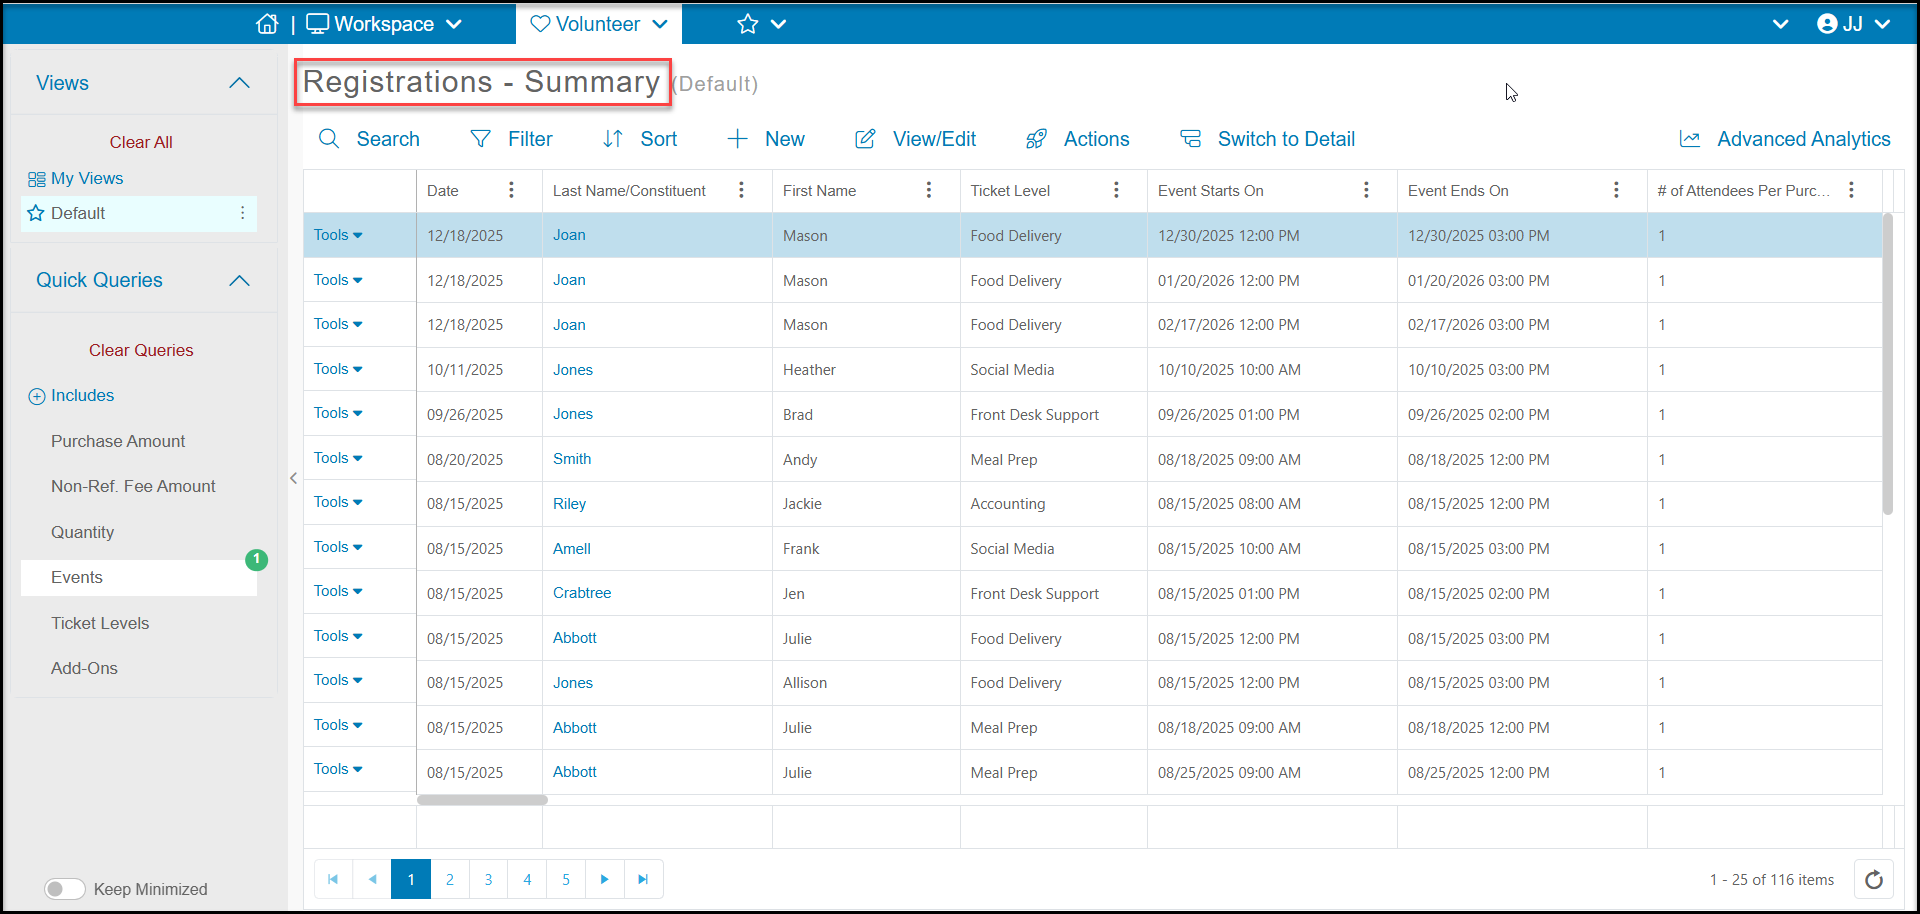
The Volunteer Registrations grid will show the names of registrants and any guests they registered for.
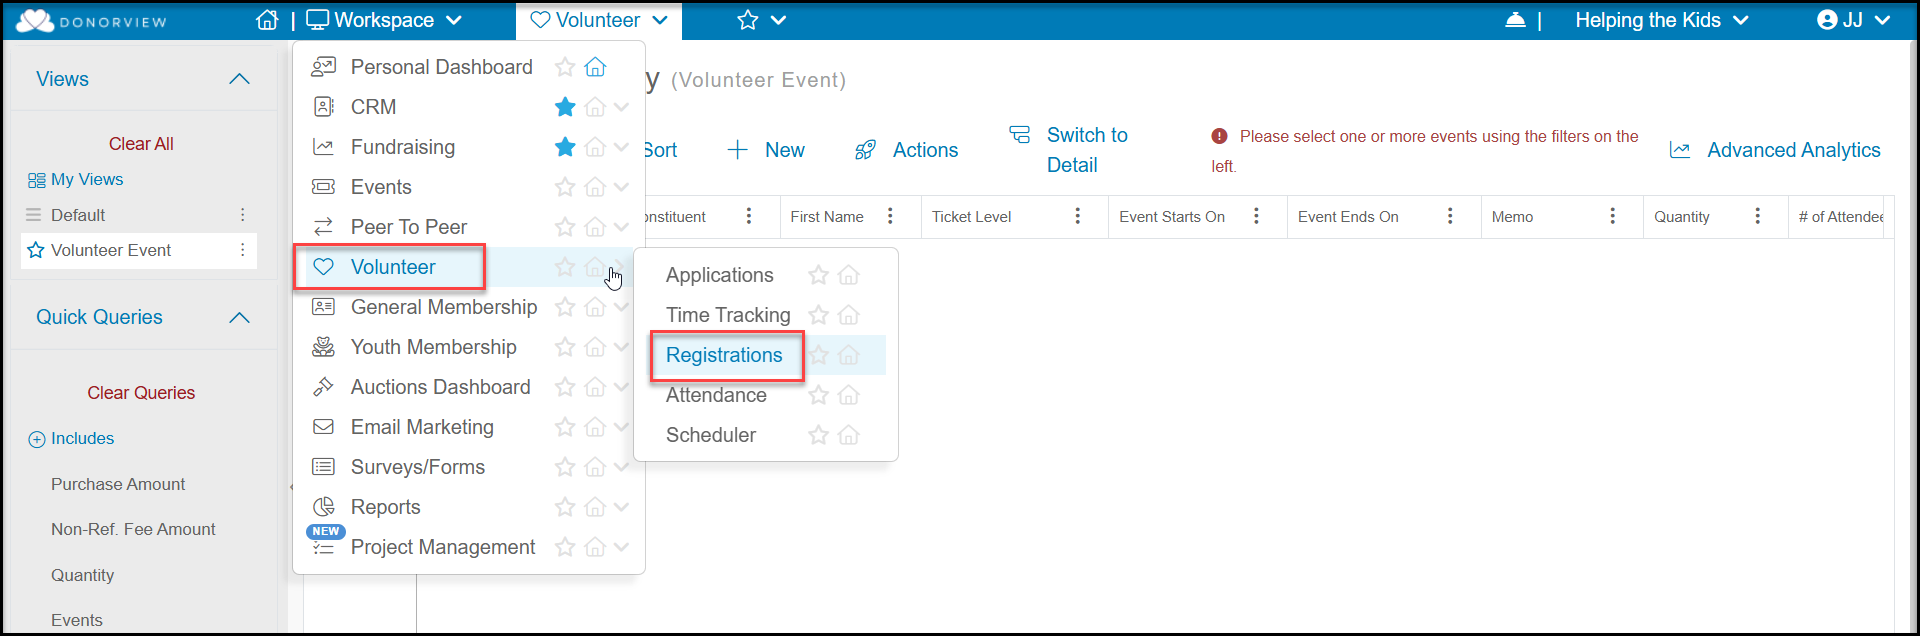
Select the volunteer event to view by using the Queries feature on the right side of the grid. If the Views and Queries sidebar is not showing, click on the small arrow on the left side of the gird (see red arrow below.)

Grid Menus
Since volunteer events are typically free, the Registrations grid is not used as often as the Volunteer Attendance grid to manage volunteers. Like the Events grid, the Registrations grid has two options, the Summary grid, which is shown by default, and the Details grid.
You must first select your volunteer event in the Quick Queries >Events menu. The grid will populate with all the volunteers who were listed as the registrant at the bottom of the volunteer event page.
LIke other grids you have the menus at the top of the grid:
- Search - To search for a specific constituent by Name, Email, Ticket Level, and an All search option to search all the text fields.
- Filter - To apply filters to any of the columns on the grid to view specific groups of data.
- Sort - To sort any of the columns in ascending or descending order.
- +New - To add a new volunteer registration. This will open the volunteer event page you select and allow you to add a new registration.
- View/Edit - If you have a particular row highlighted, you will see the View/Edit option. This will open the transaction entry for this registration to allow you to change the date it was recorded, the For-Fund-Event-Appeal, and other items related to the financial transaction record. It does NOT allow you to change the ticket level or event participation date.
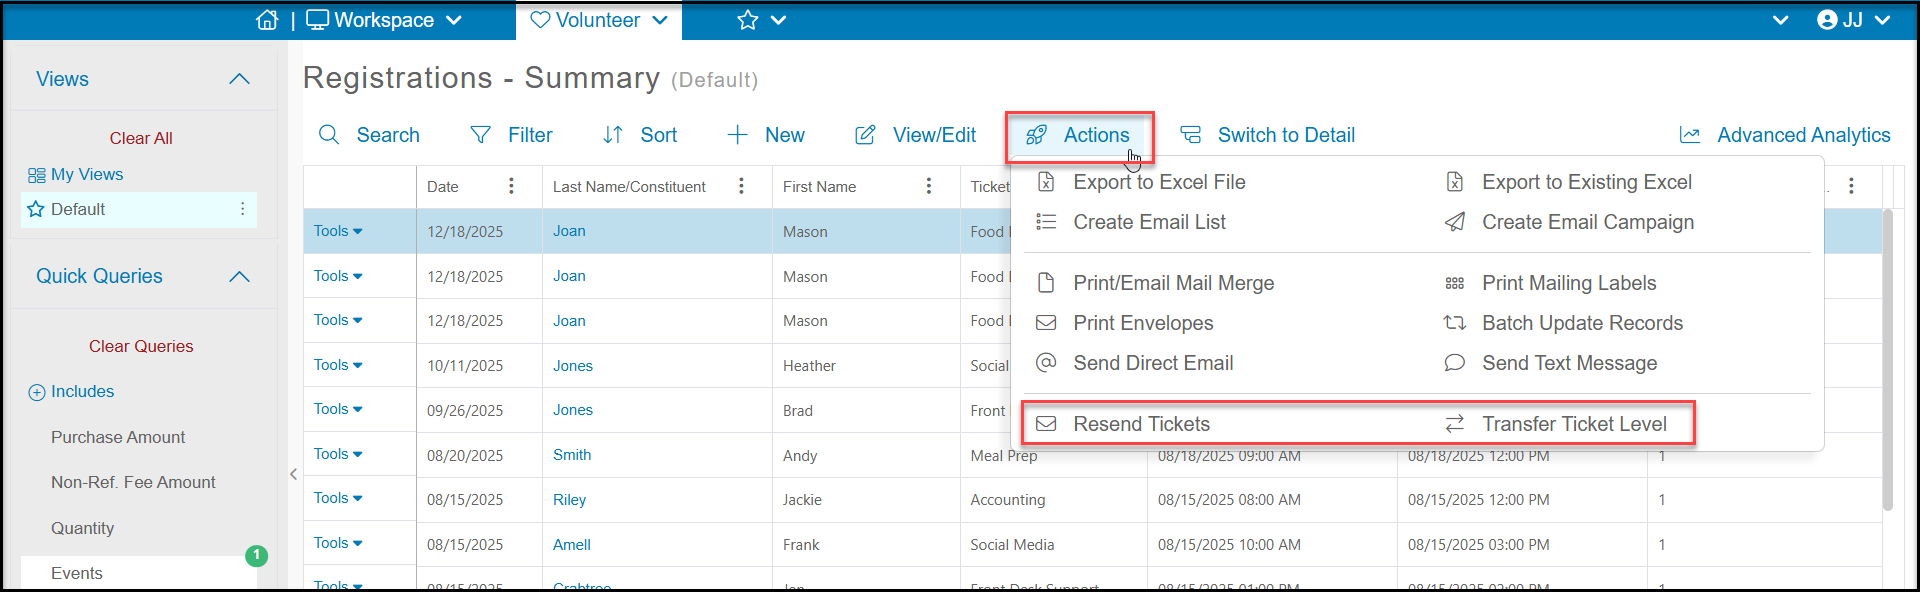
- Actions- The Actions menu has all the typical options including exporting to Excel, creating email lists, sending mail merge letters, emails, and texts, and batch updates. It also offers two special additions:
- Resend Tickets - If your volunteer event was a ticketed event, you can resend the tickets to all the registrants shown on the grid.
- Transfer Ticket Level- If you have a registrant highlighted on the list, you can transfer them to a different ticket level for the same day.
- For example, if a volunteer was signed up for Meal Prep but you needed to switch them to Meal Delivery, you can transfer them from one level to the other on the same day.
- You cannot transfer registrations to other constituents.
- Switch to Details - to switch to the Detail grid view, which will show each attendee for each ticket level. This information is better viewed on the Attendance grid.
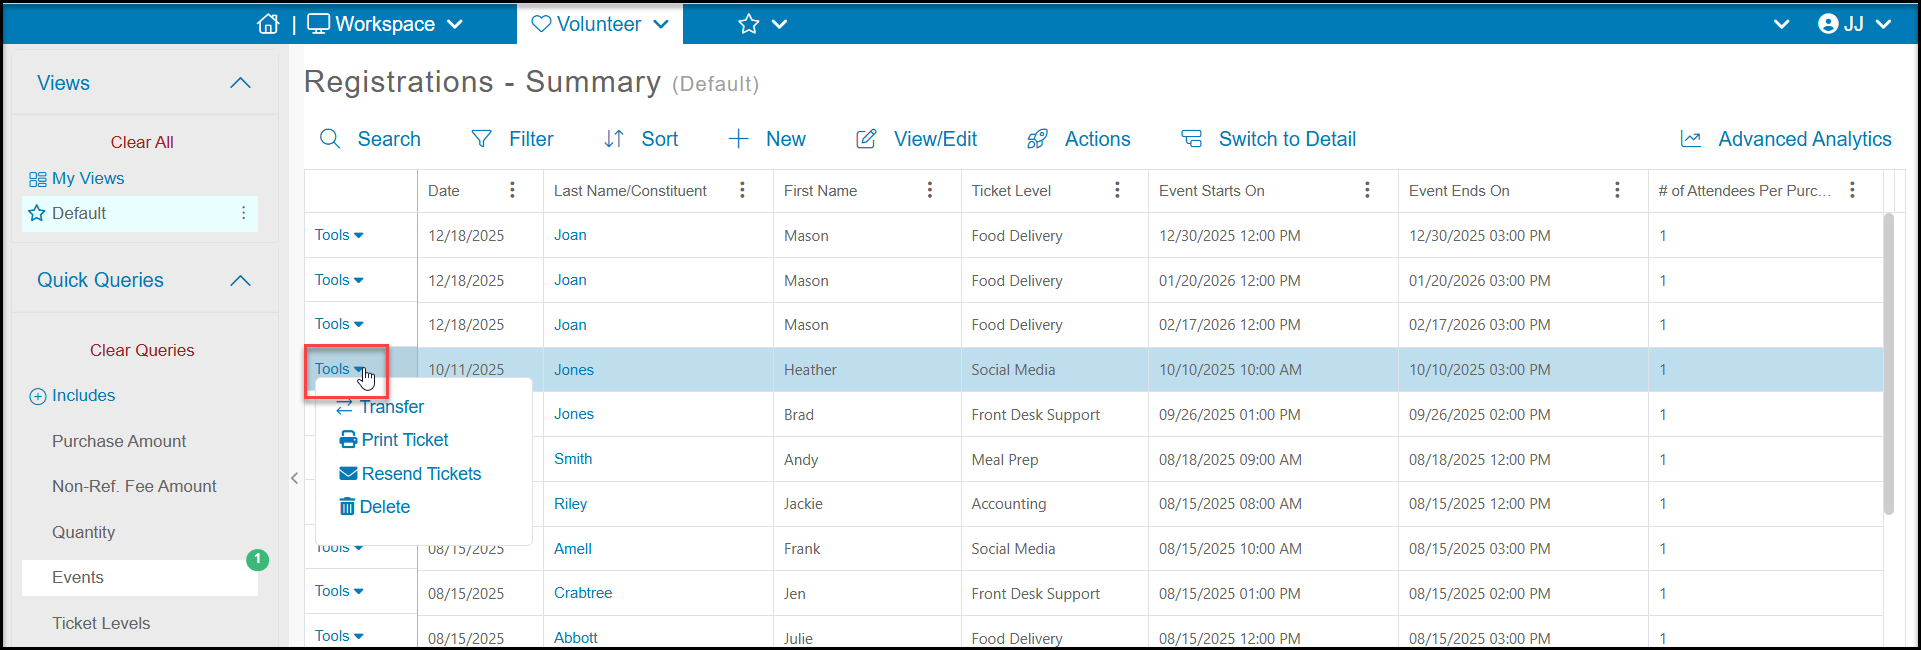
Tools Menu
The Tools menu on each row will allow you to:
- Transfer - You can switch ticket levels for this registrations, you cannot transfer to another constituent.
- Print Tickets - Print the tickets for this constituent.
- Resent Tickets - Email the tickets to this constituent only.
- Delete- Will completely delete the entire transaction.
- If you have a recurring event and the volunteer registered for multiple sessions, clicking Delete from the Summary grid will remove the entire transaction including all shifts/activities.
- To remove one particular registration, you can click on Switch to Detail and find the specific constituent and shift/activity and use the Tools menu to delete that day's registration only.
Helpful Columns on the Registrations Summary Grid
- Date - the date the transaction was recorded.
- Last Name/Constituent - the name of the constituent entered at the bottom of the event registration form.
- Ticket Level - the ticket level(s) registered by this constituent. There will be a separate row for each ticket level the constituent registered for, and if it is a recurring event, there will be a separate row for each occurrence.
- Event Starts On and Event Ends On - For a single day volunteer event, this will be the same for all the registrations. For a recurring event, you will see the specific day and shift start and end times for each day they registered for. If they registered for multiple shifts on the same day, you will be able to distinguish by the start and end time.
- Memo - If you included a memo field on your event registration page, the response will be found here.
- Quantity - how many of each ticket level were registered, this will typically be “1” unless you allow your volunteers to registered for themselves and other guests.
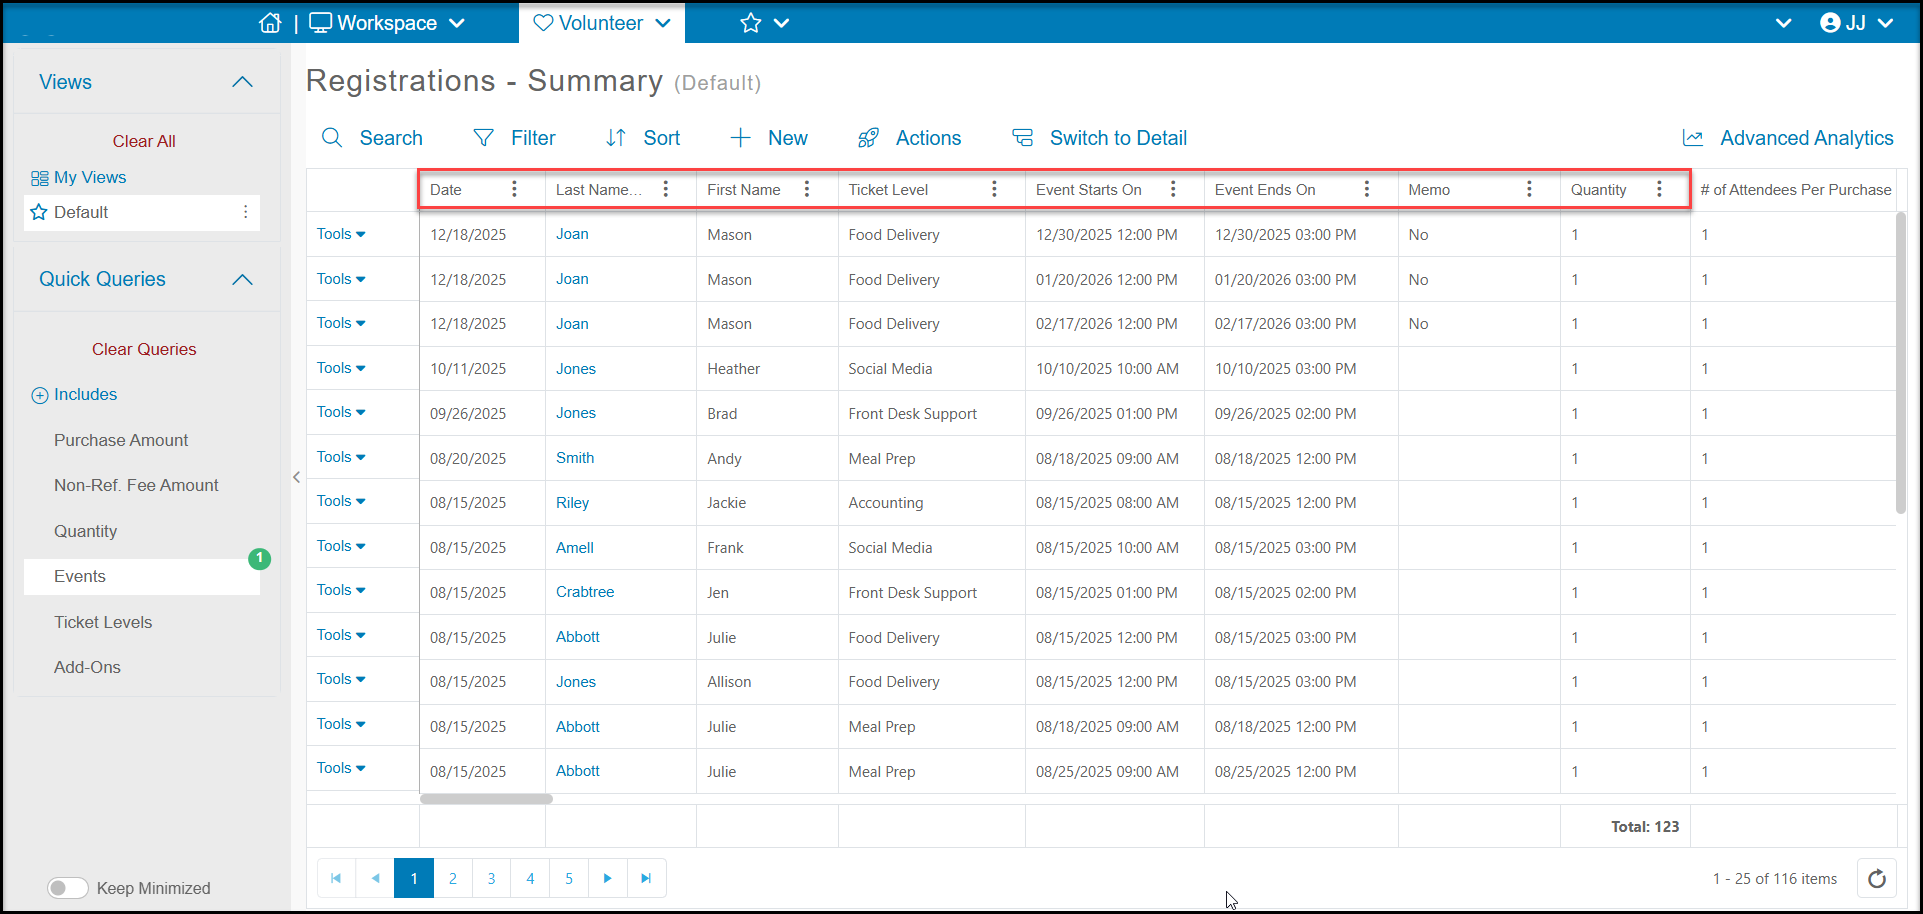
- # of Attendees Per Purchase - will show how many people are admitted with each ticket level, for example, a “Team” ticket level registration may include 4 attendees with this registration.
- This number must be 1 or greater for the volunteers to show on the Volunteer Attendance grid.
- If the # of attendees per purchase is set to “0” this ticket level registration will not appear on the Volunteer Attendance grid.
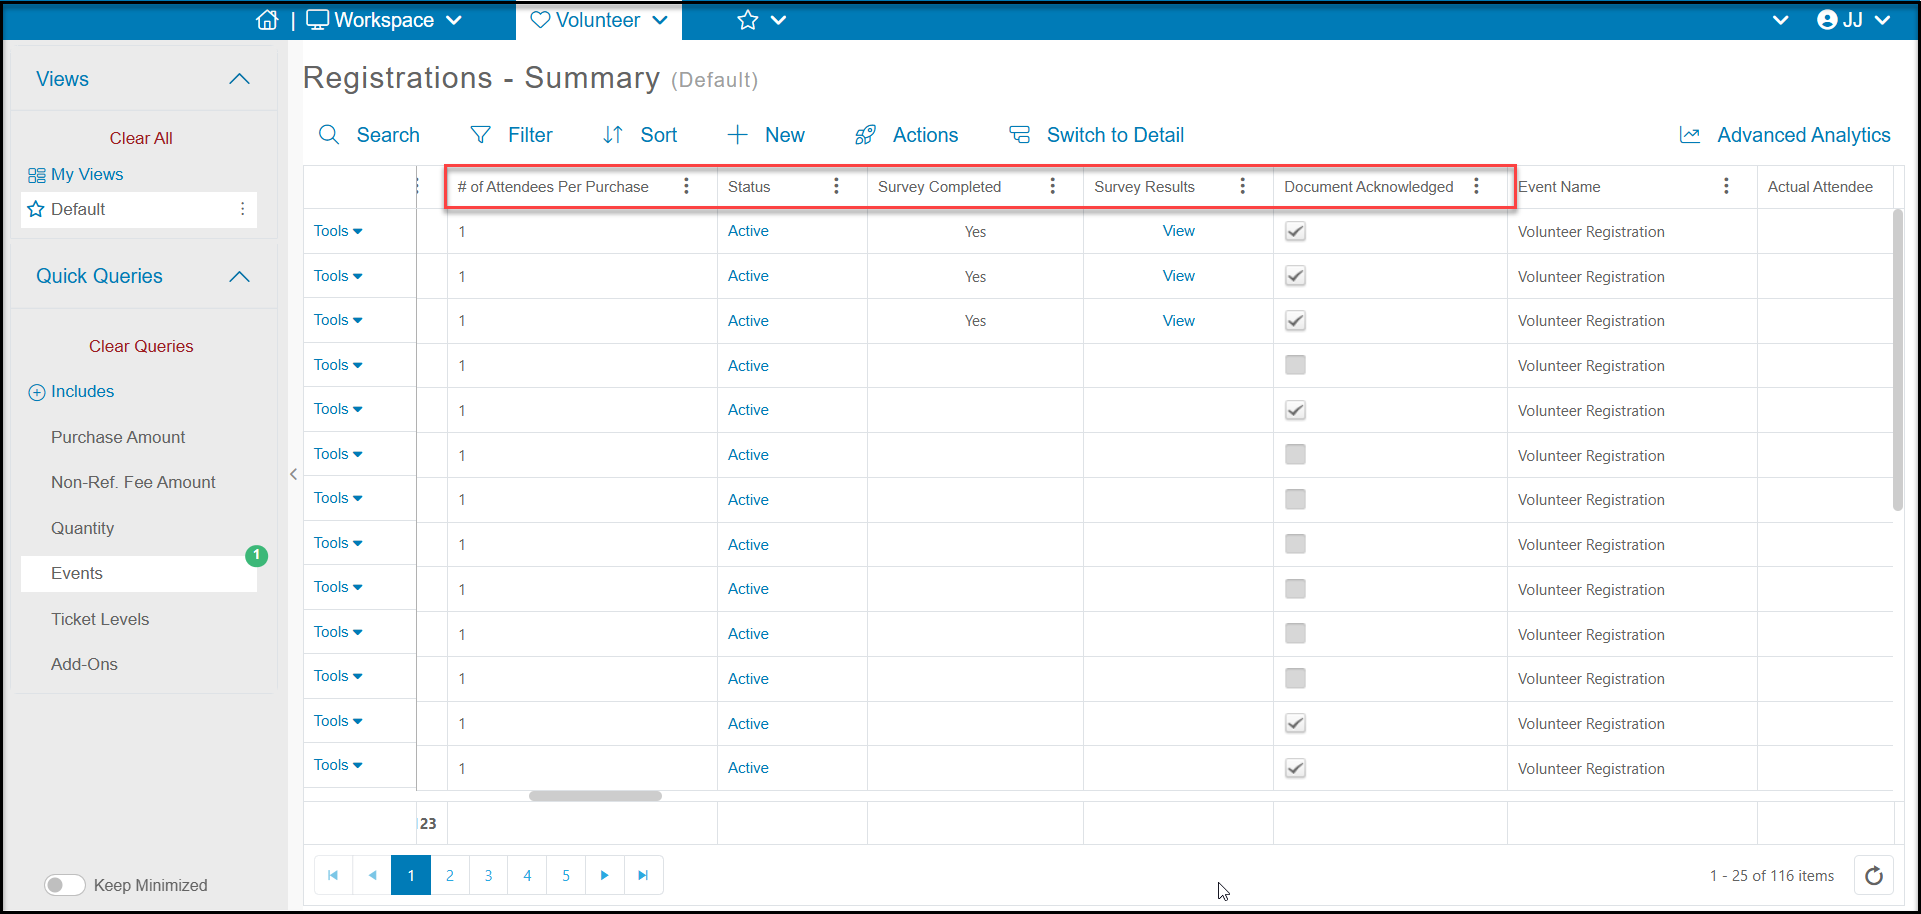
- Status - Instead of deleting a registration, you can use the Statuscolumn to update whether the volunteer will attend or not.
- With the Status set to Active and the # of Attendees Per Purchase set to 1 or greater, the volunteer will appear on the Volunteer Attendance grid.
- You can click on the Active link and change to Cancelled to:
- Remove the registrant from the Attendance grid.
- Recycle the Level so it is available for someone else to register for.
- Send a email notification to the volunteer and any notification email addresses listed in the event setup.
- You will get a popup message confirming the cancellation.
- Survey Completed - If your event registration included a link to a survey and the volunteer completed the survey, it will say “Yes” in this column. If they did not complete the survey, the field will be blank.
- Survey Results - If the survey was completed, there will be a View link under Survey Results to allow you to view the PDF version of the survey submission.
- Document Acknowledged - if you included a document or survey on your event registration page, the checkmark under this column will confirm that they acknowledged the document. If this step was not required, the check box may be blank if the volunteer did not check the box on the event registration page.