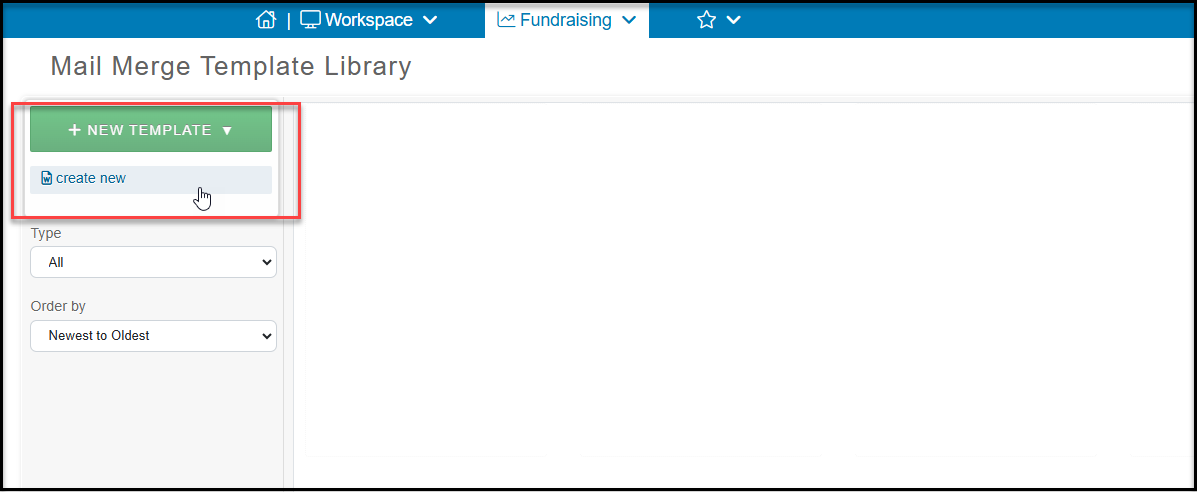
From the Mail Merge Gift Templates page in the Fundraising Module, you will find a button on the top left +NEW TEMPLATE. Clicking on the down arrow will reveal an option to click called create new.
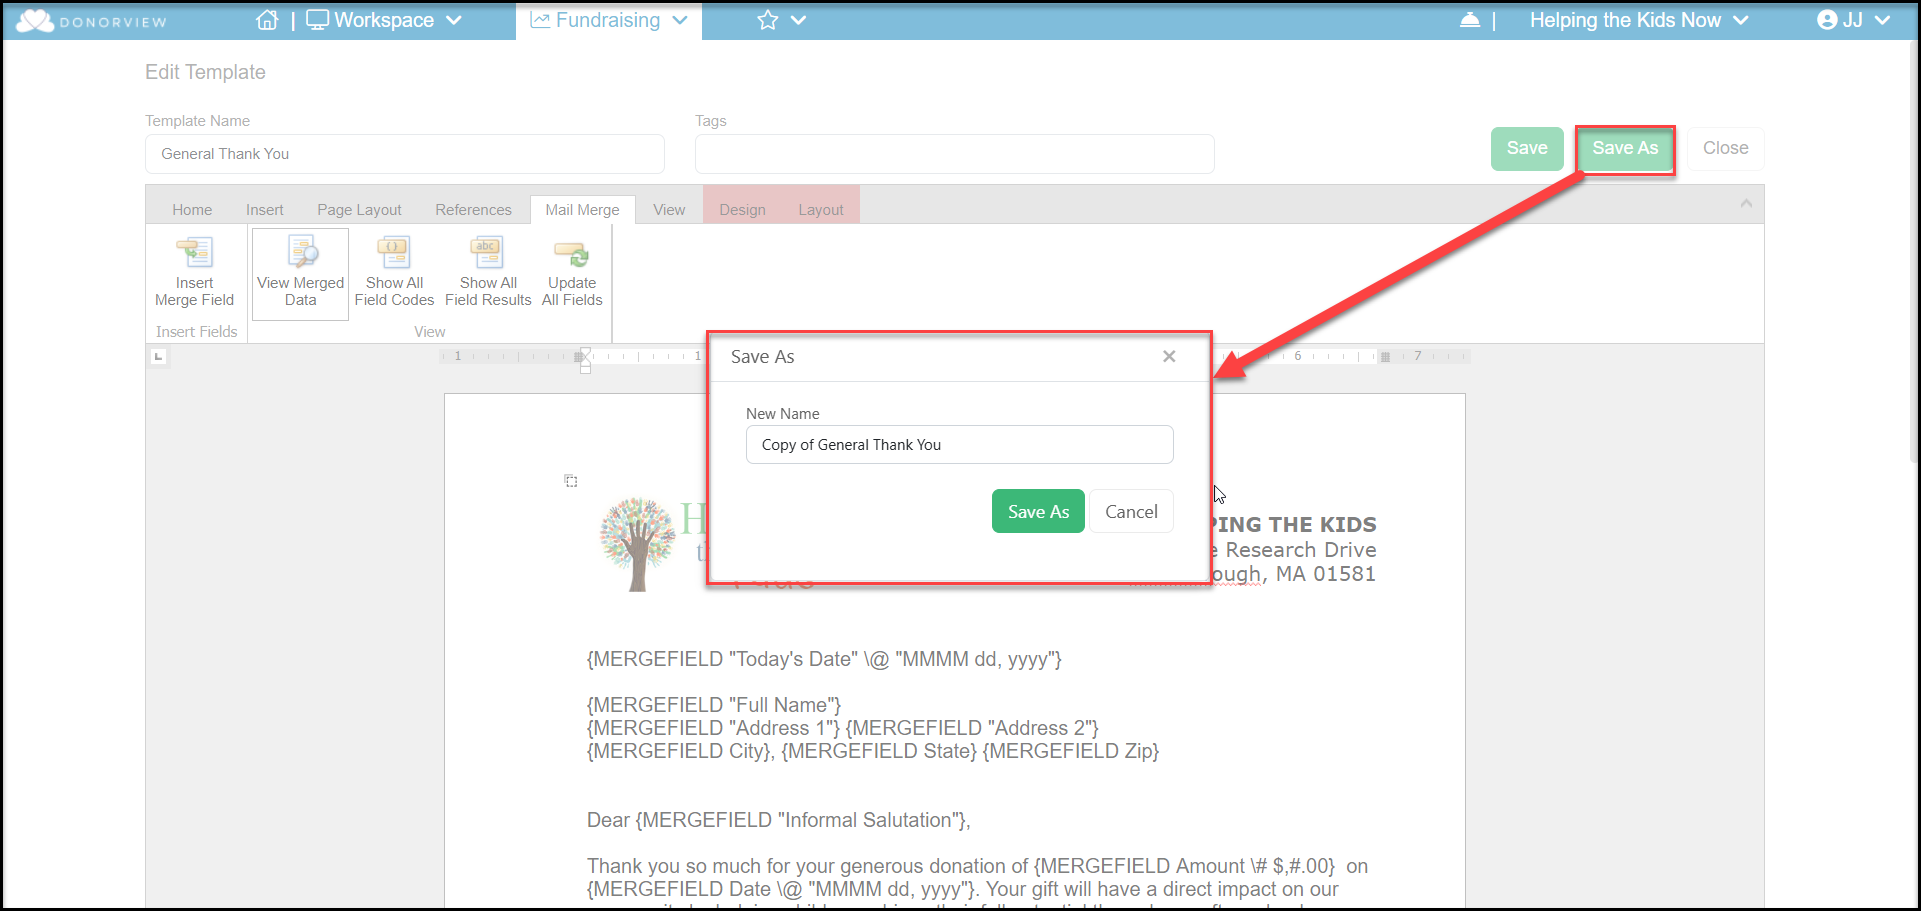
You can also make a copy of an existing template to create a new template by using the Save As function on an existing template. This example assumes you have no letter templates created on this page.
Home Tab
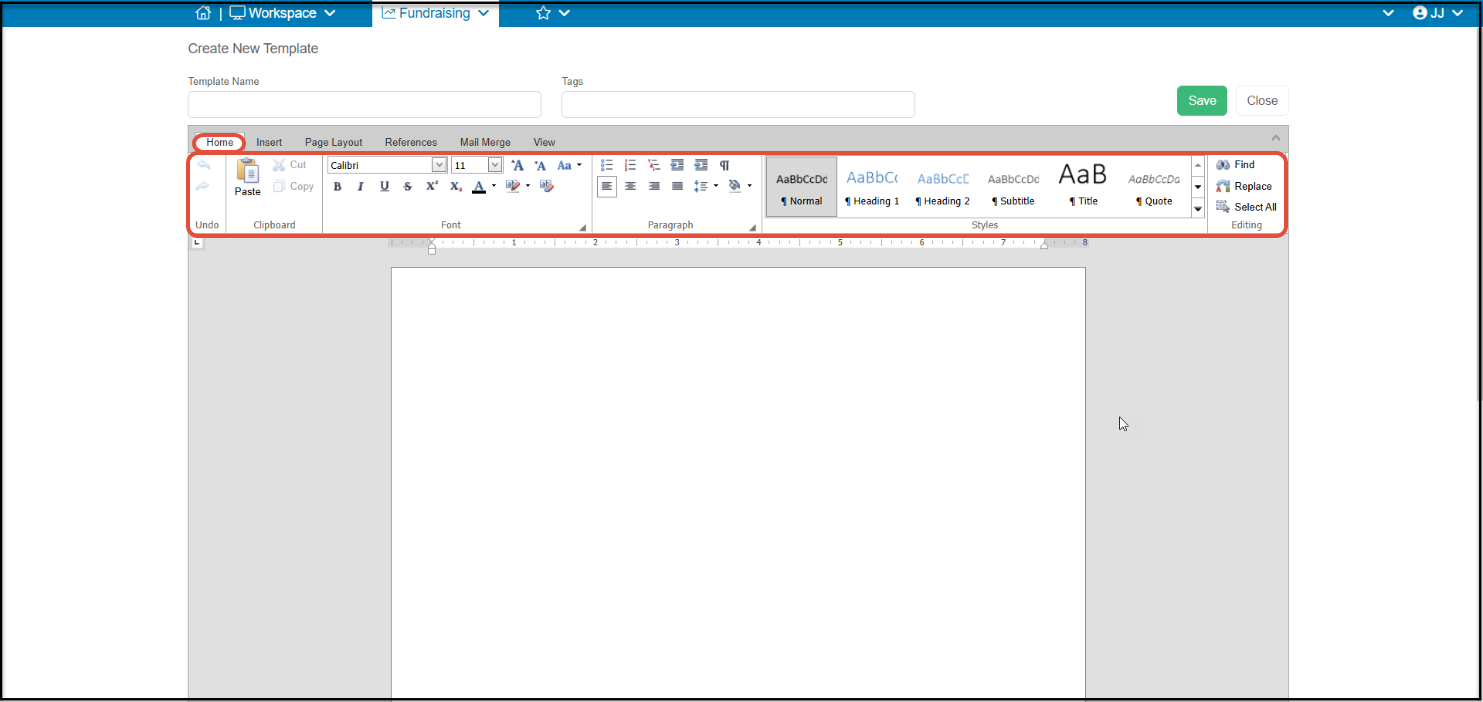
A new blank template will open that offers features similar to what can be found in Microsoft Word.
Start by entering a Template Name and clicking Save. The Tags field is not currently used.
- On the Home tab, you can customize the fonts and paragraphs.
- You can copy and paste text from a document you already have, but in some browsers, trying to copy and paste using the Paste button or copying an image will cause an error.
- To copy text, we recommend using your mouse and keyboard.
- Highlight the body of the letter using your mouse but do not highlight any images.
- Then hold the Control (ctrl) key while hitting the letter “C.”
- Put your cursor in the body of the page and hold the ctrl key again while hitting the letter “V.”
- This will paste the text into the body of your letter.
- You can now update the font, size, spacing, etc for your letter. Note that there are limited fonts available in this tool, so choose the one that is closest to your brand's font.
- Click Save again to save the changes made so far.
Insert Tab
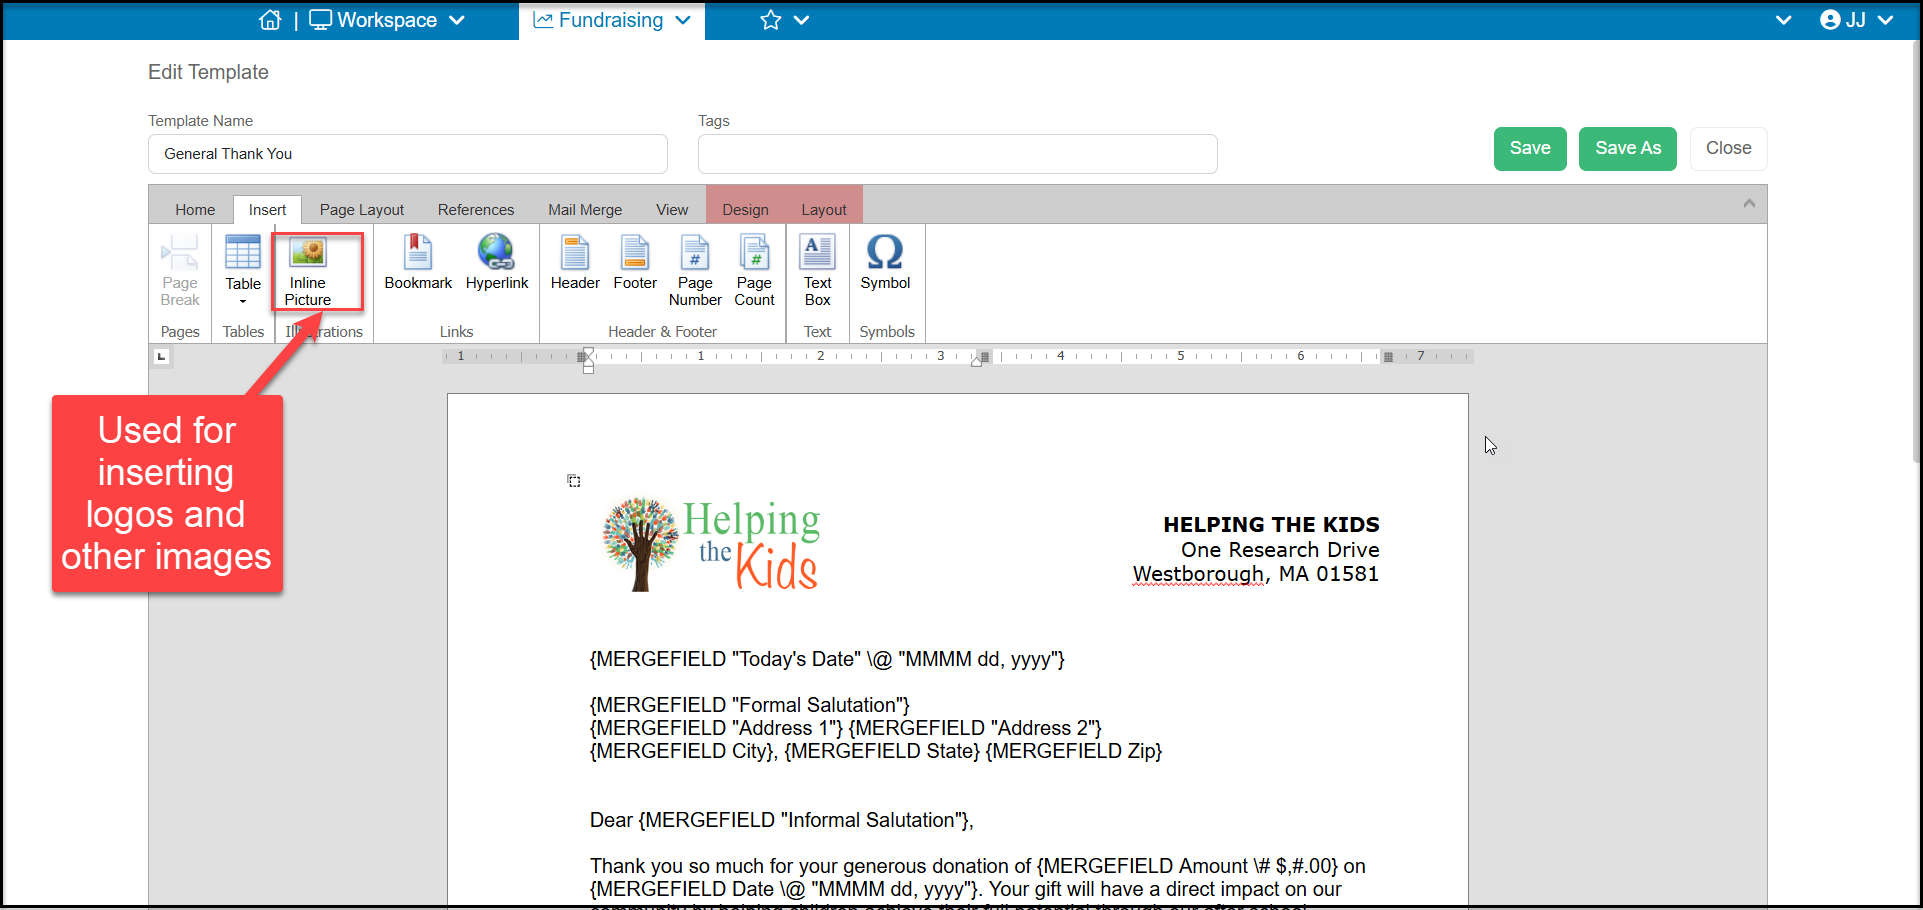
3. The Insert tab allows you to add things like logos or pictures to your letter using the Inline Picture option. You do not have to add your logo if you plan to print on pre-printed letterhead.
4. You can also add things like tables, hyperlinks, headers, footers, and page number.
5. You can add a text box, but note that you cannot place merge fields inside a text box. You need to type the information into your text box. Text boxes can be great for things like a “PS” at the bottom of your letter using a script font to make it stand out.
Page Layout Tab
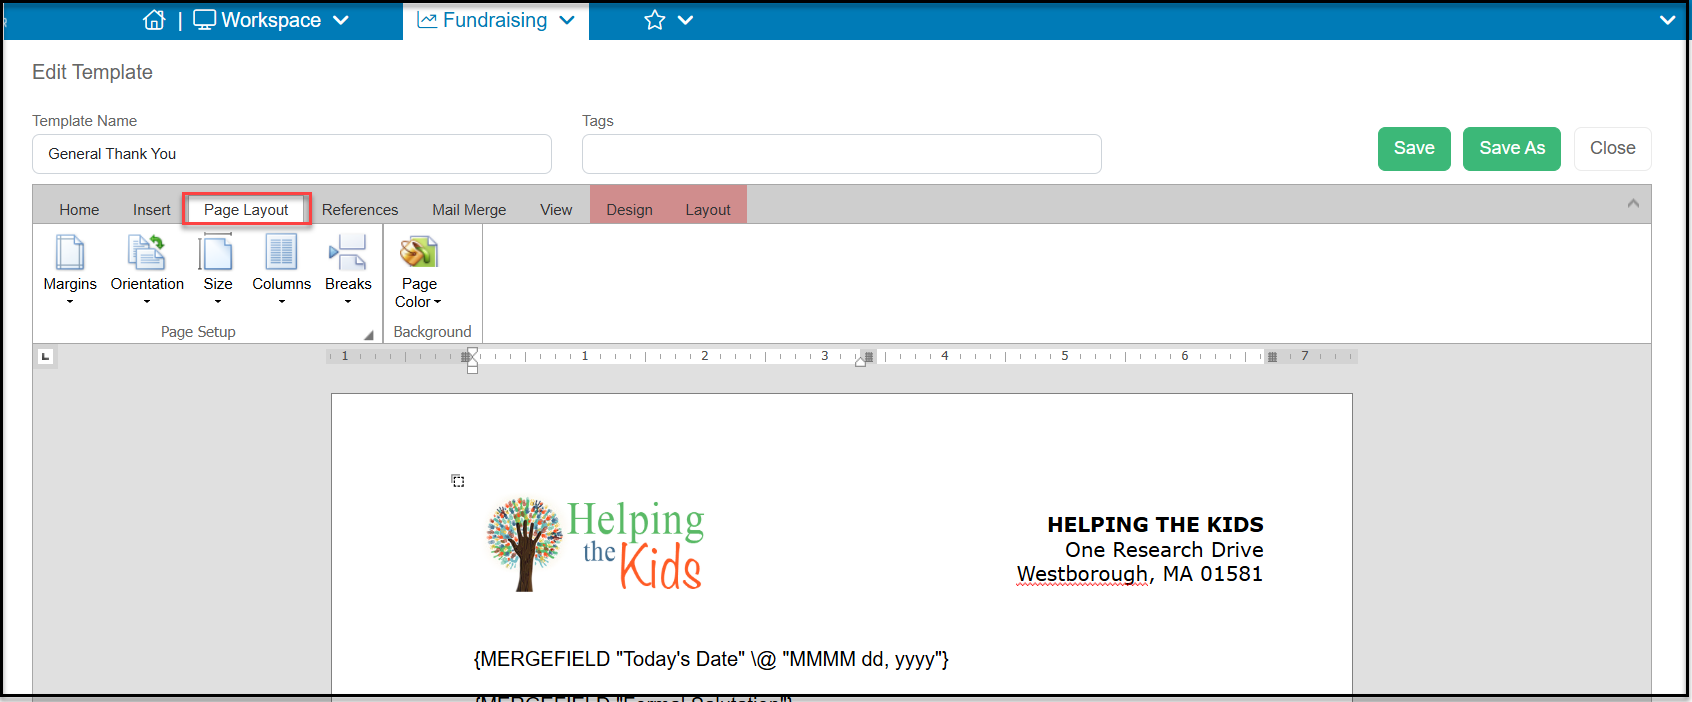
6. On the Page Layout tab you can edit your margins, change your paper orientation, and size.
7. You can also add columns, which can be used for those letterhead styles with a list of board members on the side of the page.
References Tab
8. The References tab is not used for acknowledgements. It is for multi-page reports and adding things like a table of contents.
Mail Merge Tab
9. The Mail Merge tab is where you insert the merge fields to personalize the letter.
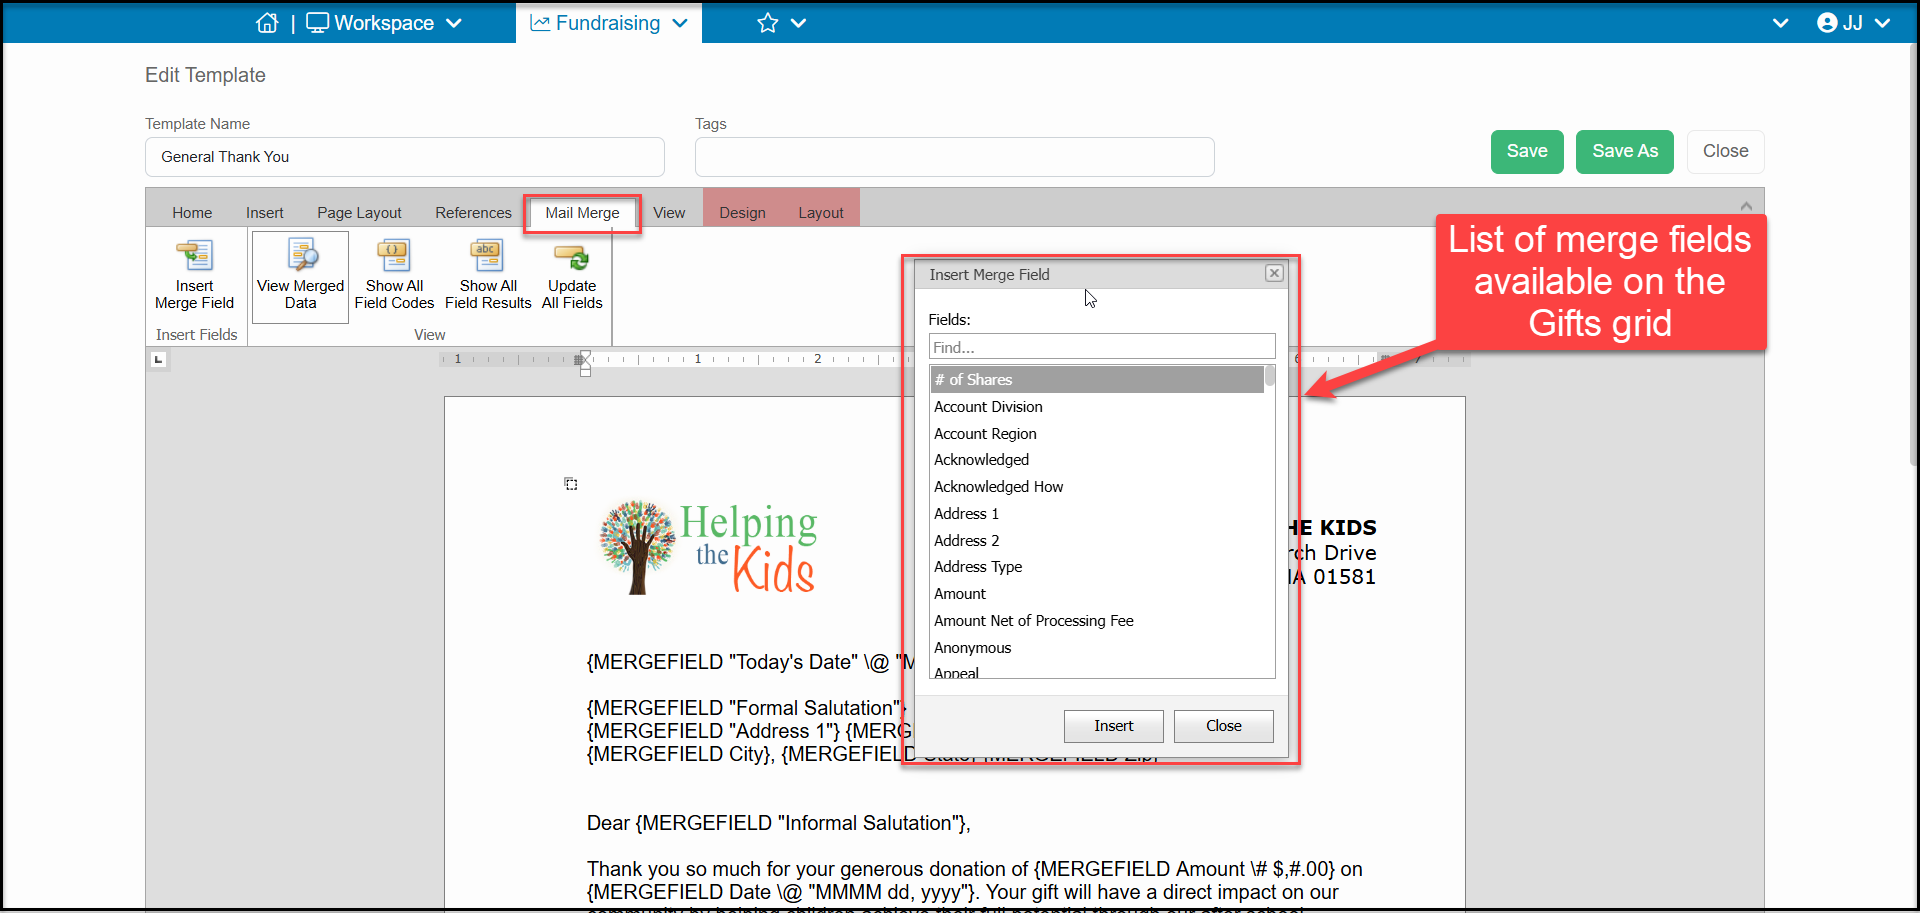
10. Click on Insert Merge Field to reveal a popup window with a list of the merge fields available from the Gifts grid. Note that each mail merge letter template is tied to only one grid and will only have fields that are available on that grid. So a Gift letter would not contain details about a membership level or ticket level, only those fields related to the financial transaction.
11. Some important fields here include:
- Today's Date - to always show the current date on your letter
- Amount - for the amount of the contribution
- Date - the date the transaction was recorded
- Salutation & Name Fields(all are editable in a constituents profile page)
- Envelope Salutation - For individuals it defaults to the combination of Prefix, First Name, Last Name/Constituent, and Suffix (Mr. Brad Jones Sr.) for companies it will just be Last Name/Constituent (ABC Company.)
- Informal Salutation - For individuals it defaults to the First Name (Brad) for companies you should enter either the name of the primary contact or a generic greeting like Friends or Supporters when the record is created.
- Formal Salutation - For individuals it defaults to Prefix and Last Name/Constituent (Mr. Jones) and for companies it defaults to the Last Name/Constituent only (ABC Company.)
- Full Name - Combination of First and Last Name/Constituent (Brad Jones or ABC Company.)
- Recognition Name - defaults to Last Name/Constituent, First (Jones, Brad or ABC Company.)
- You can also insert First Name, Last Name/Constituent, just keep in mind that if a company makes a contribution, they do not have a First Name field, so there will be a blank space before their name.
12. You can insert a merge field by placing your cursor in the spot you'd like the field to go and then either double click on the field name or select it and click Insert. You can leave the Merge Field selection window open and enter your fields as needed.
13. If a field is blank, the software will just enter a blank space. So for fields like Address 2, which is typically used for apartment and suite numbers, it should be placed on the same line as Address 1 to avoid blank spaces.
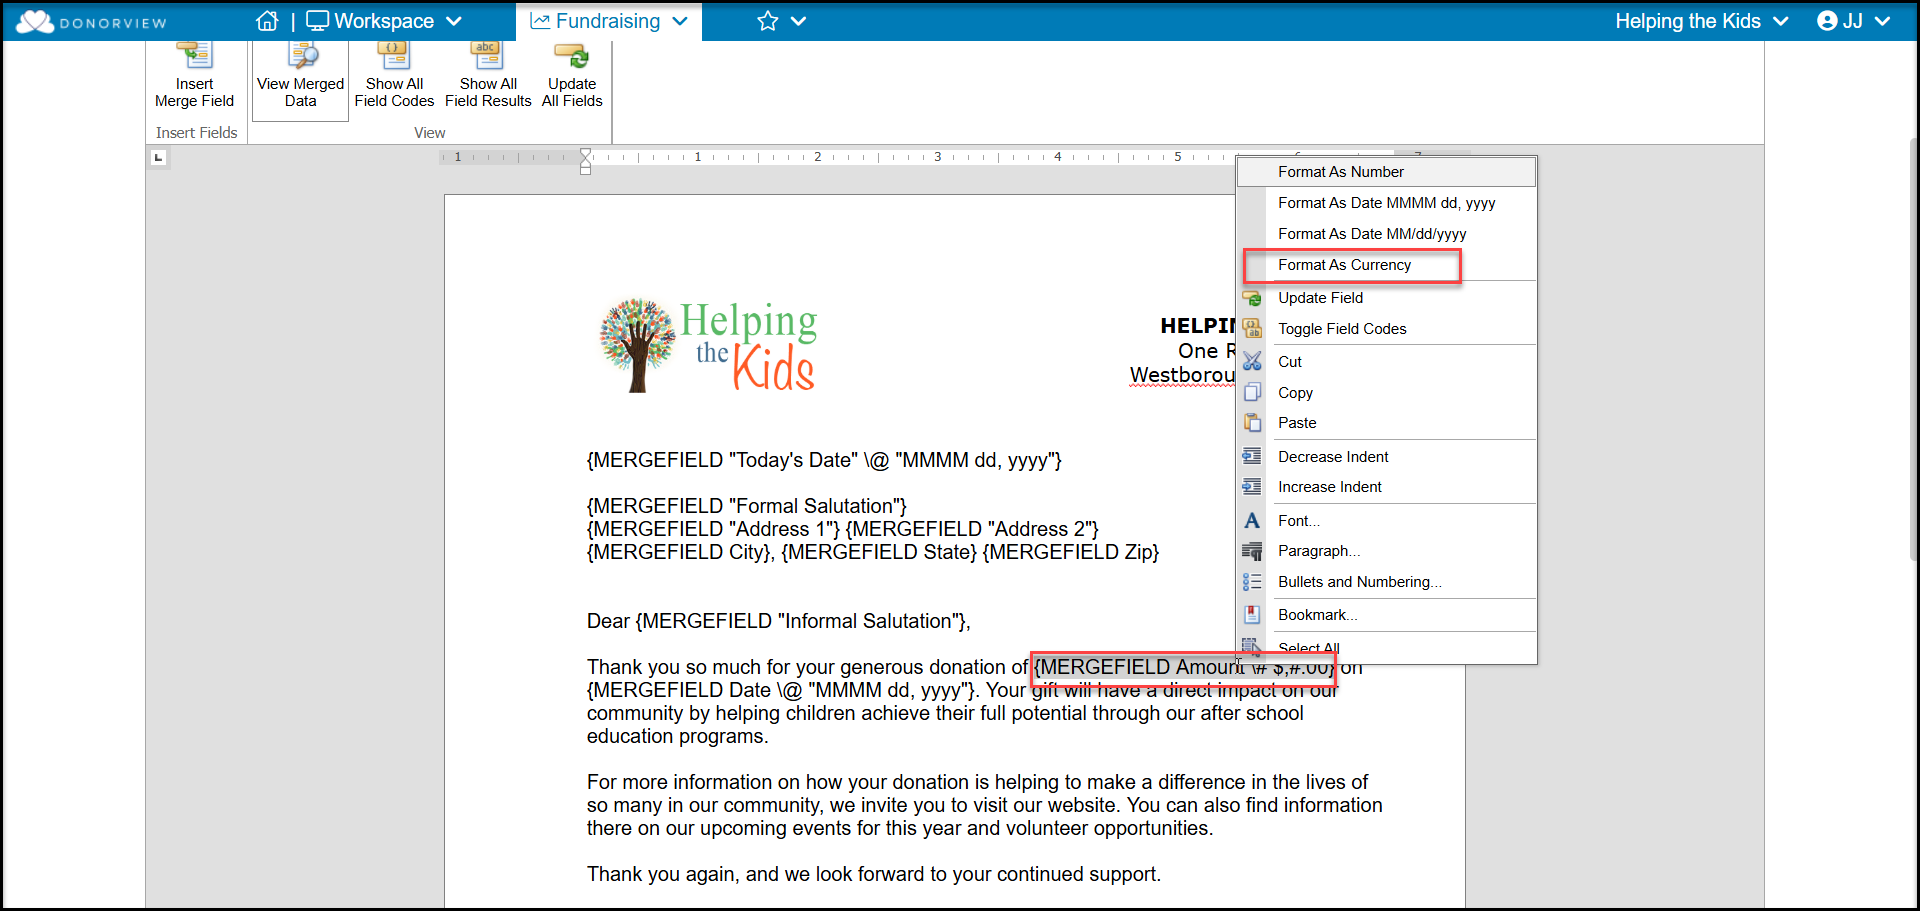
14. For any number fields, you will need to format them if you wish them to show as a currency with a $ and just two decimal places. An amount that should show as $1,000.00 will show as 1000.0000 without formatting.
15. Place your cursor inside the field and right click with your mouse. Select Format As Currency and you will see the merge field change from {MERGEFIELD Amount} to {MERGEFIELD Amount\# $,#.00}.
16. You can also format date fields. These fields default to the short format 10/17/2027, but if you right click in that field you can select the Format As Date MMMM dd, yyyy to spell out October 17, 2027.
View Tab and Design & Layout
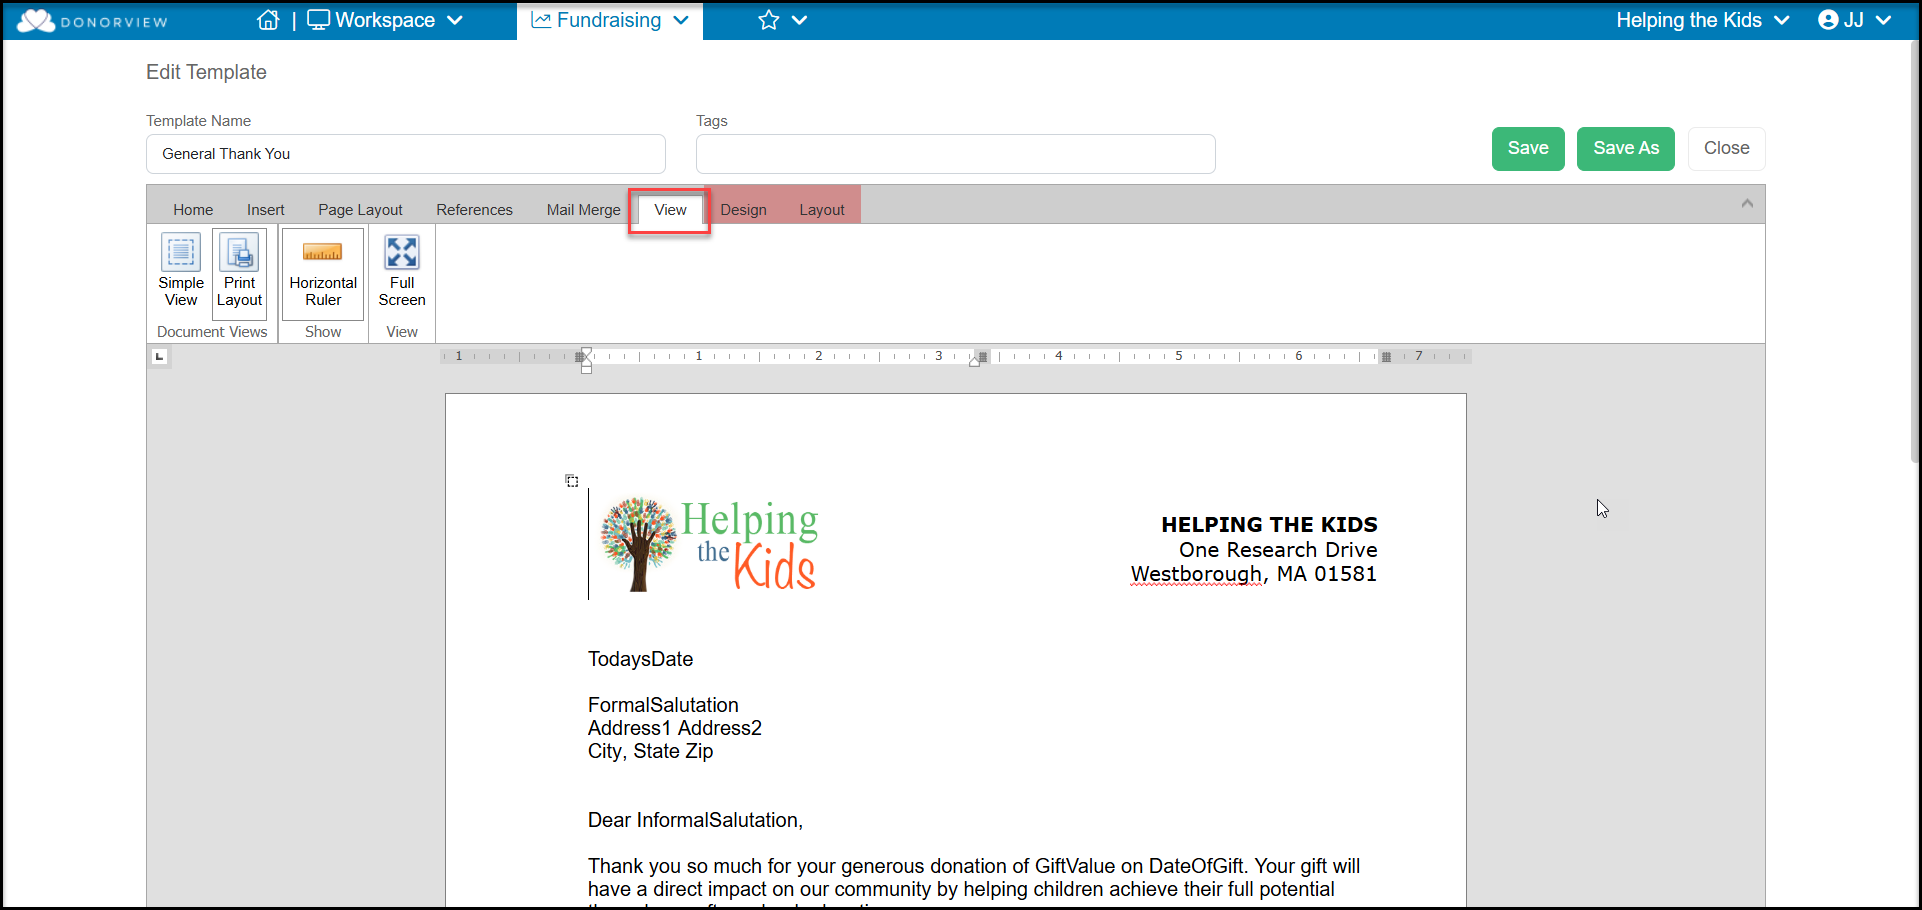
17. Under the View Tab you can change how the page is displayed while you are working on it.
18. The Design and Layout tabs are only used for tables and not applicable to acknowledgement letters.
Save and Save As
19. Be sure to frequently click on the Save button at the top of the letter to save your changes while you are working.
20. Clicking on Save As will allow you to make an exact copy of the letter. So once you have a letterhead created, you can copy it for any different letters you need to create.