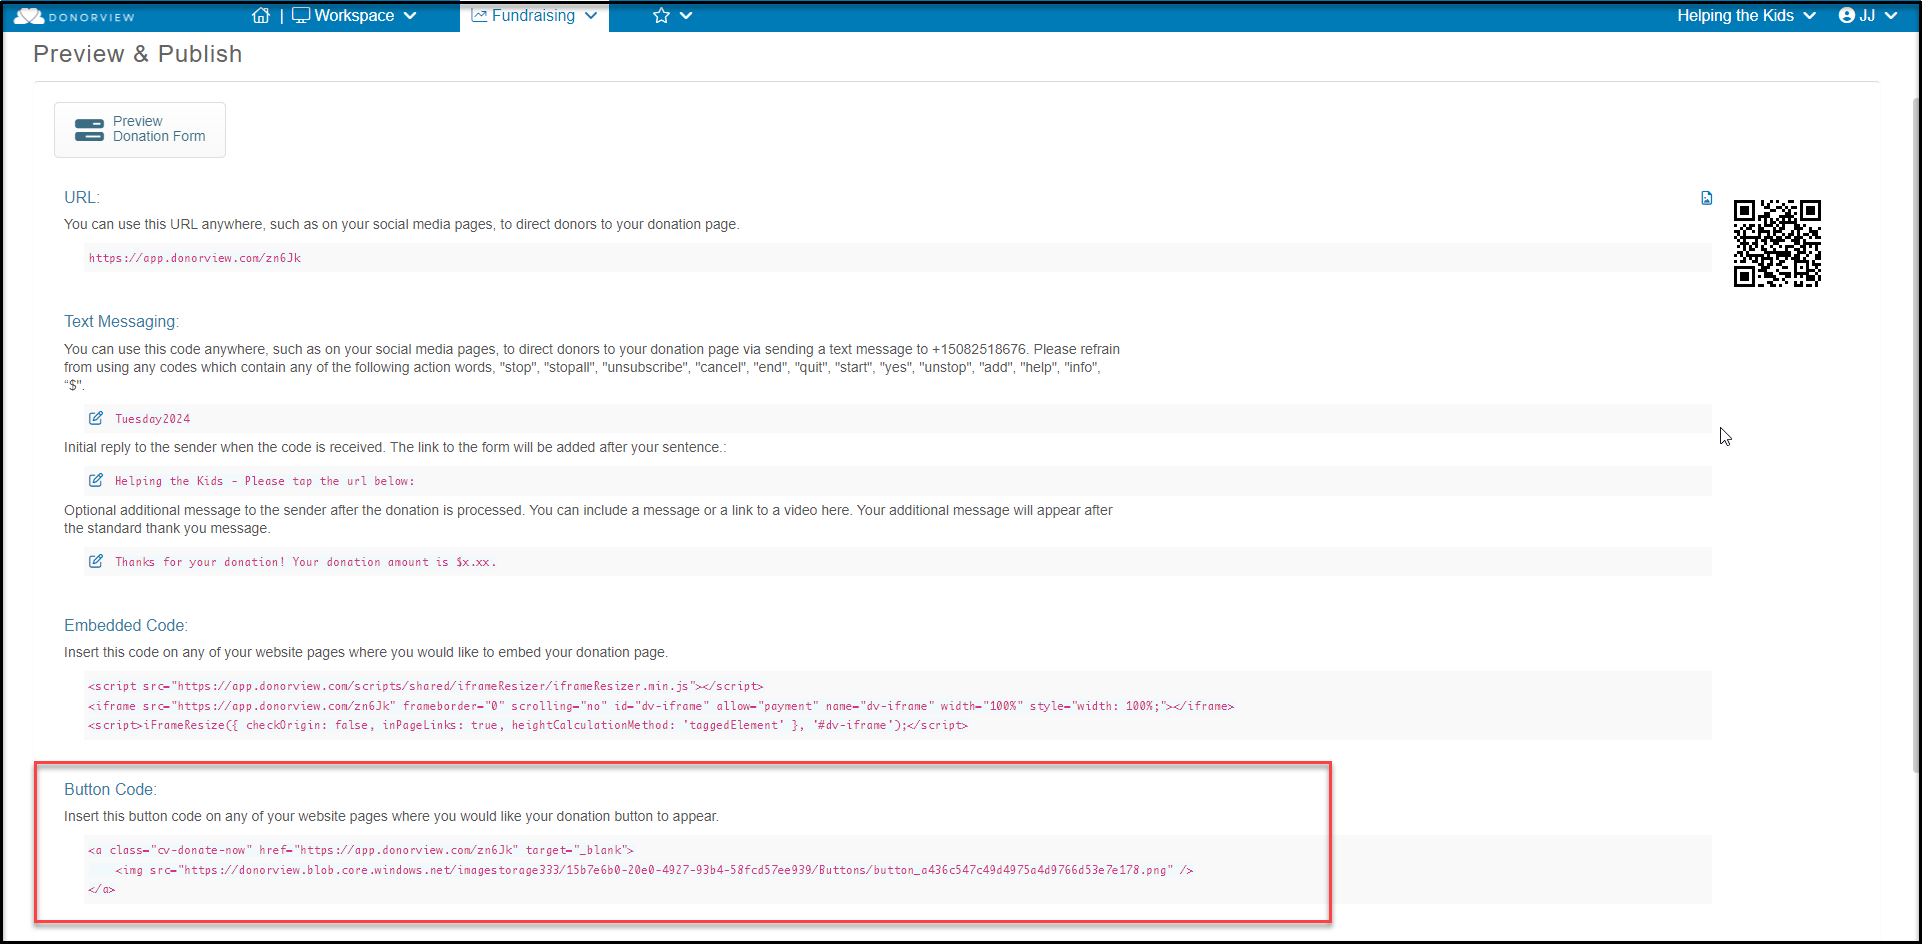
In the Fundraising Module, select Donation Pages. This will bring you to the list of all your donation pages.
- Create a New Donation Page: select the "+ New" button above the grid. Follow the steps in the setup wizard links below to complete and publish your page. See the links below for the options in creating a new page.
- Edit an existing Donation Page: Click the page title to highlight the row you want to edit and select View/Edit to edit the page.
- Copy a Donation Page: Highlight the row of the page as above, and then select: Actions > Copy Donation Page. You can enter a new name for the page, then you can edit the page as desired.
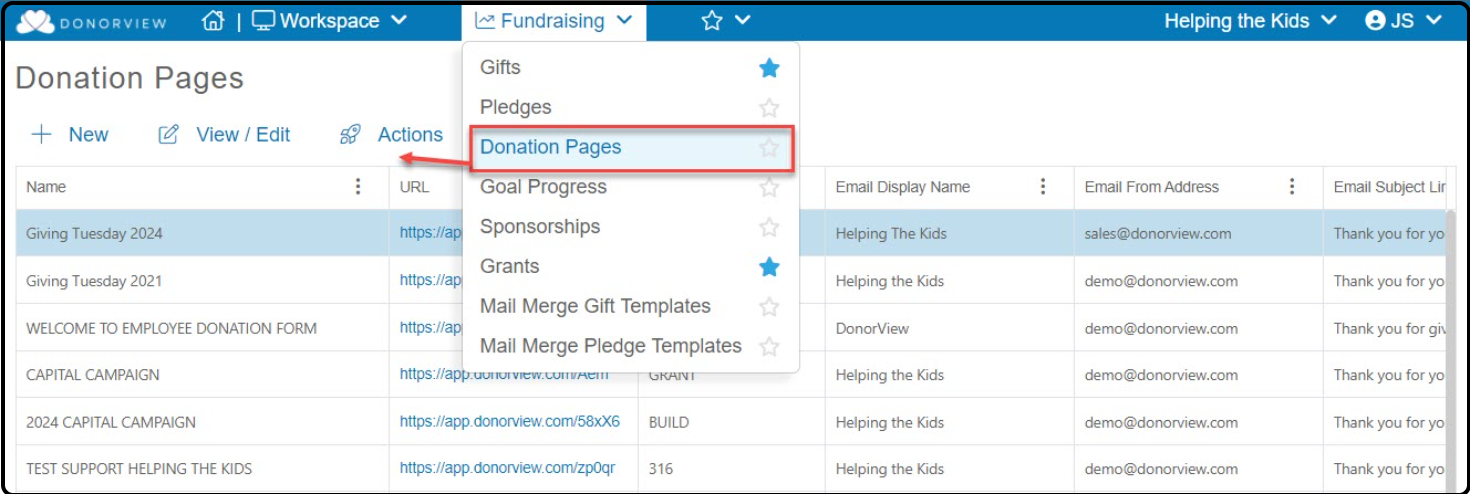
When creating a new page, the first step will be the Acknowledgement Info tab. Here you will choose whether you wish to create your page using the Simple or Advanced page designer.
- The Simple page designer allows you to establish the parameters for the gifts, but the software builds the page for you and there are limited options for the styling.
- The Advanced page designer allows you to choose whether the page is setup on one page, or if you want to use a progress entry method where the donor enters some information and clicks NEXT to continue to the next step/page. The Advanced page designed offers more flexibility in the arrangement of items on the page and lets you choose more options for layout, colors, and formatting.
These articles explain the steps for both methods.
Advanced Page Designer - https://support.donorview.com/en/support/solutions/articles/9000239295-what-are-the-steps-to-set-up-an-advanced-donation-page-
Simple Page Designer- https://support.donorview.com/en/support/solutions/articles/9000027376-what-are-the-steps-to-set-up-an-simple-donation-page-
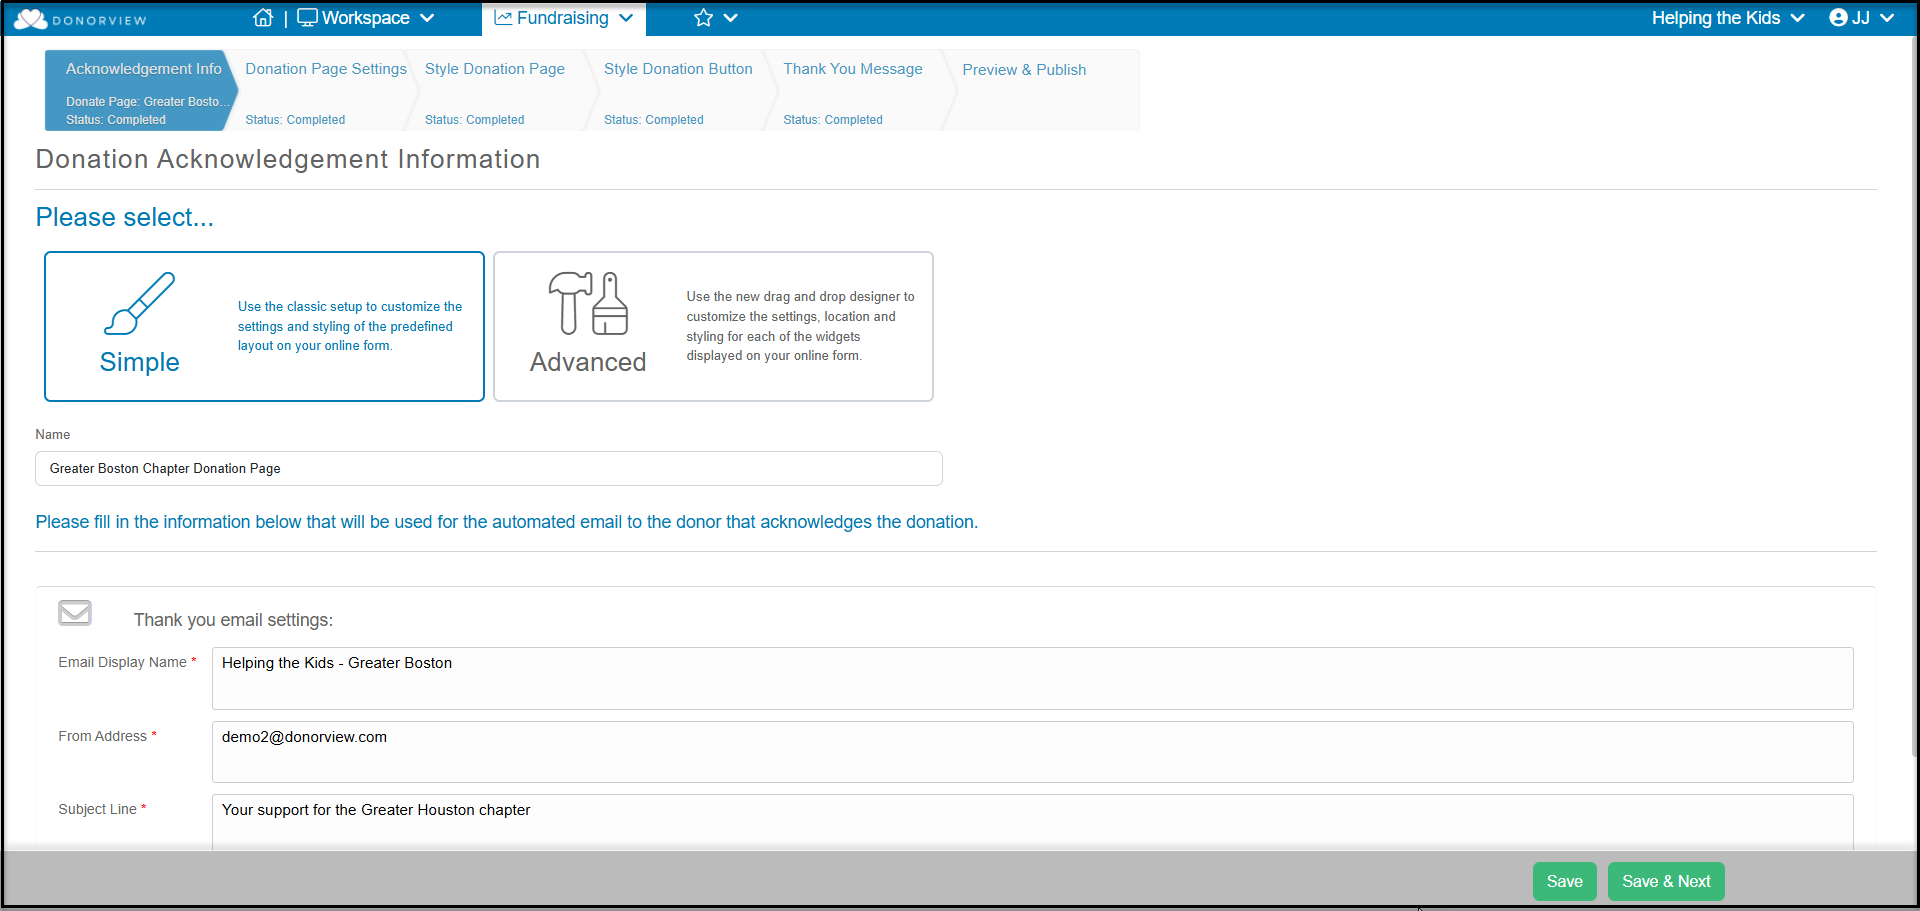
After you complete the steps to create your page, you will be able to share the page using the custom URL, QR code or Embed codes available in the last step, on the Preview & Publish tab. You can learn more about sharing your donation page in this article "How can I share my donation page online?"