# How do I create price discounts for theater seating?
> Source: https://support.donorview.com/how-do-i-create-price-discounts-for-theater-seating | Updated: 2026-06-24T18:04:13Z
Price discounts can be created for some or all seats. Price discounts use the honor system, they are not restricted and can be selected by any purchaser.
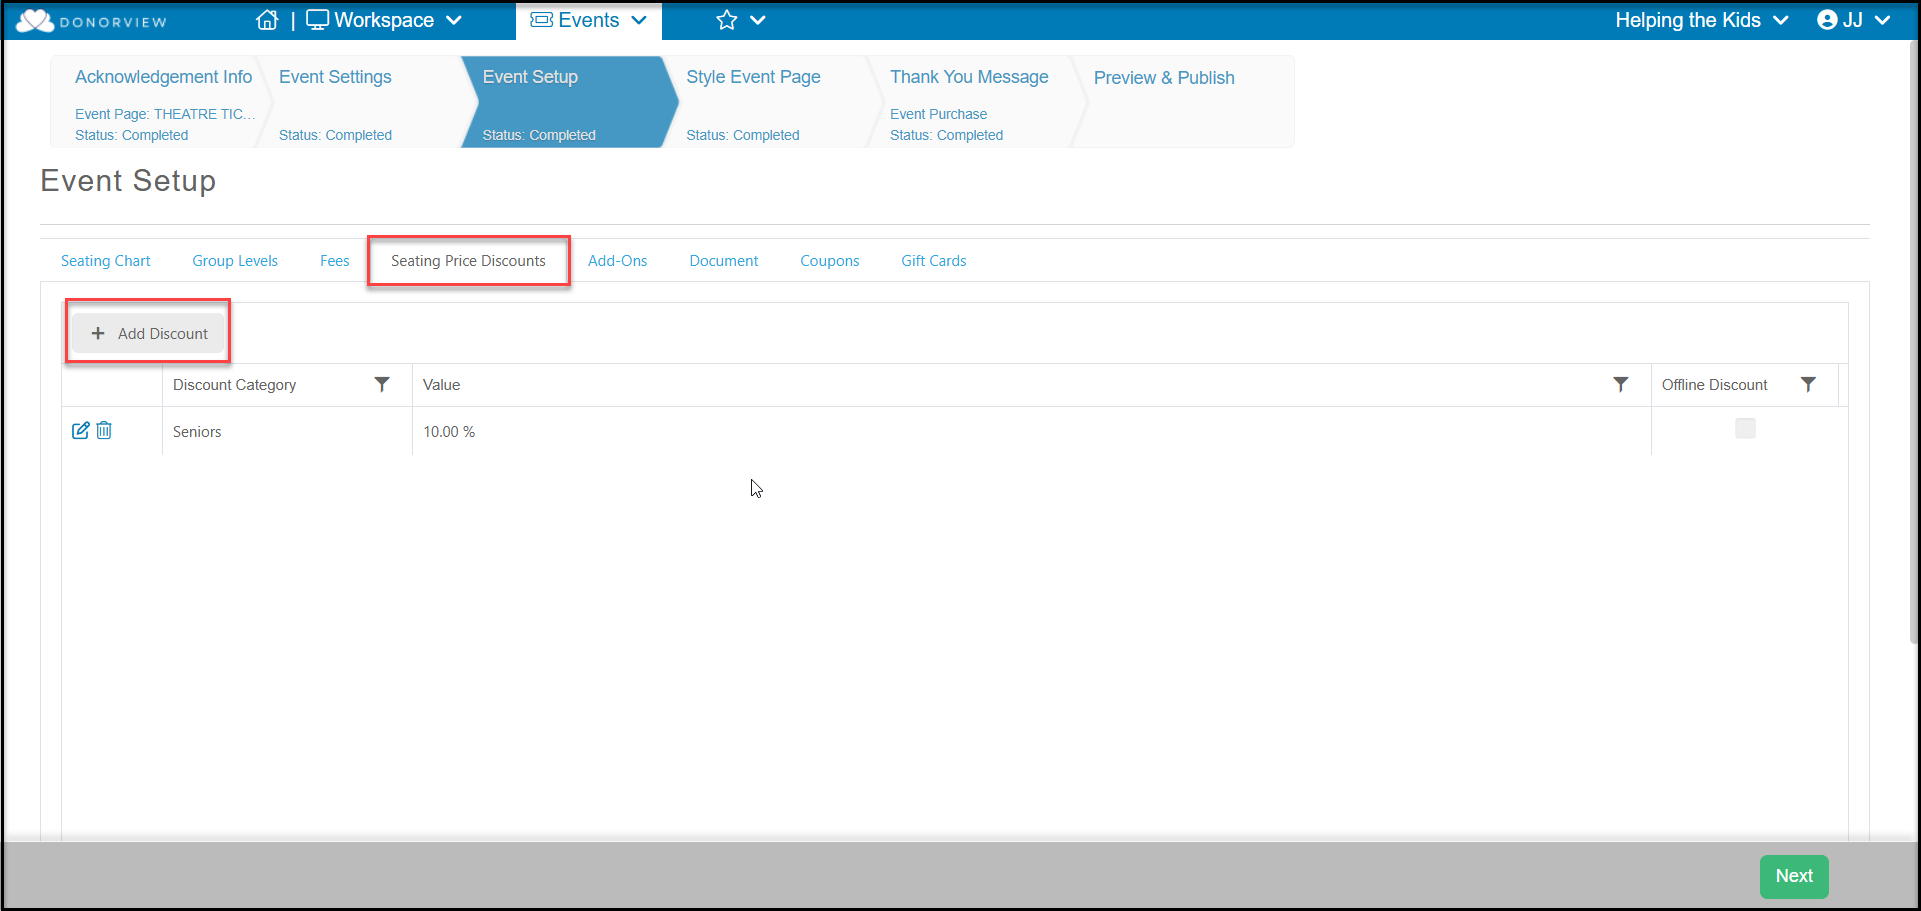
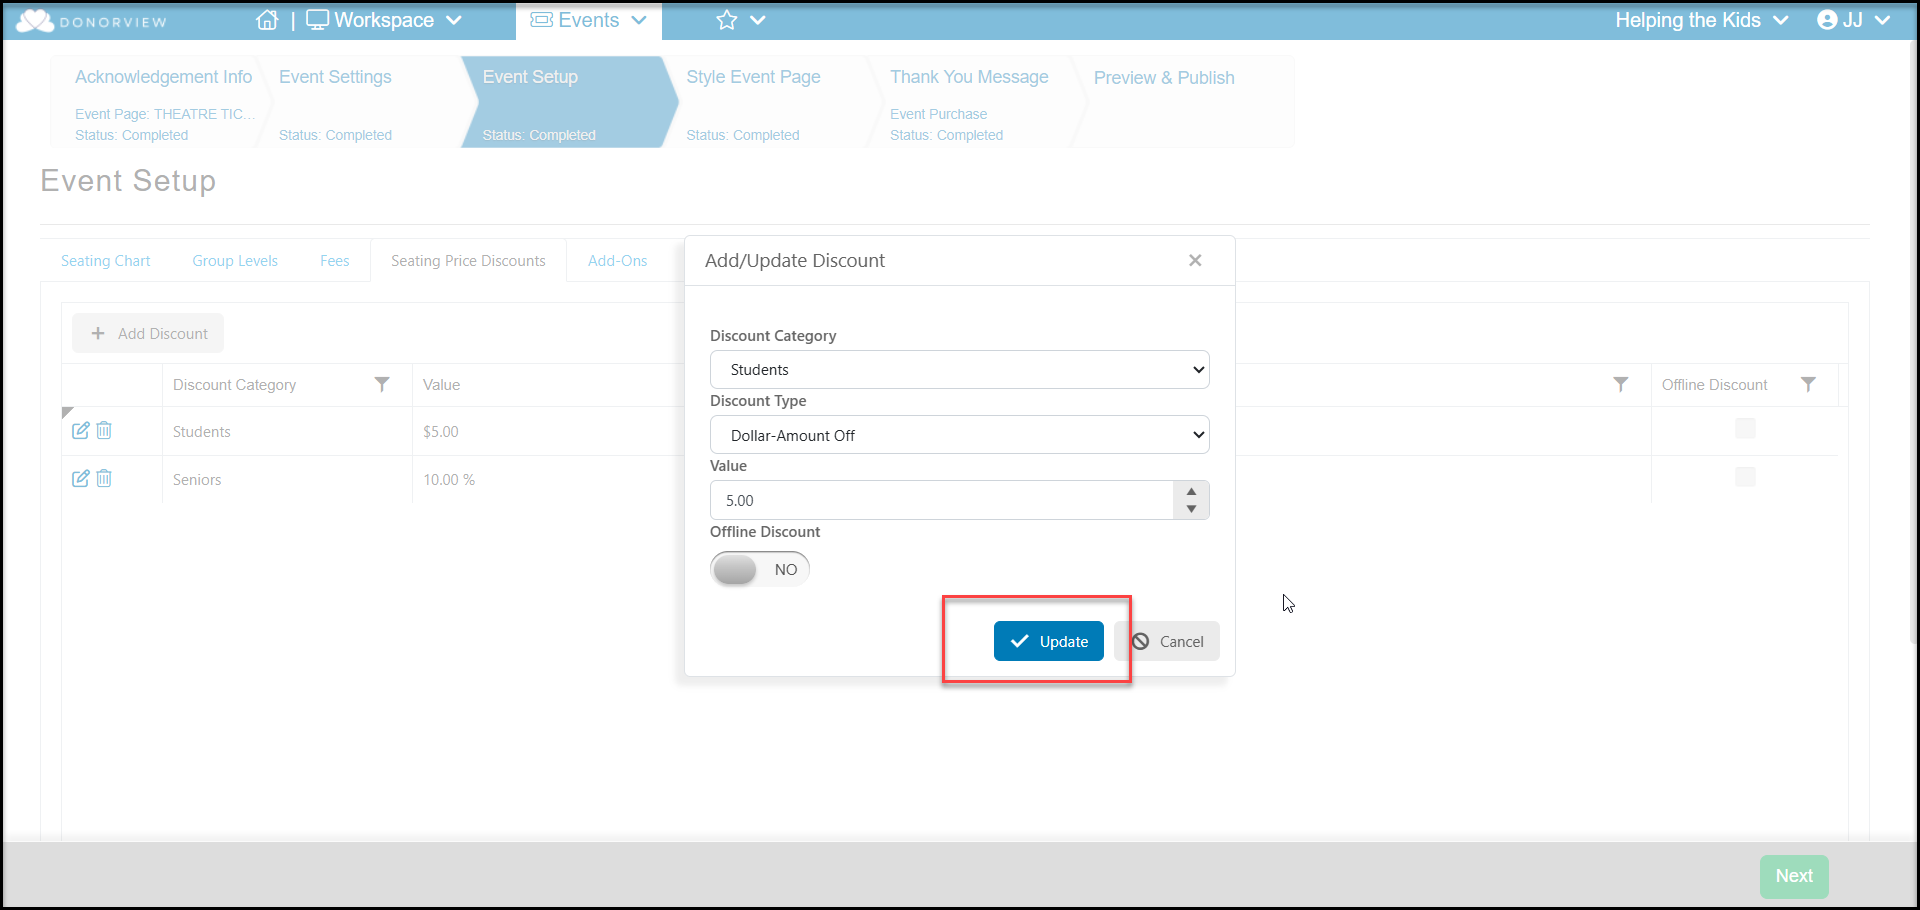
While setting up your Theater Seating Event, navigate to the Event Setup tab. Discounts must be set up first to add them to a seat or group of seats. Click on **“Seating Price Discounts”** to create the discounts.
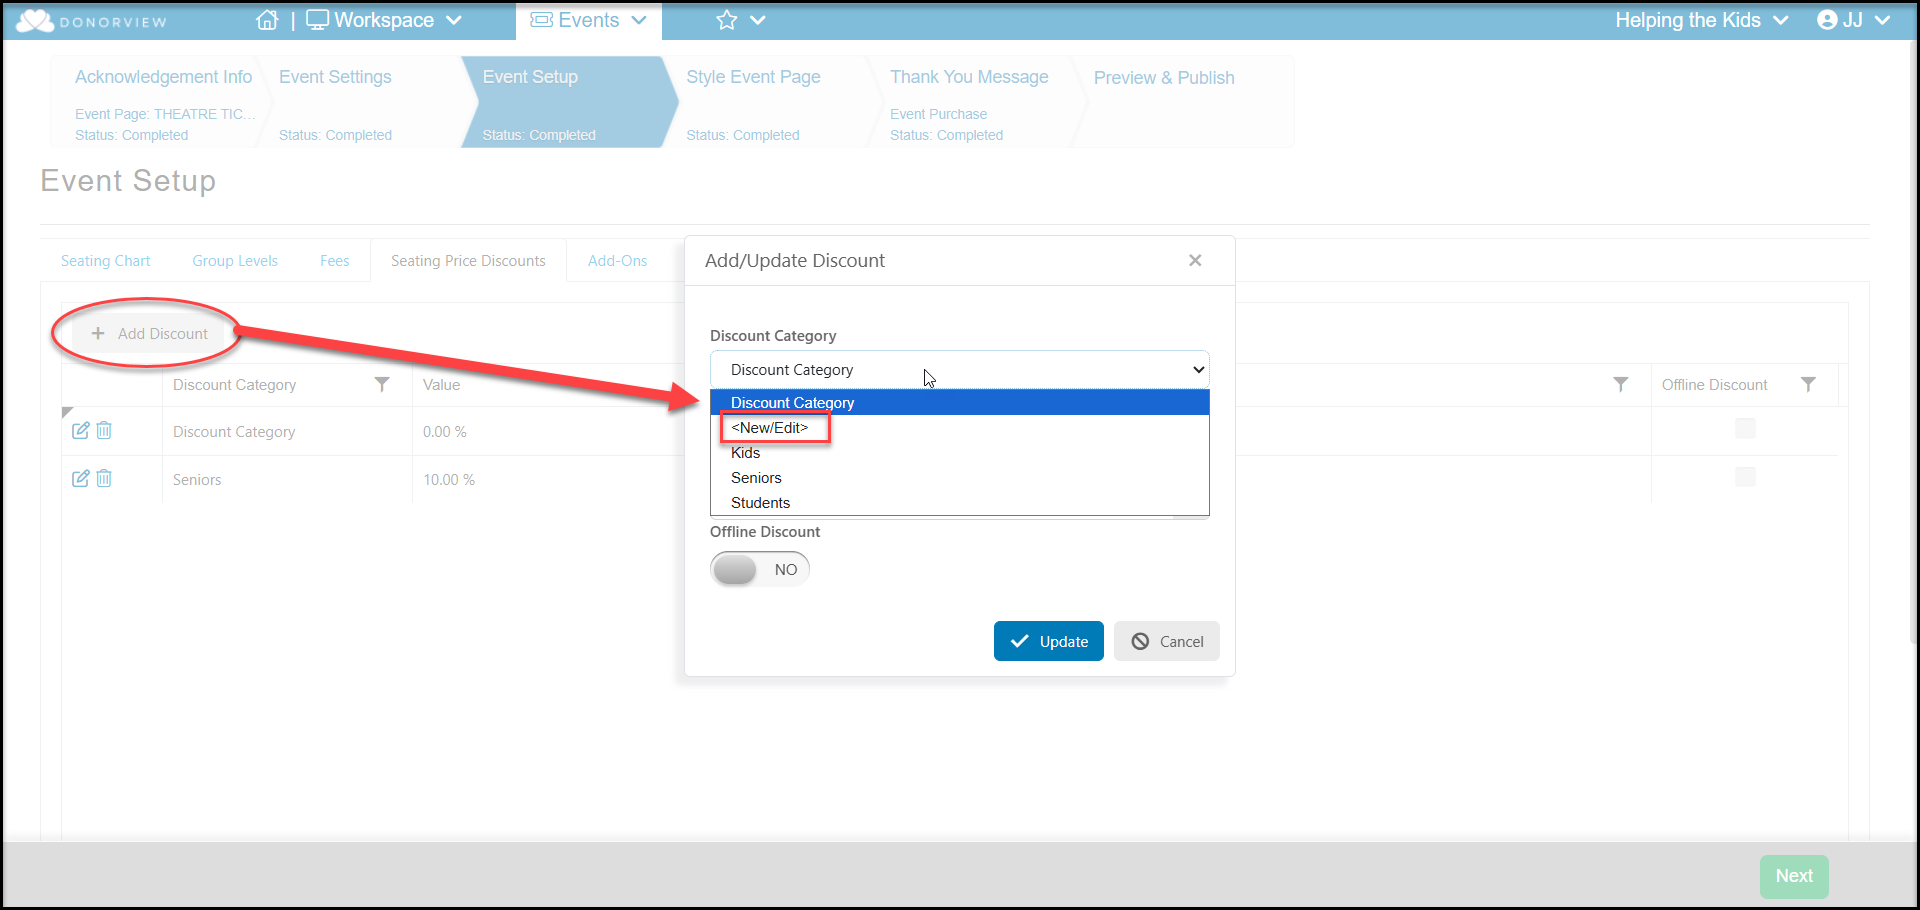
 In the new window, first select your **Discount Category.** The software defaults to Kids, Seniors, and Students, but you can use **** to change these names or add more.
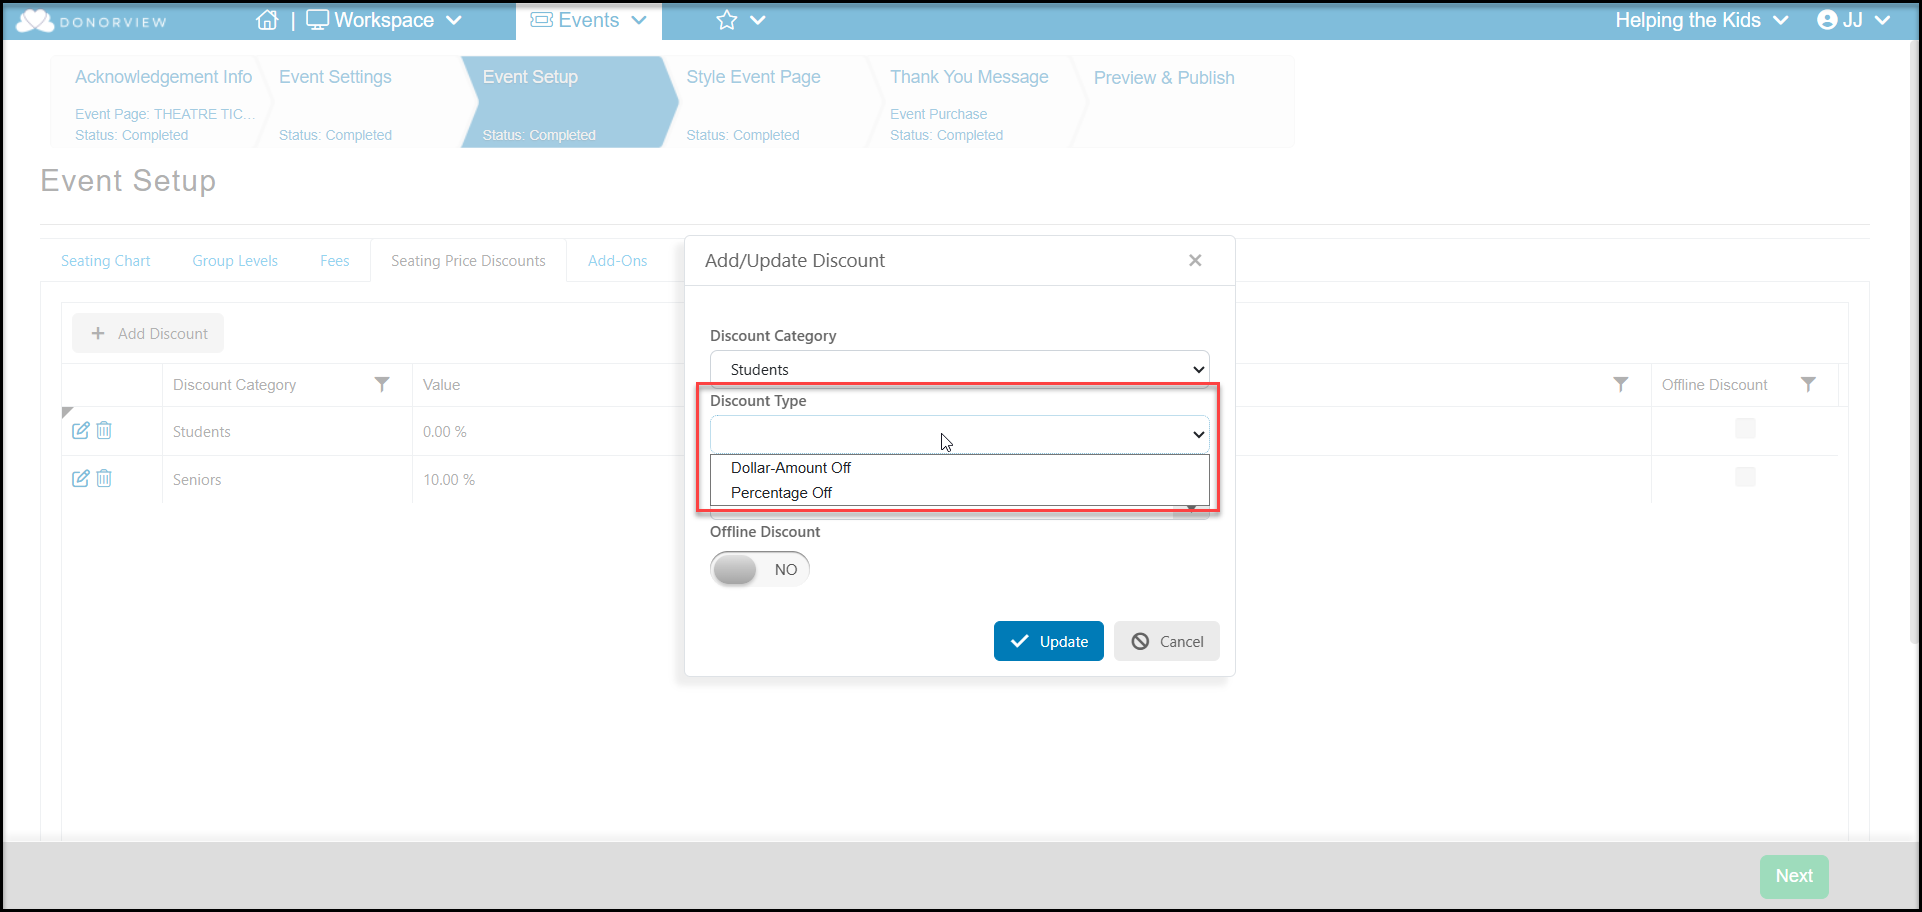
 Next choose whether the **Discount Type** is a flat dollar off or a percentage off.
 Enter the **Value** of the discount.
If you do not wish this discount to be visible to the public, set **Offline Discount** to YES so that it is only available for internal users while logged into DonorView.
Click **Update** to create the new discount.
Enter the **Value** of the discount.
If you do not wish this discount to be visible to the public, set **Offline Discount** to YES so that it is only available for internal users while logged into DonorView.
Click **Update** to create the new discount.
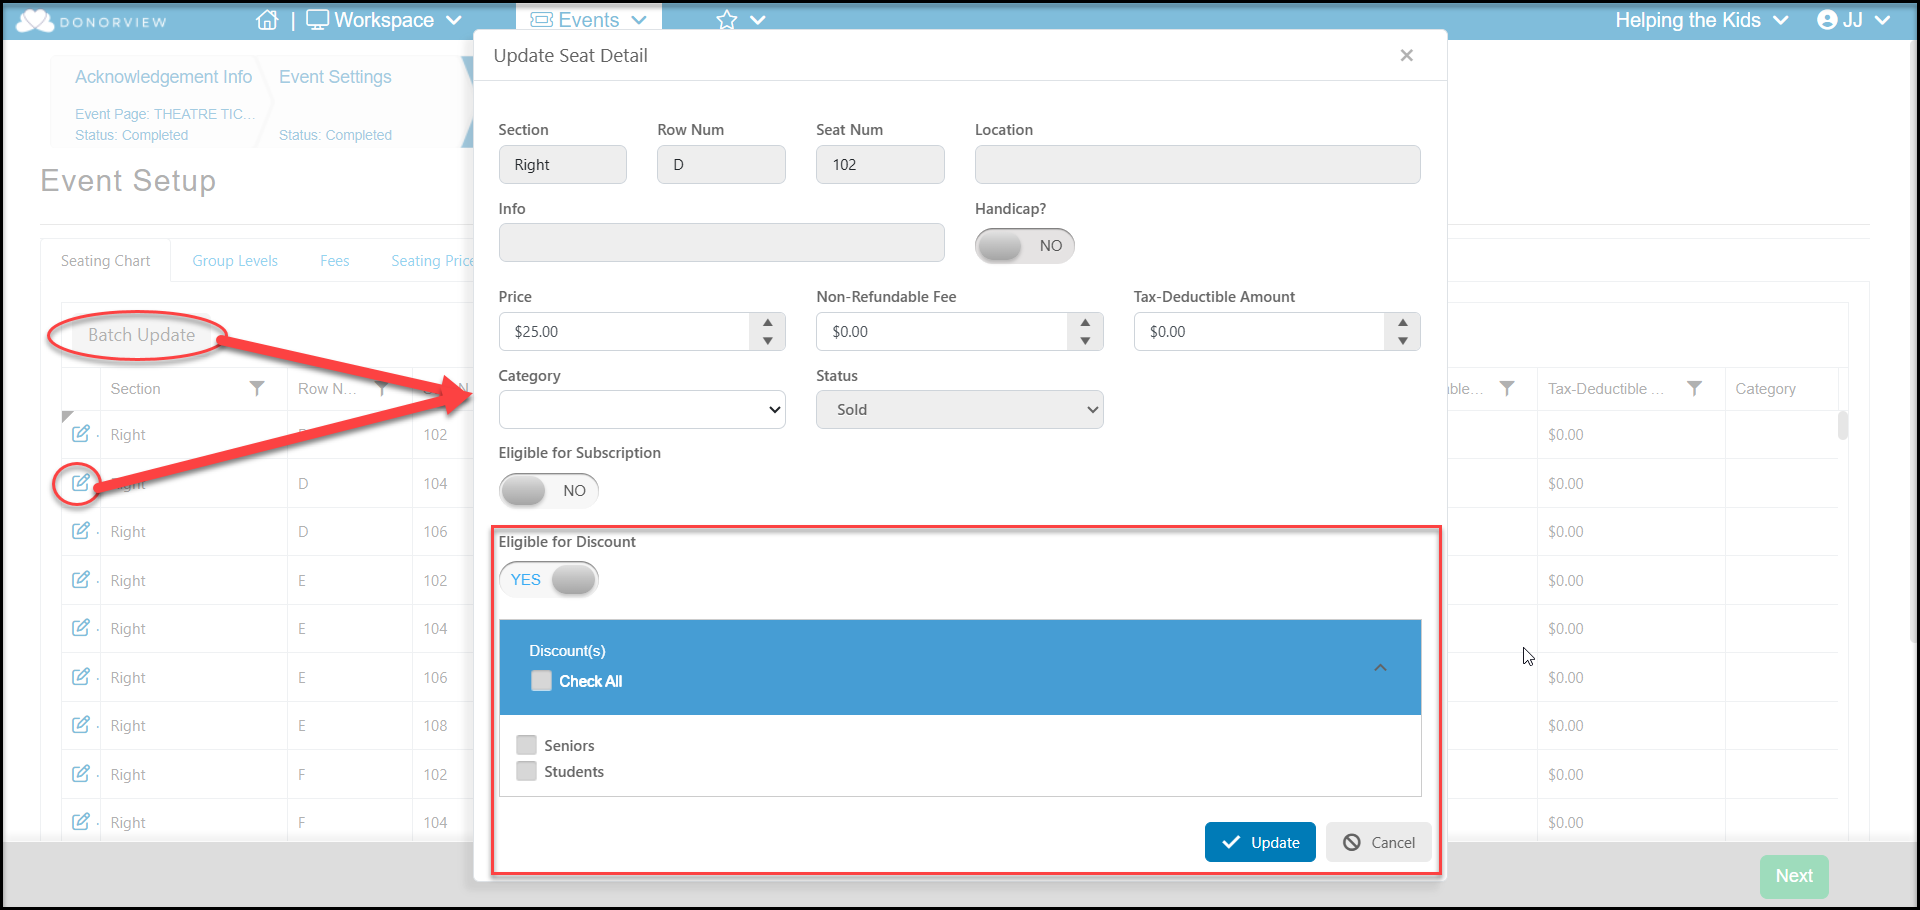
 Once the discounts are created, go back to the **Seating Chart** tab to edit individual seats, or perform a batch update by filtering the grid and clicking **Batch Update** to edit groups of seats.
Once the Edit dialog has been launched, mark **Eligible for Discount** to **YES** to select discounts are available for the selected seat or seats.
You can **Check All** to make all discounts available or select specific discounts only by checking the box next to each discount type.
Click **Update** to save your changes.
Once the discounts are created, go back to the **Seating Chart** tab to edit individual seats, or perform a batch update by filtering the grid and clicking **Batch Update** to edit groups of seats.
Once the Edit dialog has been launched, mark **Eligible for Discount** to **YES** to select discounts are available for the selected seat or seats.
You can **Check All** to make all discounts available or select specific discounts only by checking the box next to each discount type.
Click **Update** to save your changes.
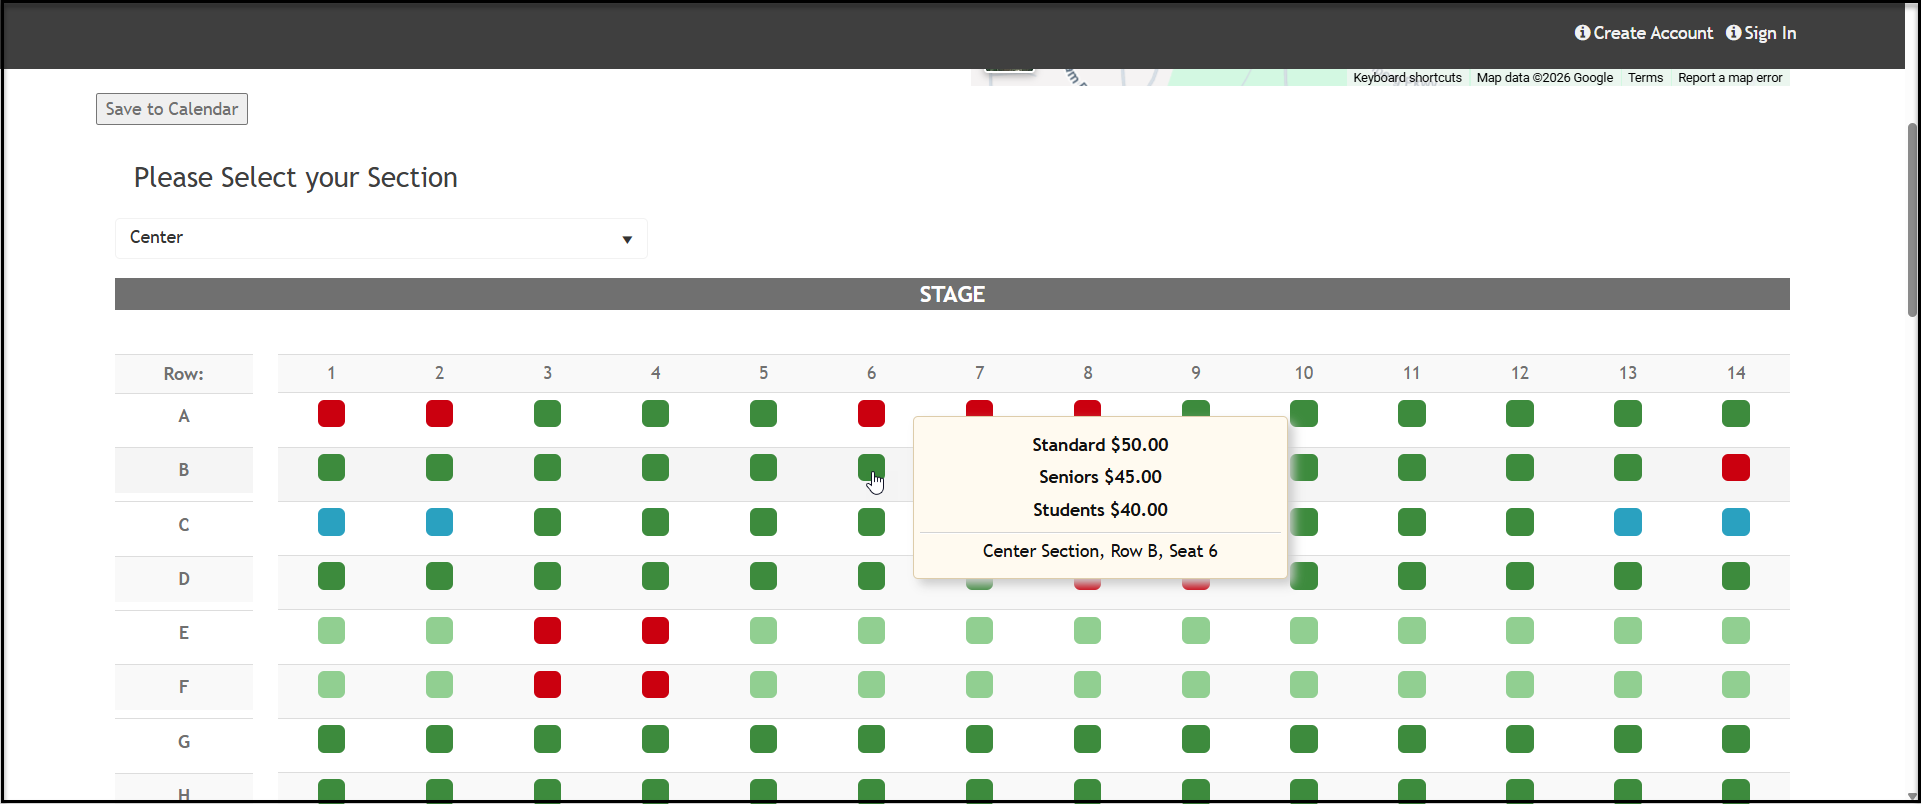
 The discounts that are checked will then be displayed to the seat purchaser when they hover over the seat. Discounts will show up under the standard price. Discounts are not visible on Subscription Only seats.
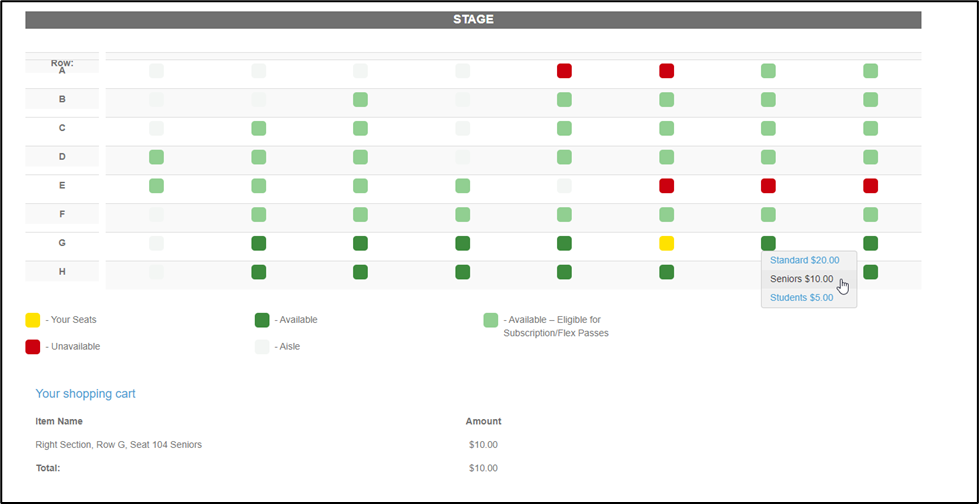
 Once they click on the seat, they can select their price discount. It will probably be beneficial to add some information to the Message Display area of the page which indicates that IDs will be required for discounts.
 To remove a discount from a single seat, click the edit icon next to the seat and uncheck the box next to the desired discount title or set **Eligible for Discount** to **NO**. Click **Update** to save the change.
To remove a discount using Batch Update, first filter the list for those seats you wish to update and remove discounts.
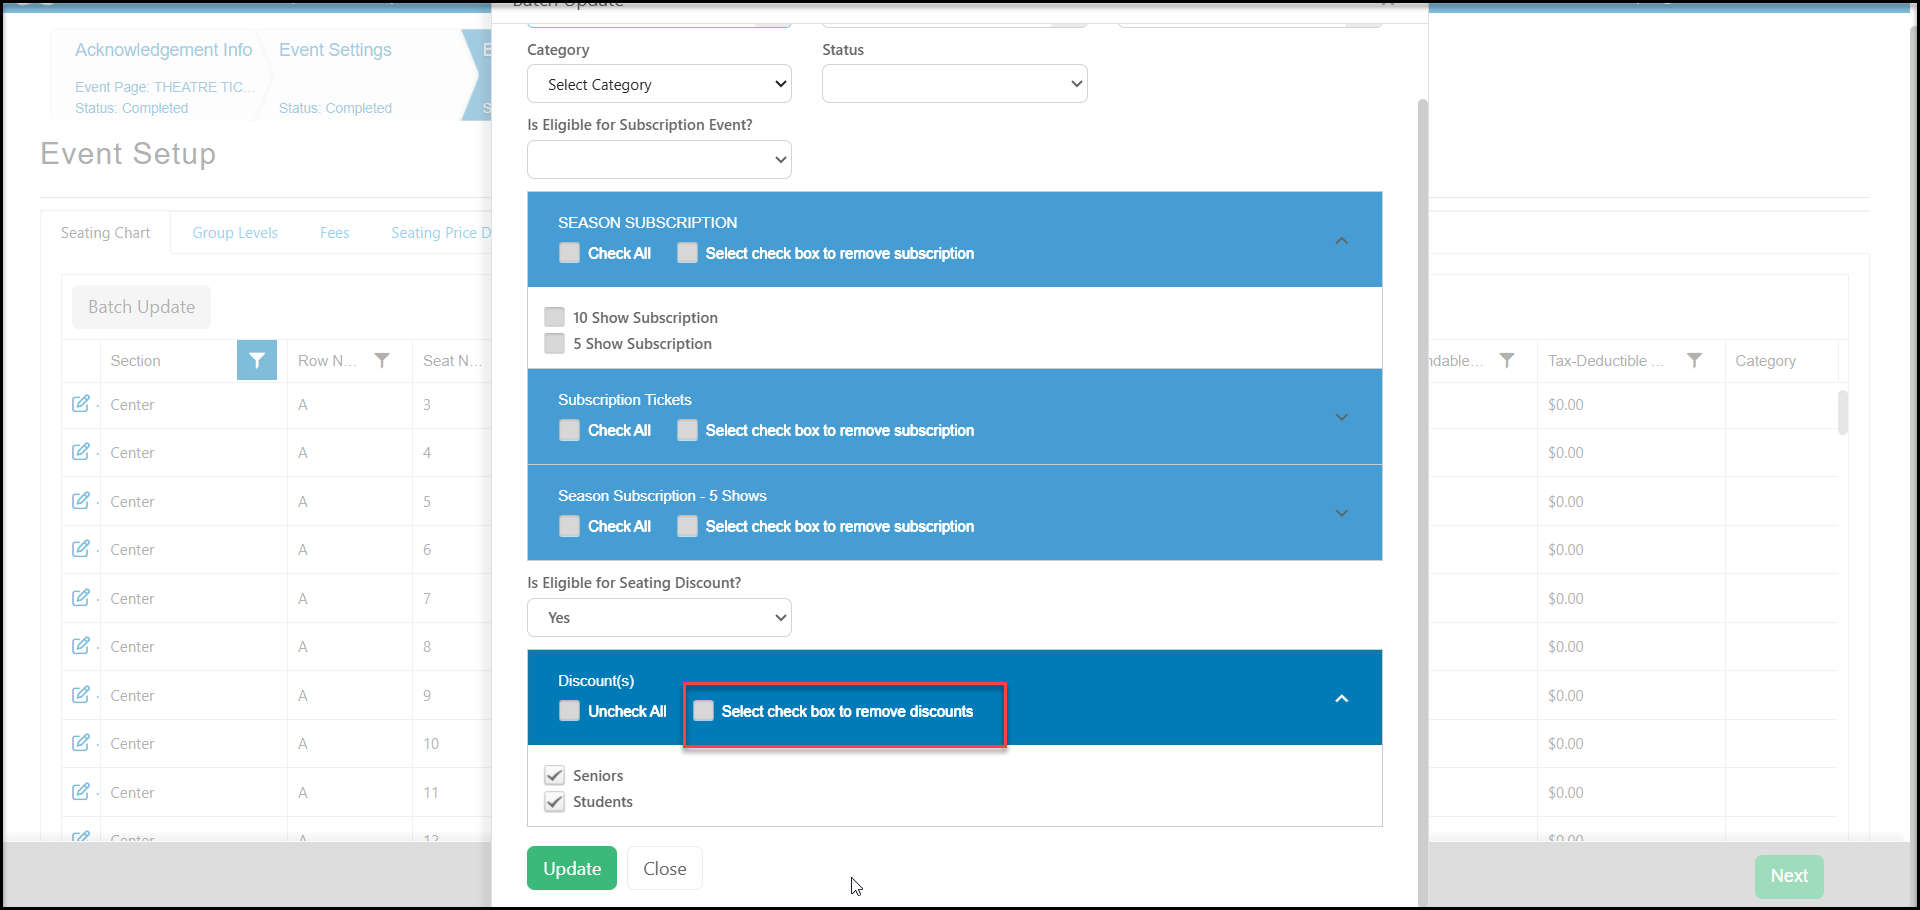
The click on **Batch Update** to open the dialog box. Check the box next to **Select Checkbox to remove discounts** and then check the boxes next to the specific discount(s) you wish to remove. Click **Update** to save your changes.
To remove a discount from a single seat, click the edit icon next to the seat and uncheck the box next to the desired discount title or set **Eligible for Discount** to **NO**. Click **Update** to save the change.
To remove a discount using Batch Update, first filter the list for those seats you wish to update and remove discounts.
The click on **Batch Update** to open the dialog box. Check the box next to **Select Checkbox to remove discounts** and then check the boxes next to the specific discount(s) you wish to remove. Click **Update** to save your changes.