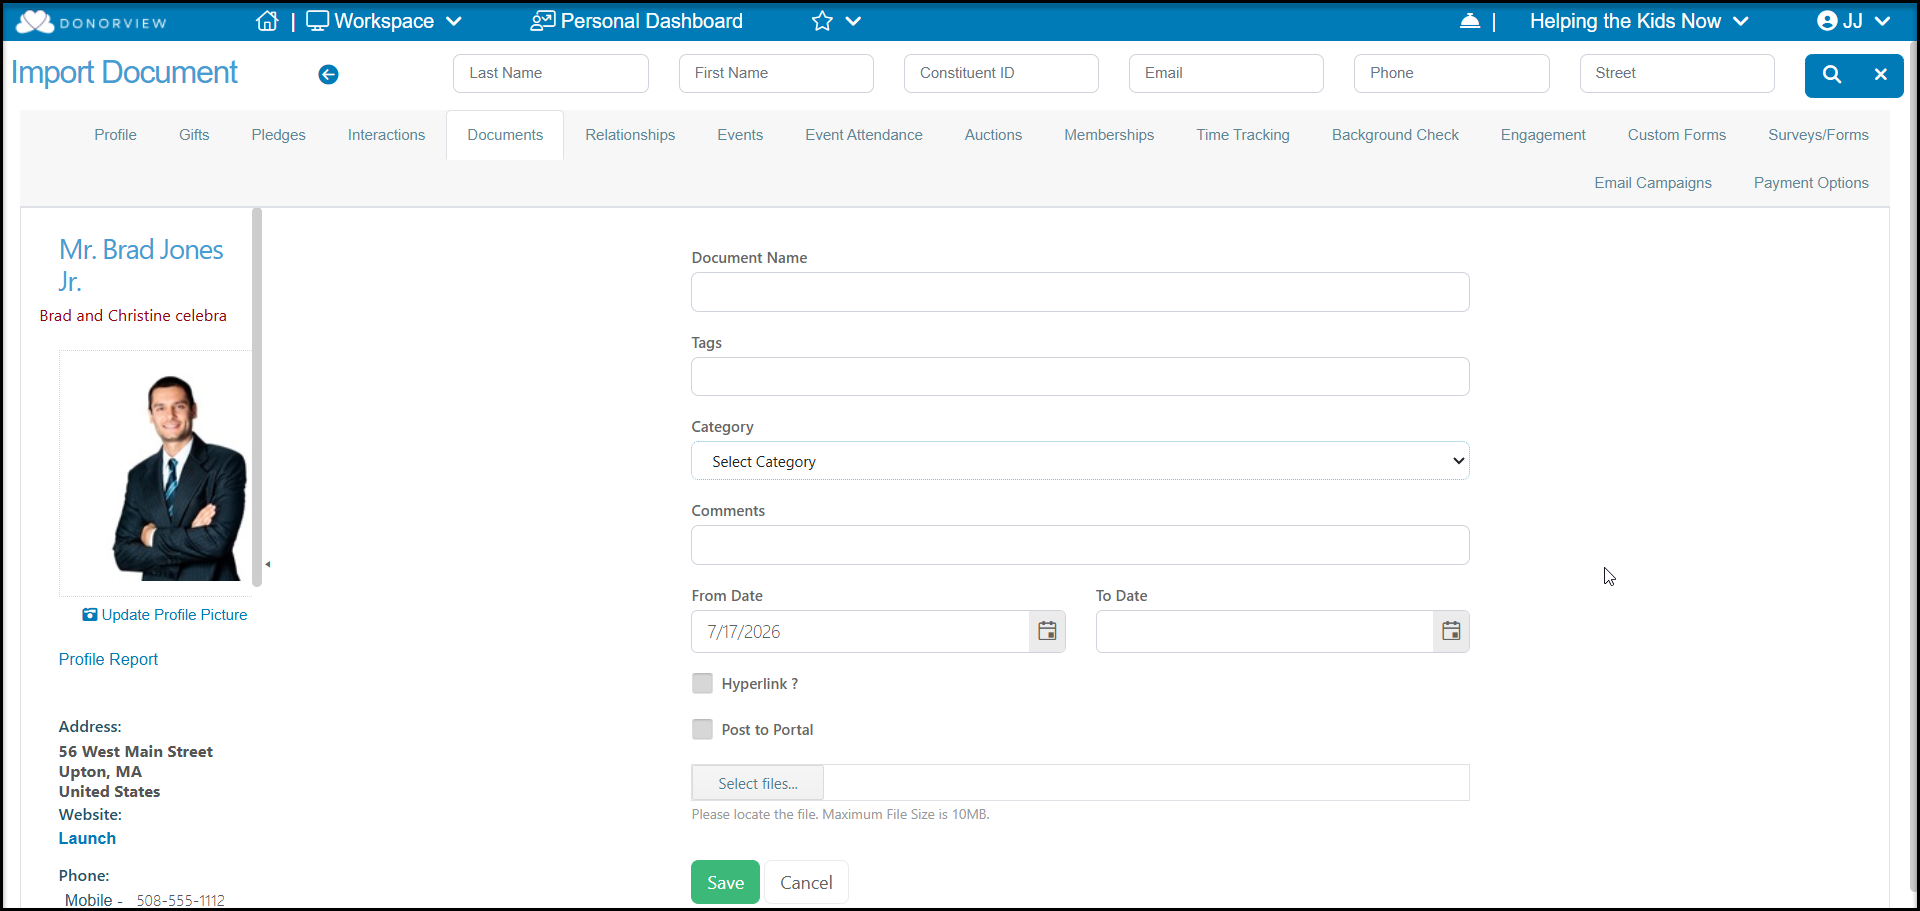
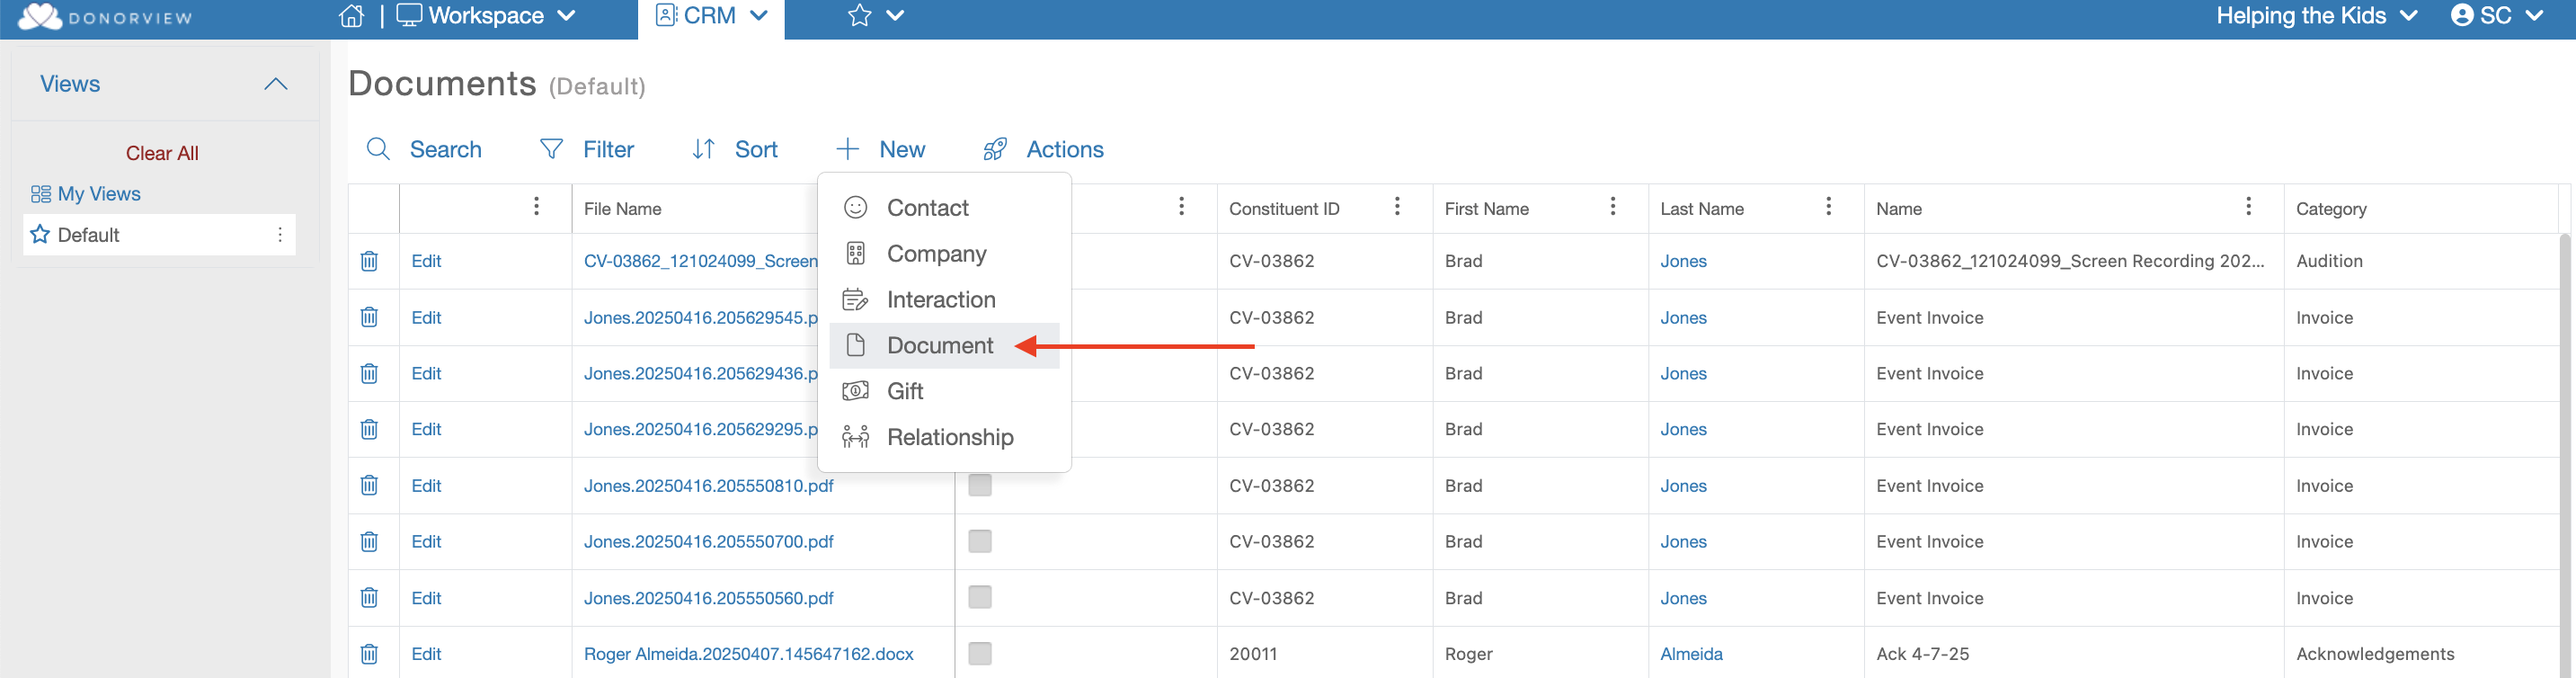
There are multiple ways to create a new document.
From the main grids (Constituents, Gift, Interactions or Documents), you can highlight the constituent, mouse over the "+ New" menu at the top of the grid and click Document. Enter the document information, upload the document and click Save. If you do not want to save your changes, you can click Cancel.
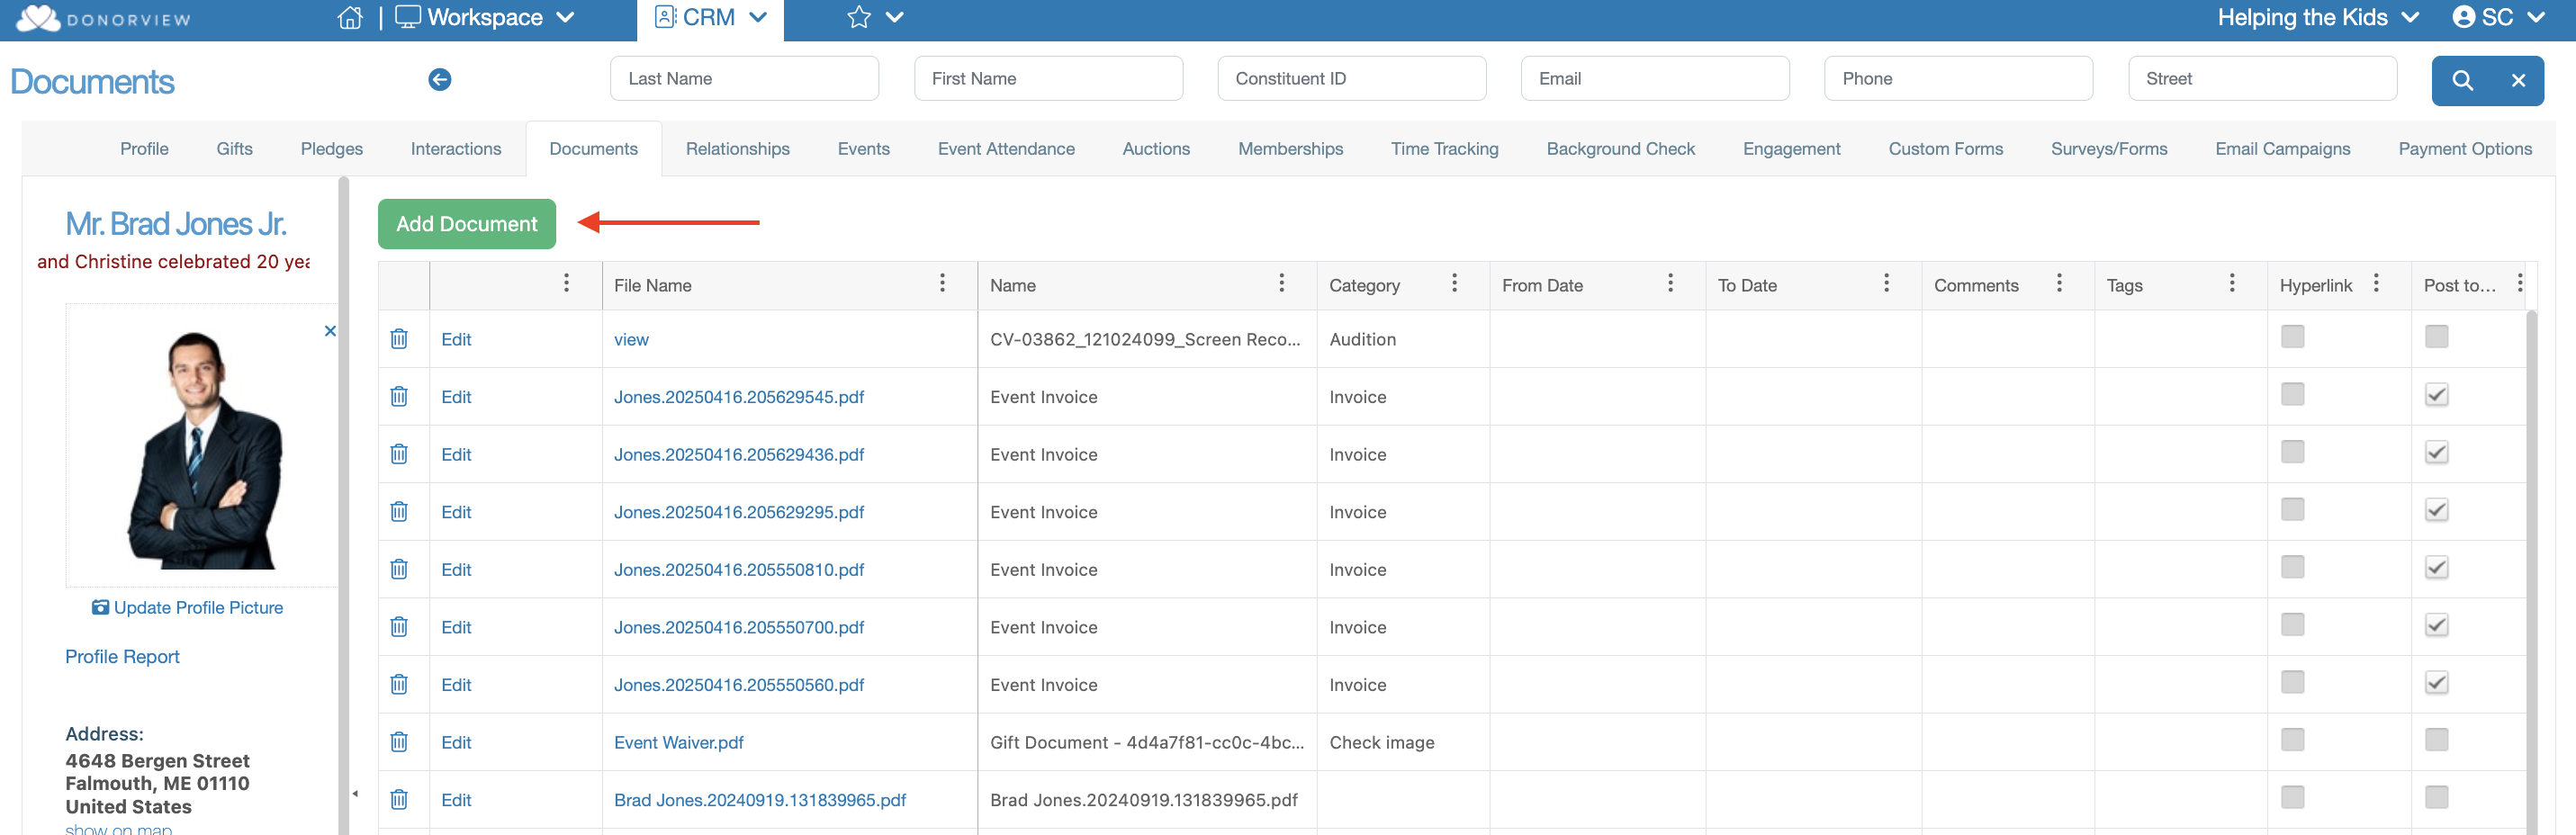
From within a constituent record, you can go to their Documents tab and click on Add Document to create a new record.
In the new window you can add information into the following fields:
- Document Name - Assign a name to the document.
- Tags - Assign as many tags as you like as another way to categories and label your document. Tags are shown on the Documents grid for filtering and reporting.
- Category - An editable list that you can use to assign your documents into categories. This is helpful for reporting from the Documents grid.
- Comments - Enter any other information you would like to describe your document.
- From Date and To Date - Enter applicable dates related to the document, for example the valid dates for a business license. These fields are optional.
- Hyperlink? - This checkbox allows you to add a hyperlink instead of uploading an actual document. For example, if you wish this to be a link to a specific webpage, you can check this box and enter the full hyperlink address.
- Post to Portal? - If you are using the Advanced Constituent Portal, checking this box will make this document available for your constituent to see and download from their portal account.
- Select files - this will open an window for you to find and select the document you wish to upload from your computer. Note that the maximum size is 10 MB and the software will accept the following file types: pdf, jpeg, png, doc, or xls.
Click Save to upload the document to the constituent's record. It will also be included in the Documents grid along with all uploaded documents for all constituents.